Unity小知识
前言
本篇文章只是为了记录一些使用学习Unity过程中的一些能够帮助我们自动化快速完成一些重复工作的小技巧。
Script Template
需求
使用Unity的时候我们难以避免需要创建脚本,平时都是通过Priject -> Right CLick -> Create -> C# Script的形式创建默认的脚本。
默认脚本如下:1
2
3
4
5
6
7
8
9
10
11
12
13
14
15
16using System.Collections;
using System.Collections.Generic;
using UnityEngine;
public class NewBehaviourScript : MonoBehaviour {
// Use this for initialization
void Start () {
}
// Update is called once per frame
void Update () {
}
}
需求决定功能,但默认的脚本模本不足以提供我们想要的结果,比如我们希望自动创建如下的脚本:1
2
3
4
5
6
7
8
9
10
11
12
13
14
15
16/*
* Description: NewBehaviourScript类
* Author: tanghuan
* Create Date: 2018/04/01
*/
using System.Collections;
using System.Collections.Generic;
using UnityEngine;
/// <summary>
/// NewBehaviourScript类
/// </summary>
public class NewBehaviourScript : MonoBehaviour {
}
这样我们就不需要每次都自己去编写自动化描述相关的内容了。
原理
如何实现,先让我们来看看,Unity是如何自动化生成NewBehaviourScript.cs脚本的。
让我们打开%EDITORPATH%/Data/Resources/ScriptTemplates/路径一探究竟: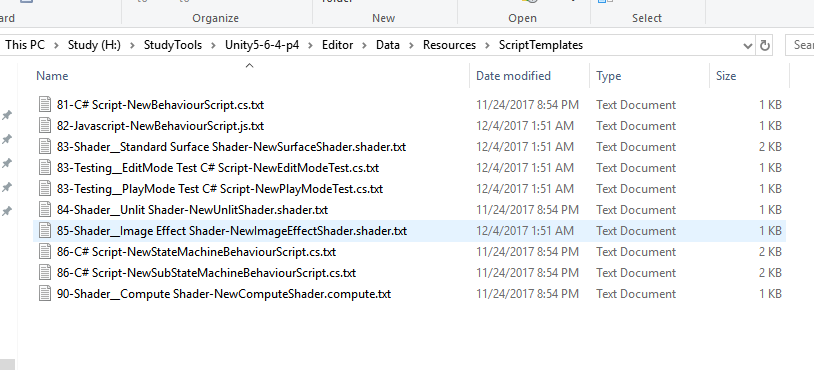
可以看到Unity默认的脚本模板是定义在这个路径下的,让我们打开81-C# Script-NewBehaviourScript.cs.txt看看默认的脚本模板是如何定义的:1
2
3
4
5
6
7
8
9
10
11
12
13
14
15
16using System.Collections;
using System.Collections.Generic;
using UnityEngine;
public class #SCRIPTNAME# : MonoBehaviour {
// Use this for initialization
void Start () {
#NOTRIM#
}
// Update is called once per frame
void Update () {
#NOTRIM#
}
}
关于Unity脚本模板的定义规则,这里没有找到官方的介绍,下面的规则参考了网上的说法:
Custom Unity Script Template
但Unity提供的脚本模板Keyword数量有限,所以我们想要创建自己的脚本模本需要分两步走:
- 根据Unity脚本模板规则创建自定义脚本
- 监听脚本Asset修改保存回调去自动化修改替换自定义Keyword
实现
- 根据Unity脚本模板规则创建自定义脚本,编写自定义脚本模板
81-C# Custom Mono Script Template-NewBehaviourScript.cs.txt1
2
3
4
5
6
7
8
9
10
11
12
13
14
15
16/*
* Description: #SCRIPTNAME#.cs
* Author: #AUTHOR#
* Create Date: #CREATEDATE#
*/
using System.Collections;
using System.Collections.Generic;
using UnityEngine;
/// <summary>
/// #SCRIPTNAME#.cs
/// </summary>
public class #SCRIPTNAME# : MonoBehaviour {
}
可以看到通过添加Unity脚本模板,右键创建时已经多了一个模板脚本选择。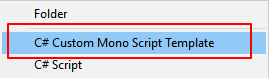
- 监听脚本Asset创建回调去自动化修改替换自定义Keyword
ScriptKeywordProcesser.cs1
2
3
4
5
6
7
8
9
10
11
12
13
14
15
16
17
18
19
20
21
22
23
24
25
26
27
28
29
30
31
32
33
34
35
36
37
38
39
40
41
42
43
44
45
46
47
48
49
50
51
52
53
54
55
56
57
58
59
60
61
62
63
64
65
66
67
68
69
70
71
72
73/*
* Description: 脚本模板自定义Keyword处理脚本
* Author: tanghuan
* Create Date: 2018/04/01
*/
using System;
using System.Collections;
using System.Collections.Generic;
using System.IO;
using System.Security.Principal;
using UnityEditor;
using UnityEngine;
/// <summary>
/// 脚本模板自定义Keyword处理脚本
/// </summary>
public class ScriptKeywordProcesser : UnityEditor.AssetModificationProcessor {
/// <summary>
/// 非用户导入的Asset创建回调(e.g. .meta文件)
/// </summary>
/// <param name="assetpath"></param>
public static void OnWillCreateAsset(string assetpath)
{
assetpath = assetpath.Replace(".meta", string.Empty);
int index = assetpath.LastIndexOf(".");
if(index <= 0)
{
return;
}
//判定是否是cs脚本
string filepostfix = assetpath.Substring(index);
if(!filepostfix.Equals(".cs"))
{
return;
}
//判定脚本文件是否存在
index = Application.dataPath.LastIndexOf("Assets");
assetpath = Application.dataPath.Substring(0, index) + assetpath;
if(!File.Exists(assetpath))
{
return;
}
var filecontent = File.ReadAllText(assetpath);
filecontent = replaceKeywords(filecontent);
File.WriteAllText(assetpath, filecontent);
AssetDatabase.Refresh();
}
/// <summary>
/// 替换文本Keyword
/// Note:
/// 自定义Keyword替换规则写在这里
/// </summary>
/// <param name="filecontent"></param>
/// <returns></returns>
private static string replaceKeywords(string filecontent)
{
string author = WindowsIdentity.GetCurrent().Name;
// 只取最终用户名
var splashindex = author.IndexOf("\\");
if(splashindex > 0)
{
author = author.Substring(0, splashindex);
}
filecontent = filecontent.Replace("#AUTHOR#", author);
filecontent = filecontent.Replace("#CREATEDATE#", DateTime.Now.ToString("yyyy//MM/dd"));
return filecontent;
}
}
最终自动化创建一份MyCustomMonoScript.cs:1
2
3
4
5
6
7
8
9
10
11
12
13
14
15
16/*
* Description: MyCustomMonoScript.cs
* Author: TONYTANG
* Create Date: 2018/04/01
*/
using System.Collections;
using System.Collections.Generic;
using UnityEngine;
/// <summary>
/// MyCustomMonoScript.cs
/// </summary>
public class MyCustomMonoScript : MonoBehaviour {
}
至此我们成功创建并支持了自定义关键词的自动化脚本创建,以后再也不用每次都去编写这些固定的文件头了。
Asset Import Cache(资源导入缓存)
在Unity里,我们每次导入或者修改资源都会资源被重新导入。在大的项目里,当大量的资源被其他人修改或者切换平台的时候会导致资源导入的时间很长,这一点是不能接受的。
Unity官方出的Cache Server正式为了减少资源导入,充分利用缓存以及共享导入资源的方式减少导入资源的时间。
先让我们看看,什么是Cache Server。
Cache Server
接下来还是按照What,Why,How的方式循序渐进了解学习Cache Server.
What
What is Cache Server?(什么是Cache Server?)
When you enable the Cache Server (see How to set up a Cache Server as a user, below), you can even share Asset imports across multiple projects (that is, the work of importing is done on one computer and the results are shared with others).
从官方的介绍可以看出,Cache Server是为了共享资源导入的一个工具。
Why
Why do we use Cache Server?(为什么需要用Cache Server?)
Unity has a completely automatic Asset
pipeline. Whenever a source Asset like a .psd or an .fbx file is modified, Unity detects the change and automatically re-imports it. The imported data from the file is subsequently stored by Unity in an internal format.
因为Unity会把外部资源根据导入设置导入成一个内部的资源格式来使用,每次资源导入设置或者资源有变化都会导致资源被重新导入一次。
Caching the imported Assets data on the Cache Server drastically reduces the time it takes to import Assets.
缓存并共享前面说到的资源导入则可以有效的减少资源导入的时间,提高团队工作效率,这也是我们为什么需要Cach Server的主要原因。
How
How to use Cache Server?(如何使用Cache Server)
在了解如何使用Cach Server之前,让我们先了解下Asset在什么情况下会被重新导入:
- The Asset file itself(Asset自身)
- The import settings(导入设置)
- Asset importer version(Asset导入版本-这里应该是指Unity版本)
- The current platform(资源平台-平时我们切换的Android,IOS,PC这些)
当上述4点任何一点被改变的话都会导致资源被重新导入。否则就直接使用Cache Server上缓存的资源导入。
如何高效的使用Cach Server了?
- 足够的硬盘空间
- 高速的读写硬盘(SSD)
- 足够的网络带宽(最好用于局域网内)
- 尽量在Linux或者MacOS上使用Cache Server
接下来让我们实战看看如何设置Cache Server:
第一步:
下载对应Unity版本的Cache Server
Unity对应版本官方的Cache Server链接:
Unity 下载存档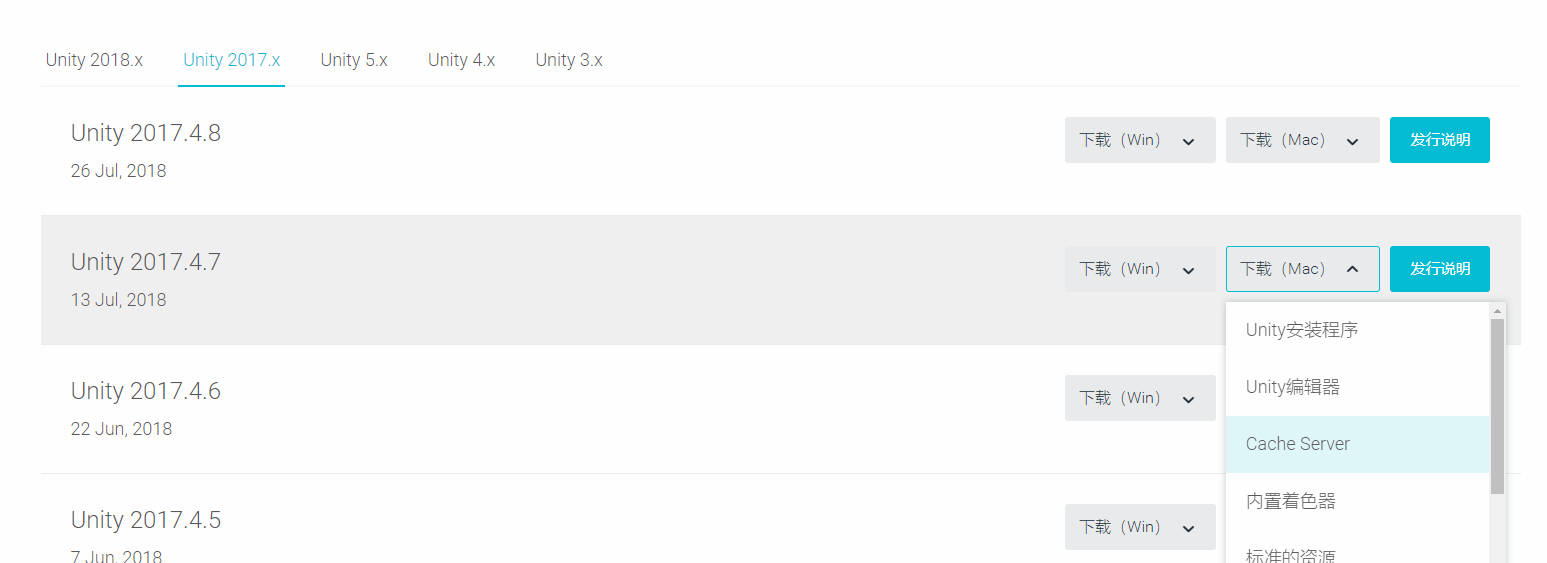
最新Cache Server链接是在Github上:
unity-cache-server
第二步:
运行Cache Server
这里我是安装在MacOS上的,所以运行RunOSX.command命令行即可: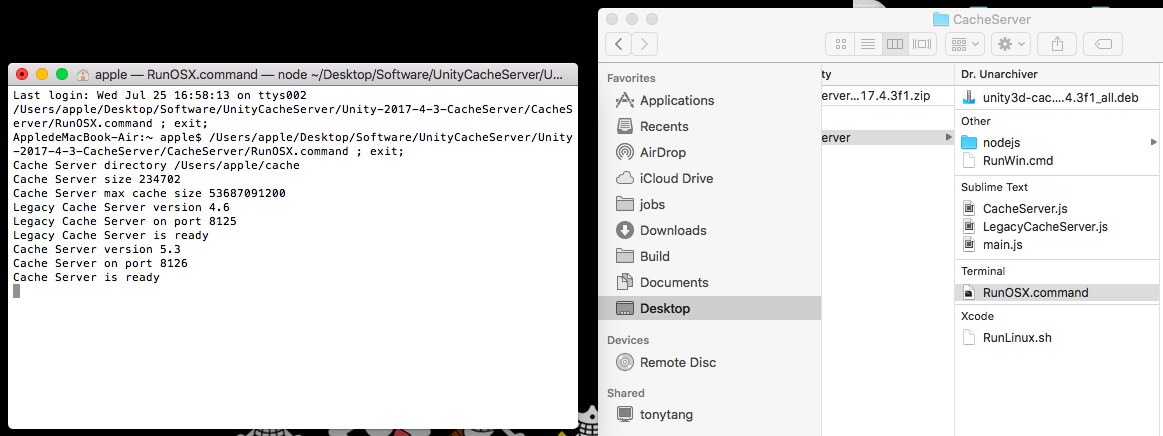
第三步:
查看Cache Server所在电脑IP(最好能固定Cache Server电脑的IP地址,避免每次去设置),配置需要使用Cache Server的Unity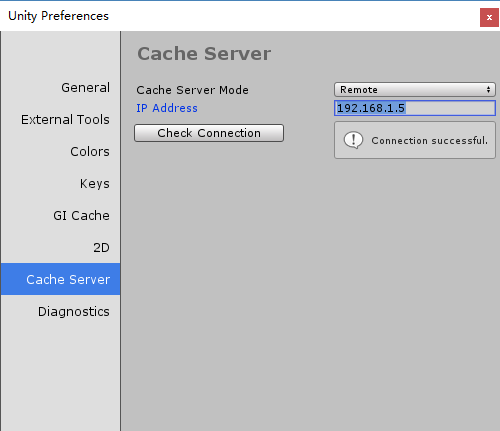
看到Connection Successful就代表我们链接成功了。
接下来我们就可以重用团队或者已经缓存过的Asset导入资源了。
Note:
使用Cache Server有哪些需要注意的点了?
- 修改已存在的Material
- 脚本和一些原始资源(Maya,3D Max直接使用的格式)不会被缓存
