Introduction 游戏开发过程中,避免不了和数据打交道,数据是游戏最基础也是很重要的一部分。本篇文章正式为了学习了解游戏开发过程中关于数据配置自动化导表生成代码等一系列自动化相关的知识而写。
Data Config What 数据配置 — 策划通过类似Excel或者其他方式配置出游戏里需要的数据,程序通过读取这些数据让游戏根据数据驱动运行起来,这正是我们所谓的数据配置。
Why 那么为什么需要数据配置了?
数据是游戏最基本的单位 — 无论是炫酷的特效还是惊人的AI都是通过读取底层数据最终得出结论的。
协同工作 — 这里说的数据配置更多的是游戏逻辑层的数据,即类似游戏里的对话显示,背包单位格子数量上限等配置。有了数据配置,程序和策划很容易协同工作,程序负责数据读取实现功能,策划负责具体的数据配置实现想要的效果。
多语言显示 — 数据配置用于语言包显示也帮助我们很方便的实现多语言的版本(读取不同语言版本的数据配置即可)。
How 实现数据配置读取原理上是把数据序列化导出保存在本地(.xml, .json .bytes……),然后通过反序列化读取回来。
序列化相关知识学习参考Runtime Serialization Excel数据读取
Note:
Functional Requirement(功能需求)
支持int,float,string基础数据配置
支持大于一个维度的数据读取(多余一个的数据)快速读取(比如配置:1;2;3;4分别代表物体随机的生命值选项)(这个算是基础需求功能 )
支持列表数据自定义数据结构快速读取(高阶功能需求 ,方便列表数据复杂的时候能够抽象成数据结构快速读取。)
1
2
3
4
5
6
7
8
9
10
11
12
13
14
15
16
17
class Property { public int Id { public get ; private set ; } public int Value { public get ; private set ; } } Property[2 ][] mPropertyArray;
那么我们就能方便的编写代码去访问特定等级所加成的属性了:
1 2 mPropertyArray[1 ][2 ]表示第二级所加成的第二个属性数据
扩展内嵌多层的话,此方案需要扩展多维数组来支持,并不是很友好
支持自动生成读表相关代码
内存开销要控制,读取速度要快
跨平台
跨语言
独立于Unity的工具(后期优化部分)
前后端表格数据区分(后期优化部分)(因为前后端往往是读不同的数据,并不需要导同一套表格数据)
原理思考 流程:
定义excel表格格式规则(这一步会影响后面所有步骤)
读取excel数据
生成可跨平台跨语言的序列化代码
序列化写入excel数据(这一步涉及跨语言问题)
反序列化读取数据
定义excel表格格式规则
读取excel数据ExcelRead )可以解决读取问题。
生成跨平台跨语言的序列化反序列化代码跨语言 这一点上,试想如果前后端用的语言不同,但前后端想共用一份导表工具来生成需要的表格数据,那么跨语言这一点就是必须的了。
序列化写入excel数据
反序列化读取数据
方案比较
C# .Net BinaryFormatter(不夸语言,序列化后数据相对大,反序列化费时且内存开销大)
ProtoBuff(跨语言,序列化数据相对小,反序列化费时和内存开销相对好点。工具成熟,社区完善,自定义数据结构方便)
FlatBuff(跨语言,序列化数据小,反序列化费时少,编写自定义序列化和反序列化数据结构不方便)
XBuffer(之前一位同事写的基于C#的简化版FlatBuff,高效且高度支持扩展和配置)
接下来针对各个方案进行简单学习,理解各自的优缺点。
参考这篇文章:Unity C#配置表工具
我们可以看到,我们需要做的事情有以下几步:
定义excel表格格式规则
从excel中读取数据
根据数据类型,动态生成每个表的C#类(用于反序列化读取数据)
动态编译C#类,输出一个动态库以及相关代码
实例化C#类,并且把数据填入到实例化对象中,序列化数据,保存在Untiy本地Resources目录中
运行时,通过生成的C#类反序列化加载并创建对应实例化对象去存储数据
Utilities.cs
1
2
3
4
5
6
7
8
9
10
11
12
13
14
15
16
17
18
19
20
21
22
23
24
25
26
27
28
29
30
31
32
33
34
35
36
37
38
39
40
41
42
43
44
45
46
47
48
49
50
51
52
53
54
55
56
57
58
59
60
61
62
63
64
using UnityEngine;using System.Collections;using System.Collections.Generic;using System.Diagnostics;using System.IO;using System.Runtime.Serialization.Formatters.Binary;public static class Utilities { public static void OpenFolder (string folderPath { if (Directory.Exists(folderPath)) { ProcessStartInfo startInfo = new ProcessStartInfo(folderPath, "explorer.exe" ); Process.Start(startInfo); } else { UnityEngine.Debug.LogError(string .Format("{0} Directory does not exist!" , folderPath)); } } public static void checkOrCreateSpecificFolder (string folderpath { if (!Directory.Exists(folderpath)) { Directory.CreateDirectory(folderpath); } } public static void recreateSpecificFolder (string folderpath { if (Directory.Exists(folderpath)) { Directory.Delete(folderpath, true ); } Directory.CreateDirectory(folderpath); } public static string getFileFolderName (string filepath { return Path.GetFileName(Path.GetDirectoryName(filepath)); } }
PathUtilites.cs
1
2
3
4
5
6
7
8
9
10
11
12
13
14
15
16
17
18
19
20
21
22
23
24
25
26
27
28
29
30
31
32
33
34
35
36
37
38
39
40
41
42
43
44
45
46
47
48
49
50
51
52
53
54
55
56
57
58
59
60
61
62
63
64
65
66
67
68
69
using System.Collections;using System.Collections.Generic;using UnityEngine;public static class PathUtilties { #region Excel Data public static string ExcelFileFolderPath = Application.dataPath + "/../ExcelDatas/Game/" ; public static string ExcelScriptOutputFolderPath = Application.dataPath + "/../DataConfigScripts/" ; public static string ExcelDataFileName = "dataconfig.byte" ; public static string ExcelDataFileOutputFolderPath = Application.dataPath + "/Resources/DataConfig/" ; public static string ExcelDataFileOutputFolderRelativePath = "DataConfig/" ; public static string ExcelScriptAssemblyFilePath = Application.dataPath + "/Scripts/Core/DataConfig/" ; public static string ExcelScriptAssemblyFileName = "dataconfig.dll" ; public static string ExcelScriptFilePostFix = ".cs" ; public static string ExcelScriptDataManagerFileName = "DataManager.cs" ; public static string ExcelTableContainerPostfix = "Container" ; #endregion }
ExportExcelData.cs
1
2
3
4
5
6
7
8
9
10
11
12
13
14
15
16
17
18
19
20
21
22
23
24
25
26
27
28
29
30
31
32
33
34
35
36
37
38
39
40
41
42
43
44
45
46
47
48
49
50
51
52
53
54
55
56
57
58
59
60
61
62
63
64
65
66
67
68
69
70
71
72
73
74
75
76
77
78
79
80
81
82
83
84
85
86
87
88
89
90
91
92
93
94
95
96
97
98
99
100
101
102
103
104
105
106
107
108
109
110
111
112
113
114
115
116
117
118
119
120
121
122
123
124
125
126
127
128
129
130
131
132
133
134
135
136
137
138
139
140
141
142
143
144
145
146
147
148
149
150
151
152
153
154
155
156
157
158
159
160
161
162
163
164
165
166
167
168
169
170
171
172
173
174
175
176
177
178
179
180
181
182
183
184
185
186
187
188
189
190
191
192
193
194
195
196
197
198
199
200
201
202
203
204
205
206
207
208
209
210
211
212
213
214
215
216
217
218
219
220
221
222
223
224
225
226
227
228
229
230
231
232
233
234
235
236
237
238
239
240
241
242
243
244
245
246
247
248
249
250
251
252
253
254
255
256
257
258
259
260
261
262
263
264
265
266
267
268
269
270
271
272
273
274
275
276
277
278
279
280
281
282
283
284
285
286
287
288
289
290
291
292
293
294
295
296
297
298
299
300
301
302
303
304
305
306
307
308
309
310
311
312
313
314
315
316
317
318
319
320
321
322
323
324
325
326
327
328
329
330
331
332
333
334
335
336
337
338
339
340
341
342
343
344
345
346
347
348
349
350
351
352
353
354
355
356
357
358
359
360
361
362
363
364
365
366
367
368
369
370
371
372
373
374
375
376
377
378
379
380
381
382
383
384
385
386
387
388
389
390
391
392
393
394
395
396
397
398
399
400
401
402
403
404
405
406
407
408
409
410
411
412
413
414
415
416
417
418
419
420
421
422
423
424
425
426
427
428
429
430
431
432
433
434
435
436
437
438
439
440
441
442
443
444
445
446
447
448
449
450
451
452
453
454
455
456
457
458
459
460
461
462
463
464
465
466
467
468
469
470
471
472
473
474
475
476
477
using System.Collections;using System.Collections.Generic;using UnityEngine;using UnityEditor;using Excel;using System.IO;using System.Data;using System.Reflection;using System.Text;using Microsoft.CSharp;using System.CodeDom.Compiler;using System;using System.Runtime.Serialization.Formatters.Binary;public class ConfigData { public string Type; public string Name; public string Data; } public class ExportExcelData { private const int NameLineNumber = 1 ; private const int TypeLineNumber = 2 ; private const int DataLineNumber = 3 ; private static List<string > ValideTypesList = new List<string >(new string []{"int" , "float" , "string" }); [MenuItem("Tools/DataConfig/导出所有表格数据" , false , 100 )] public static void exportAllExcelData ( { string [] excelfiles = Directory.GetFiles(PathUtilties.ExcelFileFolderPath, "*.xlsx" ); Dictionary<string , List<ConfigData[]>> datadic = new Dictionary<string , List<ConfigData[]>>(); Dictionary<string , string []> namedic = new Dictionary<string , string []>(); Dictionary<string , string []> typedic = new Dictionary<string , string []>(); foreach (var excelfile in excelfiles) { if (!readAllDataFromExcelFile(excelfile, ref datadic, ref typedic, ref namedic)) { return ; } } Dictionary<string , string > codemap = new Dictionary<string , string >(); foreach (var data in datadic) { string classname = data.Key; DataConfigScriptGenerator dcsg = new DataConfigScriptGenerator(classname, typedic[classname], namedic[classname]); codemap.Add(classname, dcsg.generateCode()); } Utilities.recreateSpecificFolder(PathUtilties.ExcelScriptOutputFolderPath); Utilities.recreateSpecificFolder(PathUtilties.ExcelDataFileOutputFolderPath); Utilities.recreateSpecificFolder(PathUtilties.ExcelScriptAssemblyFilePath); string [] scripts = new string [codemap.Values.Count]; codemap.Values.CopyTo(scripts, 0 ); var assemblyfilepath = PathUtilties.ExcelScriptAssemblyFilePath + PathUtilties.ExcelScriptAssemblyFileName; Assembly assembly = compileCode(scripts, assemblyfilepath); if (assembly == null ) { Debug.LogError("编译dll失败!" ); return ; } foreach (var data in datadic) { object container = assembly.CreateInstance(data.Key + "Container" ); Type classtype = assembly.GetType(data.Key); if (!serialize(container, classtype, data.Value, PathUtilties.ExcelDataFileOutputFolderPath)) { return ; } } createDataManager(assembly, PathUtilties.ExcelScriptAssemblyFilePath); foreach (var code in codemap) { using (FileStream fs = File.Create(PathUtilties.ExcelScriptOutputFolderPath + code.Key + PathUtilties.ExcelScriptFilePostFix)) { byte [] info = new UTF8Encoding(true ).GetBytes(code.Value); fs.Write(info, 0 , info.Length); } } AssetDatabase.Refresh(); } private static bool readAllDataFromExcelFile (string excelfile, ref Dictionary<string , List<ConfigData[]>> datadic, ref Dictionary<string , string []> typesmap, ref Dictionary<string , string []> namesmap { Debug.Log(string .Format("excelfile: {0}" , excelfile)); FileStream fs = File.Open(excelfile, FileMode.Open, FileAccess.Read); IExcelDataReader excelreader = ExcelReaderFactory.CreateOpenXmlReader(fs); if (!excelreader.IsValid) { Debug.LogError(string .Format("Excel文件:{0}读取失败!" , excelfile)); return false ; } else { Debug.Log(string .Format("Excel文件.Name:{0}" , excelreader.Name)); var dataset = excelreader.AsDataSet(); if (dataset.Tables.Count > 1 ) { Debug.LogError(string .Format("Excel文件:{0},不允许一个Excel多张Table!" , excelreader.Name)); return false ; } else if (datadic.ContainsKey(excelreader.Name )) { Debug.LogError(string .Format("有同名的Excel Table存在!同名Excel:{0}!" , excelreader.Name)); return false ; } else { int currentlinenumber = 1 ; string [] types = null ; string [] names = null ; datadic.Add(excelreader.Name, new List<ConfigData[]>()); while (excelreader.Read()) { string [] datas = new string [excelreader.FieldCount]; for (int i = 0 ; i < excelreader.FieldCount; i++) { datas[i] = excelreader.GetString(i); } if (currentlinenumber == NameLineNumber) { names = datas; if (checkRepeatedNameString(names)) { Debug.LogError(string .Format("Excel Table:{0}" , excelreader.Name)); return false ; } namesmap.Add(excelreader.Name, names); } else if (currentlinenumber == TypeLineNumber ) { types = datas; if (checkInvalideType(types)) { Debug.LogError(string .Format("Excel Table:{0}" , excelreader.Name)); return false ; } typesmap.Add(excelreader.Name, types); } else if (currentlinenumber >= DataLineNumber ) { ConfigData[] configdatas = new ConfigData[datas.Length]; for (int m = 0 ; m < datas.Length; m++) { ConfigData cd = new ConfigData(); cd.Type = types[m]; cd.Name = names[m]; cd.Data = datas[m]; if (string .IsNullOrEmpty(cd.Type)) { Debug.LogError(string .Format("数据第{0}行,第{1}列字段类型不能为空!" , currentlinenumber, m)); return false ; } else if (string .IsNullOrEmpty(cd.Name { Debug.LogError(string .Format("数据第{0}行,第{1}列字段名字不能为空!" , currentlinenumber, m)); return false ; } configdatas[m] = cd; } datadic[excelreader.Name].Add(configdatas); } else { Debug.LogError(string .Format("无效的行号:{0}" , currentlinenumber)); return false ; } currentlinenumber++; } return true ; } } } private static bool checkRepeatedNameString (string [] names { var tempdic = new Dictionary<string , string >(); foreach (var name in names) { if (tempdic.ContainsKey(name)) { Debug.LogError(string .Format("同名字段:{0}!" , name)); return true ; } else { tempdic.Add(name, name); } } return false ; } private static bool checkInvalideType (string [] types { foreach (var type in types) { if (!ValideTypesList.Contains(type)) { Debug.LogError(string .Format("无效类型:{0}" , type)); return true ; } } return false ; } private static Assembly compileCode (string [] scripts, string outputfile { CSharpCodeProvider codeprovider = new CSharpCodeProvider(); CompilerParameters objcompilerparameters = new CompilerParameters(); objcompilerparameters.ReferencedAssemblies.AddRange(new string [] { "System.dll" }); objcompilerparameters.OutputAssembly = outputfile; objcompilerparameters.GenerateExecutable = false ; objcompilerparameters.GenerateInMemory = true ; CompilerResults cr = codeprovider.CompileAssemblyFromSource(objcompilerparameters, scripts); if (cr.Errors.HasErrors) { Debug.LogError("编译错误:" ); foreach (CompilerError err in cr.Errors) Debug.LogError(err.ErrorText); return null ; } return cr.CompiledAssembly; } private static bool serialize (object container, Type type, List<ConfigData[]> datalist, string outputpath { FieldInfo dictInfo = container.GetType().GetField("Dict" ); object dict = dictInfo.GetValue(container); foreach (var datas in datalist) { object instance = type.Assembly.CreateInstance(type.FullName); foreach (var data in datas) { FieldInfo fieldinfo = type.GetField(data.Name); fieldinfo.SetValue(instance, parseValue(data.Type, data.Data)); } object id = type.GetField("id" ).GetValue(instance); bool isExist = (bool )dict.GetType().GetMethod("ContainsKey" ).Invoke(dict, new object [] { id }); if (isExist) { Debug.LogError("Repetitive key " + id + " in " + container.GetType().Name); return false ; } dict.GetType().GetMethod("Add" ).Invoke(dict, new object [] { id, instance }); } var bf = new BinaryFormatter(); var s = new FileStream(outputpath + type.Name + ".bytes" , FileMode.CreateNew, FileAccess.Write); bf.Serialize(s, container); s.Close(); return true ; } private static bool createDataManager (Assembly assembly, string outputpath ) { StringBuilder source = new StringBuilder(); source.Append("/*\n" ); source.Append("\tAuto create\n" ); source.Append("\tDon't Edit it\n" ); source.Append("*/\n" ); source.Append("\n" ); source.Append("using System;\n" ); source.Append("using UnityEngine;\n" ); source.Append("using System.Runtime.Serialization;\n" ); source.Append("using System.Runtime.Serialization.Formatters.Binary;\n" ); source.Append("using System.IO;\n\n" ); source.Append("[Serializable]\n" ); source.Append("public class DataManager : SingletonTemplate<DataManager>\n" ); source.Append("{\n" ); var types = assembly.GetTypes(); foreach (var type in types) { if (!type.Name.EndsWith(PathUtilties.ExcelTableContainerPostfix)) { continue ; } source.Append("\tpublic " + type.Name + " " + type.Name.Remove(0 , 2 ) + ";\n" ); } source.Append("\n" ); source.Append("\tpublic void loadAll()\n" ); source.Append("\t{\n" ); foreach (var type in types) { if (!type.Name.EndsWith("Container" )) { continue ; } string typeName = type.Name.Remove(type.Name.IndexOf("Container" )); source.Append("\t\t" + type.Name.Remove(0 , 2 ) + " = Load(" + '"' + typeName + '"' + ") as " + type.Name + ";\n" ); } source.Append("\t}\n\n" ); source.Append("\tprivate System.Object Load(string name)\n" ); source.Append("\t{\n" ); source.Append("\t\tvar bf = new BinaryFormatter();\n" ); source.Append("\t\tTextAsset text = Resources.Load<TextAsset>(" + '"' + PathUtilties.ExcelDataFileOutputFolderRelativePath + '"' + " + name);\n" ); source.Append("\t\tStream s = new MemoryStream(text.bytes);\n" ); source.Append("\t\tSystem.Object obj = bf.Deserialize(s);\n" ); source.Append("\t\ts.Close();\n" ); source.Append("\t\treturn obj;\n" ); source.Append("\t}\n" ); foreach (var type in types) { if (type.Name.EndsWith("Container" )) { continue ; } var classname = type.Name; source.Append("\t\n" ); source.Append("\tpublic " + classname + " get" + classname.Substring(2 ) + "Data(int id)\n" ); source.Append("\t{\n" ); source.Append("\t\t" + classname + " data = null;\n" ); source.Append("\t\t" + classname.Substring(2 ) + "Container.getMap().TryGetValue(id, out data);\n" ); source.Append("\t\tif(data == null)\n" ); source.Append("\t\t{\n" ); source.Append("\t\t\tDebug.LogError(string.Format(\"表格:{ 0}找不到id: { 1}的数据!\", data.GetType().ToString(), id));\n" ); source.Append("\t\t}\n" ); source.Append("\t\treturn data;\n" ); source.Append("\t}\n" ); } source.Append("}\n" ); StreamWriter sw = new StreamWriter(outputpath + PathUtilties.ExcelScriptDataManagerFileName); sw.WriteLine(source.ToString()); sw.Close(); return true ; } private static object parseValue (string type, string data { if (type.Equals("string" )) { return data; } else if (type.Equals("int" )) { return int .Parse(data); } else if (type.Equals("float" )) { return float .Parse(data); } else { Debug.LogError(string .Format("类型字符串:{0}不支持该类型数据解析!" , type)); return data; } } }
DataConfigScriptGenerator.cs
1
2
3
4
5
6
7
8
9
10
11
12
13
14
15
16
17
18
19
20
21
22
23
24
25
26
27
28
29
30
31
32
33
34
35
36
37
38
39
40
41
42
43
44
45
46
47
48
49
50
51
52
53
54
55
56
57
58
59
60
61
62
63
64
65
66
67
68
69
70
71
72
73
74
75
76
77
78
79
80
81
82
83
84
85
86
87
88
89
90
91
92
93
94
95
96
97
98
99
100
101
102
103
104
105
106
107
108
109
110
111
112
113
114
115
116
using System.Collections;using System.Collections.Generic;using System.Text;using UnityEngine;public class DataConfigScriptGenerator { public string ClassName { get ; private set ; } public string [] TypeDatas { get ; private set ; } public string [] TypeNameDatas { get ; private set ; } public DataConfigScriptGenerator (string classname, string [] typedatas, string [] typenamedatas { ClassName = classname; TypeDatas = typedatas; TypeNameDatas = typenamedatas; } public string generateCode ( { if (string .IsNullOrEmpty(ClassName) || TypeDatas == null || TypeNameDatas == null ) { return null ; } return generateRealCode(); } private string generateRealCode ( { StringBuilder classsource = new StringBuilder(); classsource.Append("/*\n" ); classsource.Append("\tAuto create\n" ); classsource.Append("\tDon't Edit it\n" ); classsource.Append("*/\n" ); classsource.Append("\n" ); classsource.Append("using System;\n" ); classsource.Append("using System.Reflection;\n" ); classsource.Append("using System.Collections.Generic;\n" ); classsource.Append("\n" ); classsource.Append("[Serializable]\n" ); classsource.Append("public class " + ClassName + "\n" ); classsource.Append("{\n" ); for (int i = 0 ; i < TypeDatas.Length; i++) { classsource.Append(filedString(TypeDatas[i], TypeNameDatas[i])); } classsource.Append("}\n" ); classsource.Append("\n" ); classsource.Append("[Serializable]\n" ); classsource.Append("public class " + ClassName + PathUtilties.ExcelTableContainerPostfix + "\n" ); classsource.Append("{\n" ); classsource.Append("\tpublic " + "Dictionary<int, " + ClassName + ">" + " Dict" + " = new Dictionary<int, " + ClassName + ">();\n" ); classsource.Append("\tpublic " + "Dictionary<int, " + ClassName + ">" + " getMap()\n" ); classsource.Append("\t{\n" ); classsource.Append("\t\treturn Dict;\n" ); classsource.Append("\t}\n" ); classsource.Append("}\n" ); return classsource.ToString(); } private string filedString (string type, string field { if (string .IsNullOrEmpty(type) || string .IsNullOrEmpty(field)) return null ; StringBuilder sbProperty = new StringBuilder(); sbProperty.Append("\tpublic " + type + " " + field + ";\n" ); return sbProperty.ToString(); } }
让我们来看看最终的结果:
t_game.cs
1 2 3 4 5 6 7 8 9 10 11 12 13 14 15 16 17 18 19 20 21 22 23 24 25 26 27 28 Auto create Don't Edit it */ using System;using System.Reflection;using System.Collections.Generic;[Serializable] public class t_game { public int id; public string author; public string sex; public int age; public float money; } [Serializable] public class t_gameContainer { public Dictionary<int , t_game> Dict = new Dictionary<int , t_game>(); public Dictionary<int , t_game> getMap() { return Dict; } }
DataManager.cs
1
2
3
4
5
6
7
8
9
10
11
12
13
14
15
16
17
18
19
20
21
22
23
24
25
26
27
28
29
30
31
32
33
34
35
36
37
38
39
40
41
42
/* Auto create Don't Edit it */ using System; using UnityEngine; using System.Runtime.Serialization; using System.Runtime.Serialization.Formatters.Binary; using System.IO; [Serializable] public class DataManager : SingletonTemplate<DataManager> { public t_gameContainer gameContainer; public void loadAll() { gameContainer = Load("t_game") as t_gameContainer; } private System.Object Load(string name) { var bf = new BinaryFormatter(); TextAsset text = Resources.Load<TextAsset>("DataConfig/" + name); Stream s = new MemoryStream(text.bytes); System.Object obj = bf.Deserialize(s); s.Close(); return obj; } public t_game getgameData(int id) { t_game data = null; gameContainer.getMap().TryGetValue(id, out data); if(data == null) { Debug.LogError(string.Format("表格:{ 0}找不到id: { 1}的数据!", data.GetType().ToString(), id)); } return data; } }
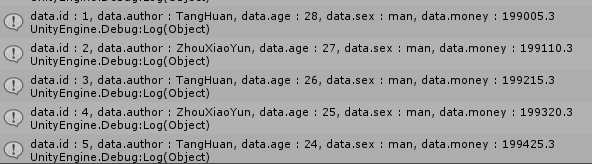
最后在Unity里测试读取和打印:
1
2
3
4
5
6
7
8
9
10
11
12
13
14
15
16
GUILayout.BeginHorizontal(); if (GUILayout.Button("加载所有表格数据" , GUILayout.MaxWidth(250.0 f), GUILayout.MaxHeight(50.0 f))){ Debug.Log("加载所有表格数据" ); DataManager.Singleton.loadAll(); } if (GUILayout.Button("打印所有表格数据" , GUILayout.MaxWidth(250.0 f), GUILayout.MinHeight(50.0 f))){ Debug.Log("打印所有表格数据" ); for (int i = 1 ; i <= DataManager.Singleton.gameContainer.Dict.Count; i++) { var data = DataManager.Singleton.getgameData(i); Debug.Log(string .Format("data.id : {0}, data.author : {1}, data.age : {2}, data.sex : {3}, data.money : {4}" , data.id, data.author, data.age, data.sex, data.money)); } } GUILayout.EndHorizontal();
就这样我们成功的通过读取表格数据,生成对应代码,序列化数据,然后通过生成的对应表代码反序列化读取出数据就基本完成了。
遇到的问题:
错误信息:
个人猜测因为序列化反序列化时要求Assemble信息一致,所以如果反序列化使用Unity 编译后的C#无法成功反序列化
网上相关问题:SerializationException: Could not find type ‘System.Collections.Generic.List’1 in c# untiy3d How to Serialize Across Assemblies with the BinaryFormatter
但考虑到BinderToType低版本.Net可以用但BinderToName要求.Net 4.0,所以这里放弃了直接生成新的cs表代码通过Unity编译使用的方案,选择依然采用直接编译表代码成dll来使用。
问题
C#反序列化默认是反射实现的,速度会比较慢,可以考虑实现自定义反序列化加快读取速度,参考:Runtime_Serialization
序列化同一个类型对象500次并反序列化500次
打印记录反序列化的内存和时间开销
1
2
3
4
5
6
7
8
9
10
11
12
13
14
15
16
17
18
19
20
21
22
23
24
25
26
27
28
29
30
31
32
33
34
35
36
37
38
39
40
41
42
43
44
45
46
47
48
49
50
51
52
53
54
55
56
57
58
59
60
61
62
63
64
65
66
67
68
69
70
71
72
73
74
75
76
77
78
79
80
81
82
83
84
85
86
87
88
89
90
91
92
93
94
95
96
97
98
99
100
101
102
103
104
105
106
107
108
109
110
111
112
113
114
115
116
117
118
119
120
121
122
123
124
125
126
private static long mHeapMemorySize;private static void TonyTangShowHeapMemoryUsingPrepration ( GC.Collect(); mHeapMemorySize = GC.GetTotalMemory(true ); } private static void TonyTangShowHeapMemoryUsing (string postfix var newestheapmemorysize = GC.GetTotalMemory(false ); var heapmemoryoffset = newestheapmemorysize - mHeapMemorySize; Console.WriteLine(string .Format("Heap Memory Size = {0} Pre Memory Size = {1} Memory Offset = {2} -- {3}" , newestheapmemorysize, mHeapMemorySize, heapmemoryoffset, postfix)); mHeapMemorySize = newestheapmemorysize; } [Serializable] public class Map { public Map ( { mID = 0 ; mMapName = "DefaultMap" ; } public int ID { get { return mID; } set { mID = value ; } } private int mID; public string MapName { get { return mMapName; } set { mMapName = value ; } } private string mMapName; } string mMapSavePath = "./mapInfo.dat" ;for (int id = 0 ; id < 500 ; id++){ Map map = new Map(); map.ID = id; map.MapName = id.ToString(); BinaryFormatter bf = new BinaryFormatter(); var mapsavepath = mMapSavePath + id; if (!File.Exists(mapsavepath)) { FileStream fsc = File.Create(mapsavepath); fsc.Close(); } FileStream fs = File.Open(mapsavepath, FileMode.Open); bf.Serialize(fs, map); fs.Close(); } ShowHeapMemoryUsingPrepration(); TimeCounter.Singleton.Restart("Deserialization" ); Map mDSMap; BinaryFormatter dsbf = new BinaryFormatter (); for (int id = 0 ; id < 500 ; id++){ var mapsavepath = mMapSavePath + id; if (File.Exists(mapsavepath)) { FileStream dsfs = File.Open(mapsavepath, FileMode.Open); mDSMap = (Map)dsbf.Deserialize(dsfs); dsfs.Close(); } } TimeCounter.Singleton.End(); ShowHeapMemoryUsing("Serialization" );
自定义序列化反序列化开销:实际测试以后发现,自定义并没有加快反序列化的速度,反而增加了内存开销 Performance Test - BinaryFormatter vs Protobuf-Net 里的结论一致了。但至于为什么反序列化速度没有提升,这里不太明白,理论上避免了反射应该是有所提升才对。希望知道的朋友忘告知。
序列化的数据仅仅是通过C#自身可以反序列化出来,不支持跨语言(比如服务器端使用Java的话,并不能直接使用同样的序列化数据)。
ProtoBuff ProtoBuff学习了解 Protocol Buffers是Google发布出来的开源项目。Protocol Buffers - a language-neutral, platform-neutral, extensible way of serializing structured data for use in communications protocols, data storage, and more.
定义出我们需要序列化的数据结构,保存在.proto文件里。
运用Protocol buffer编译器编译出我们对应语言的解析该数据结构的代码类。Protocol buffer编译器
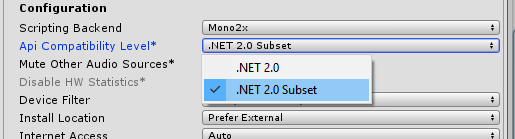
——————————————-2018/5/6(新增)—————————————————-扒一扒.net、.net framework、mono和Unity Replacing MonoDevelop-Unity with Visual Studio Community starting in Unity 2018.1
所以通过Google,我找到了以下两个开源项目:
1. [Protobuf-csharp-port ](https://github.com/jskeet/protobuf-csharp-port )
2. [Protobuf-net ](https://github.com/mgravell/protobuf-net )
前者在Git上的描述不多,所以这里就以下面引用的话来了解两者之间的区别。
[Protobuf-csharp-port is written by Jon Skeet and is a faithful port of Google’s java implementation that uses similar command-line tooling. You create the data definitions in text-based .proto files and use a code generation tool to create the C# classes. ](http://www.ben-morris.com/protocol-buffers-protobuf-net-vs-protobuf-csharp-port/ )
Protobuf-csharp-port是由Jon Skeet编写,利用原生工具去port的版本。在编译创建上都沿用了Protocol buffer的原始方式(通过编译.proto文件生成解析定义的Message数据结构的C#代码类)
[Protobuf-net is written by Marc Gravell and will be more familiar to .Net developers. The implementation uses .Net classes and attributes to define data rather than .proto files. Overall, the code resembles existing .Net serializers such as the DataContractSerializer. ](http://www.ben-morris.com/protocol-buffers-protobuf-net-vs-protobuf-csharp-port/ )
Protobuf-net是由Marc Gravell编写,支持.NET的类和attributes去定义数据结构,也支持.proto文件预编译生成对应代码类。可以说是.NET风格的Protobuf。
同时Github写明了支持:
.net 2.0/3.0/3.5/4.0
Mono 2.x
所以这里就决定使用Protobuf-net作为Unity C#序列化数据的存储和协议传输的库来学习。
1. 安装Protobuf-net
VS -> Tools -> Nuget Package Manager -> Package Manager Console
在Package Manager Console窗口输入下列命令就会自动去下载Protobuf-net包并安装了。
1 Install-Package protobuf-net
也可以直接下载[Down load link of Protobuf-net ](https://code.google.com/archive/p/protobuf-net/downloads )
把Protobuf-net.dll放到Assets/Plugins目录下
2. 定义可序列化的类
1
2
3
4
5
6
7
8
9
10
11
12
13
14
15
16
17
18
19
20
21
22
23
24
25
26
27
using UnityEngine;using System.Collections;using ProtoBuf;[ProtoContract] public class PlayerData { [ProtoMember(1 )] public string SceneName { get ; set ; } [ProtoMember(2 )] public int Scores { get ; set ; } [ProtoMember(3 )] public int SpeedLevel { get ; set ; } }
通过C#(对应语言)protocol buffer API去读写存储的数据。
1
2
3
4
5
6
7
8
9
10
11
12
13
14
15
16
17
18
19
20
21
22
23
24
25
26
27
28
29
30
31
32
33
34
35
36
37
38
39
40
41
42
43
public void Awake ( ...... mPlayerData = new PlayerData(); mProfilePath = Application.persistentDataPath + "/PlayerProile.bin" ; Debug.Log("mProfilePath = " + mProfilePath); } public void SavePlayerData ( FileStream profile; if (File.Exists(mProfilePath)) { profile = File.Open(mProfilePath, FileMode.Open); Serializer.Serialize(profile, mPlayerData); } else { profile = File.Create(mProfilePath); Serializer.Serialize(profile, mPlayerData); } } private void LoadPlayerData ( FileStream profile; if (File.Exists(mProfilePath)) { profile = File.OpenRead(mProfilePath); mPlayerData = Serializer.Deserialize<PlayerData>(profile); } else { mPlayerData = new PlayerData(); mPlayerData.SceneName = Application.productName; mPlayerData.Scores = 0 ; mPlayerData.SpeedLevel = 1 ; SavePlayerData(); } }
但只是这样的话,会报如下错误:proto2参考
1 2 3 4 5 6 7 8 9 10 syntax = "proto2" ; package NGUI2DGame; message PlayerData{ optional string SceneName = 1 ; optional int32 Scores = 2 ; optional int32 SpeedLevel = 3 ; }
然后通过Protogen.exe帮我们生成对应解析该数据结构所需要的代码类
1 protogen -i:PlayerData.proto -o:PlayerData.cs -ns:NGUI2DGame
-i是指明输入,这里可以通过-i指定多个输入proto文件。-o是指定输出文件,最终生成的对应信息的代码类。-ns是指定namespace
1
2
3
4
5
6
7
8
9
10
11
12
13
14
15
16
17
18
19
20
21
22
23
24
25
26
27
28
29
30
31
32
33
34
35
36
37
38
39
40
41
42
43
44
45
46
47
//PlayerData.cs //------------------------------------------------------------------------------ // <auto-generated> // This code was generated by a tool. // // Changes to this file may cause incorrect behavior and will be lost if // the code is regenerated. // </auto-generated> //------------------------------------------------------------------------------ // Generated from: PlayerData.proto namespace NGUI2DGame { [global::System.Serializable, global::ProtoBuf.ProtoContract(Name=@"PlayerData")] public partial class PlayerData : global::ProtoBuf.IExtensible { public PlayerData() {} private string _SceneName = ""; [global::ProtoBuf.ProtoMember(1, IsRequired = false, Name=@"SceneName", DataFormat = global::ProtoBuf.DataFormat.Default)] [global::System.ComponentModel.DefaultValue("")] public string SceneName { get { return _SceneName; } set { _SceneName = value; } } private int _Scores = default(int); [global::ProtoBuf.ProtoMember(2, IsRequired = false, Name=@"Scores", DataFormat = global::ProtoBuf.DataFormat.TwosComplement)] [global::System.ComponentModel.DefaultValue(default(int))] public int Scores { get { return _Scores; } set { _Scores = value; } } private int _SpeedLevel = default(int); [global::ProtoBuf.ProtoMember(3, IsRequired = false, Name=@"SpeedLevel", DataFormat = global::ProtoBuf.DataFormat.TwosComplement)] [global::System.ComponentModel.DefaultValue(default(int))] public int SpeedLevel { get { return _SpeedLevel; } set { _SpeedLevel = value; } } private global::ProtoBuf.IExtension extensionObject; global::ProtoBuf.IExtension global::ProtoBuf.IExtensible.GetExtensionObject(bool createIfMissing) { return global::ProtoBuf.Extensible.GetExtensionObject(ref extensionObject, createIfMissing); } } }
接下来把我们生成的代码通过VS编译成DLL
新建C# Library工程
删掉原始cs添加刚才生成的PlayerData.cs
添加Protobuf-net库引用(用CoreOnly/ios/protobuf-net.dll)
编译出dll
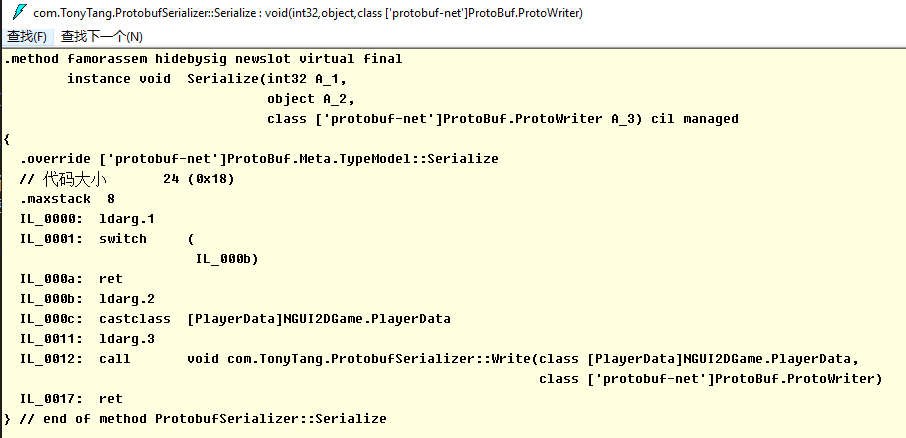
1 precompile PlayerData.dll -o:ProtobufSerializer.dll -t:com.TonyTang.ProtobufSerializer
-o指明输出文件 -t指明生成的序列化类的类名
1 2 3 4 5 6 7 ProtobufSerializer serializer = new ProtobufSerializer(); profile = File.Open(mProfilePath, FileMode.Open); serializer.Serialize(profile, mPlayerData); profile = File.OpenRead(mProfilePath); mPlayerData = serializer.Deserialize(profile,null ,typeof (PlayerData)) as PlayerData;
因为需要编写.proto文件后编译生成对应的Serialization类的dll,所以最好通过shell脚本写成自动化。在ios android设备上使用 Protobuf (使用源码方式)
了解了什么(What)是Protobuf,如何(How)使用Protobuf,那么我们也应该大概了解下为什么(Why)Protobuf高效,更小,更快,更简单…..Google Protocol Buffer 的使用和原理 官网讲到的Protocol buffer的Encode技术
那么为什么要用Protocol buffer了?使用 Protocol Buffers 代替 JSON 的五个原因
Note:proto2的语言编写规范 。
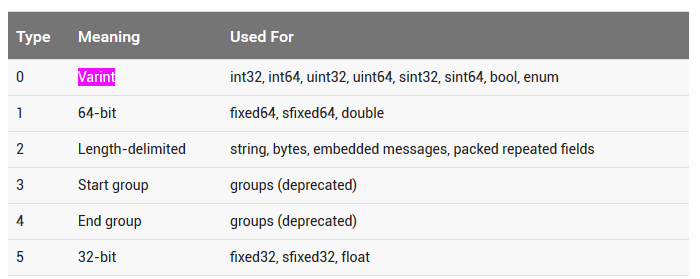
从之前的学习可以知道的是,ProtoBuf通过自定义了Encode和Decode,使用Varint技术,把数据成功压缩更小,实现了更小的数据量存储。
———————————————-2018/04/22—————————————————-Protocol Buffer 序列化原理大揭秘 - 为什么Protocol Buffer性能这么好? ———————————————-2018/04/22—————————————————-
前面提到的是Protocol Buffer 2的使用,那么我们能否集成使用Protocol Buffer 3吗?
Protocol Buffer 3 in Unity Protocok Buffer(高效的跨语言序列化反序列化数据以及数据结构向后扩展兼容)
问题:
PB3对.Net版本的要求?
Probuf官方Git链接:protobuf protobuf latest
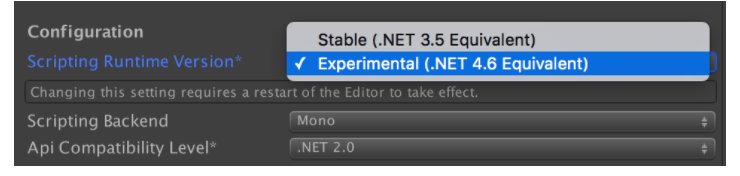
Unity支持的.Net版本?
Unity支持的PB版本?protobuf3-for-unity
Python对应需要的PB版本?
Protoc的选择?
流程:
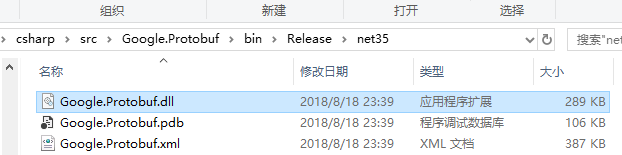
下载新版Protobuf Csharp版 自己编译基于.Net 3.5版本Protobuf Csharp版dll(我的理解这一步的dll是Protobuf核心的模块,用于支持对数据编码存储)
Note:
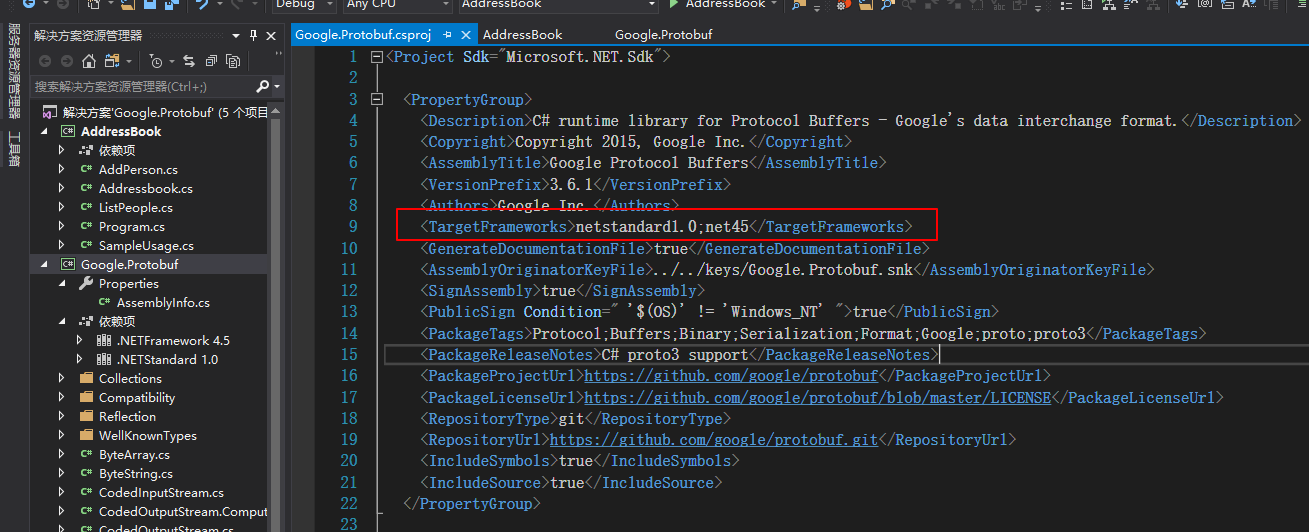
Protobuf 3.6.1的Google.Protobuf.sln工程需要VS2017才能正确打开,VS2015本人打开显示加载.csproj的C#项目都失败了
使用Protoc.exe对*.proto文件进行解析生成对应的代码(我的理解,这一步是为了支持指定定义的数据格式的序列化和反序列化相关代码)
1 // 使用proto3
syntax = "proto3";
// 指明namespace
package GameData;
// 游戏配置信息
message GameConfig {
string difficultyLevel = 1; // 游戏难度
int32 versionNumber = 2; // 游戏版本号
int32 resourceNumber = 3; // 游戏资源版本号
}
使用protoc.exe生成用于序列化反序列化GameConfig的代码:
1 protoc.exe --csharp_out=CsharpCode -I=Proto GameConfig.proto
—csharp_out指明CS脚本输出目录
1
2
3
4
5
6
7
8
9
10
11
12
13
14
15
16
17
18
19
20
21
22
23
24
25
26
27
28
29
30
31
32
33
34
35
36
37
38
39
40
41
42
43
44
45
46
47
48
49
50
51
52
53
54
55
56
57
58
59
60
61
62
63
64
65
66
67
68
69
70
71
72
73
74
75
76
77
78
79
80
81
82
83
84
85
86
87
88
89
90
91
92
93
94
95
96
97
98
99
100
101
102
103
104
105
106
107
108
109
110
111
112
113
114
115
116
117
118
119
120
121
122
123
124
125
126
127
128
129
130
131
132
133
134
135
136
137
138
139
140
141
142
143
144
145
146
147
148
149
150
151
152
153
154
155
156
157
158
159
160
161
162
163
164
165
166
167
168
169
170
171
172
173
174
175
176
177
178
179
180
181
182
183
184
185
186
187
188
189
190
191
192
193
194
195
196
197
198
199
200
201
202
203
204
205
206
207
208
209
210
211
212
213
214
215
216
217
218
219
220
221
222
223
224
225
226
227
228
229
230
231
232
233
234
235
236
237
238
239
240
241
// <auto-generated> // Generated by the protocol buffer compiler. DO NOT EDIT! // source: GameConfig.proto // </auto-generated> #pragma warning disable 1591, 0612, 3021 #region Designer generated code using pb = global::Google.Protobuf; using pbc = global::Google.Protobuf.Collections; using pbr = global::Google.Protobuf.Reflection; using scg = global::System.Collections.Generic; namespace GameData { /// <summary>Holder for reflection information generated from GameConfig.proto</summary> public static partial class GameConfigReflection { #region Descriptor /// <summary>File descriptor for GameConfig.proto</summary> public static pbr::FileDescriptor Descriptor { get { return descriptor; } } private static pbr::FileDescriptor descriptor; static GameConfigReflection() { byte[] descriptorData = global::System.Convert.FromBase64String( string.Concat( "ChBHYW1lQ29uZmlnLnByb3RvEghHYW1lRGF0YSJUCgpHYW1lQ29uZmlnEhcK", "D2RpZmZpY3VsdHlMZXZlbBgBIAEoCRIVCg12ZXJzaW9uTnVtYmVyGAIgASgF", "EhYKDnJlc291cmNlTnVtYmVyGAMgASgFYgZwcm90bzM=")); descriptor = pbr::FileDescriptor.FromGeneratedCode(descriptorData, new pbr::FileDescriptor[] { }, new pbr::GeneratedClrTypeInfo(null, new pbr::GeneratedClrTypeInfo[] { new pbr::GeneratedClrTypeInfo(typeof(global::GameData.GameConfig), global::GameData.GameConfig.Parser, new[]{ "DifficultyLevel", "VersionNumber", "ResourceNumber" }, null, null, null) })); } #endregion } #region Messages /// <summary> /// 游戏配置信息 /// </summary> public sealed partial class GameConfig : pb::IMessage<GameConfig> { private static readonly pb::MessageParser<GameConfig> _parser = new pb::MessageParser<GameConfig>(() => new GameConfig()); private pb::UnknownFieldSet _unknownFields; [global::System.Diagnostics.DebuggerNonUserCodeAttribute] public static pb::MessageParser<GameConfig> Parser { get { return _parser; } } [global::System.Diagnostics.DebuggerNonUserCodeAttribute] public static pbr::MessageDescriptor Descriptor { get { return global::GameData.GameConfigReflection.Descriptor.MessageTypes[0]; } } [global::System.Diagnostics.DebuggerNonUserCodeAttribute] pbr::MessageDescriptor pb::IMessage.Descriptor { get { return Descriptor; } } [global::System.Diagnostics.DebuggerNonUserCodeAttribute] public GameConfig() { OnConstruction(); } partial void OnConstruction(); [global::System.Diagnostics.DebuggerNonUserCodeAttribute] public GameConfig(GameConfig other) : this() { difficultyLevel_ = other.difficultyLevel_; versionNumber_ = other.versionNumber_; resourceNumber_ = other.resourceNumber_; _unknownFields = pb::UnknownFieldSet.Clone(other._unknownFields); } [global::System.Diagnostics.DebuggerNonUserCodeAttribute] public GameConfig Clone() { return new GameConfig(this); } /// <summary>Field number for the "difficultyLevel" field.</summary> public const int DifficultyLevelFieldNumber = 1; private string difficultyLevel_ = ""; /// <summary> /// 游戏难度 /// </summary> [global::System.Diagnostics.DebuggerNonUserCodeAttribute] public string DifficultyLevel { get { return difficultyLevel_; } set { difficultyLevel_ = pb::ProtoPreconditions.CheckNotNull(value, "value"); } } /// <summary>Field number for the "versionNumber" field.</summary> public const int VersionNumberFieldNumber = 2; private int versionNumber_; /// <summary> /// 游戏版本号 /// </summary> [global::System.Diagnostics.DebuggerNonUserCodeAttribute] public int VersionNumber { get { return versionNumber_; } set { versionNumber_ = value; } } /// <summary>Field number for the "resourceNumber" field.</summary> public const int ResourceNumberFieldNumber = 3; private int resourceNumber_; /// <summary> /// 游戏资源版本号 /// </summary> [global::System.Diagnostics.DebuggerNonUserCodeAttribute] public int ResourceNumber { get { return resourceNumber_; } set { resourceNumber_ = value; } } [global::System.Diagnostics.DebuggerNonUserCodeAttribute] public override bool Equals(object other) { return Equals(other as GameConfig); } [global::System.Diagnostics.DebuggerNonUserCodeAttribute] public bool Equals(GameConfig other) { if (ReferenceEquals(other, null)) { return false; } if (ReferenceEquals(other, this)) { return true; } if (DifficultyLevel != other.DifficultyLevel) return false; if (VersionNumber != other.VersionNumber) return false; if (ResourceNumber != other.ResourceNumber) return false; return Equals(_unknownFields, other._unknownFields); } [global::System.Diagnostics.DebuggerNonUserCodeAttribute] public override int GetHashCode() { int hash = 1; if (DifficultyLevel.Length != 0) hash ^= DifficultyLevel.GetHashCode(); if (VersionNumber != 0) hash ^= VersionNumber.GetHashCode(); if (ResourceNumber != 0) hash ^= ResourceNumber.GetHashCode(); if (_unknownFields != null) { hash ^= _unknownFields.GetHashCode(); } return hash; } [global::System.Diagnostics.DebuggerNonUserCodeAttribute] public override string ToString() { return pb::JsonFormatter.ToDiagnosticString(this); } [global::System.Diagnostics.DebuggerNonUserCodeAttribute] public void WriteTo(pb::CodedOutputStream output) { if (DifficultyLevel.Length != 0) { output.WriteRawTag(10); output.WriteString(DifficultyLevel); } if (VersionNumber != 0) { output.WriteRawTag(16); output.WriteInt32(VersionNumber); } if (ResourceNumber != 0) { output.WriteRawTag(24); output.WriteInt32(ResourceNumber); } if (_unknownFields != null) { _unknownFields.WriteTo(output); } } [global::System.Diagnostics.DebuggerNonUserCodeAttribute] public int CalculateSize() { int size = 0; if (DifficultyLevel.Length != 0) { size += 1 + pb::CodedOutputStream.ComputeStringSize(DifficultyLevel); } if (VersionNumber != 0) { size += 1 + pb::CodedOutputStream.ComputeInt32Size(VersionNumber); } if (ResourceNumber != 0) { size += 1 + pb::CodedOutputStream.ComputeInt32Size(ResourceNumber); } if (_unknownFields != null) { size += _unknownFields.CalculateSize(); } return size; } [global::System.Diagnostics.DebuggerNonUserCodeAttribute] public void MergeFrom(GameConfig other) { if (other == null) { return; } if (other.DifficultyLevel.Length != 0) { DifficultyLevel = other.DifficultyLevel; } if (other.VersionNumber != 0) { VersionNumber = other.VersionNumber; } if (other.ResourceNumber != 0) { ResourceNumber = other.ResourceNumber; } _unknownFields = pb::UnknownFieldSet.MergeFrom(_unknownFields, other._unknownFields); } [global::System.Diagnostics.DebuggerNonUserCodeAttribute] public void MergeFrom(pb::CodedInputStream input) { uint tag; while ((tag = input.ReadTag()) != 0) { switch(tag) { default: _unknownFields = pb::UnknownFieldSet.MergeFieldFrom(_unknownFields, input); break; case 10: { DifficultyLevel = input.ReadString(); break; } case 16: { VersionNumber = input.ReadInt32(); break; } case 24: { ResourceNumber = input.ReadInt32(); break; } } } } } #endregion } #endregion Designer generated code
使用生成的代码进行序列化和反序列化数据测试
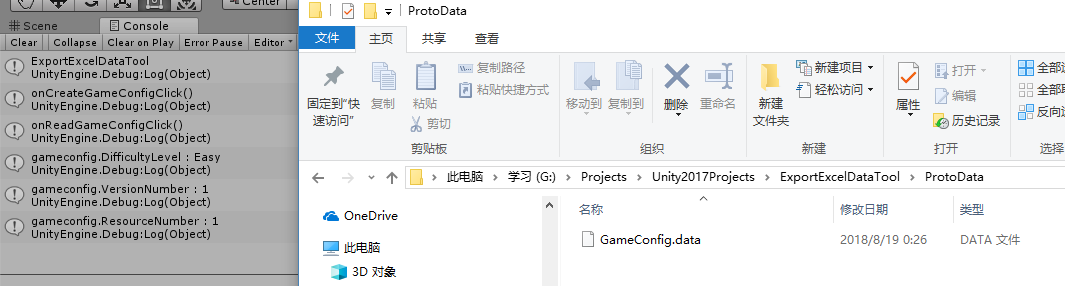
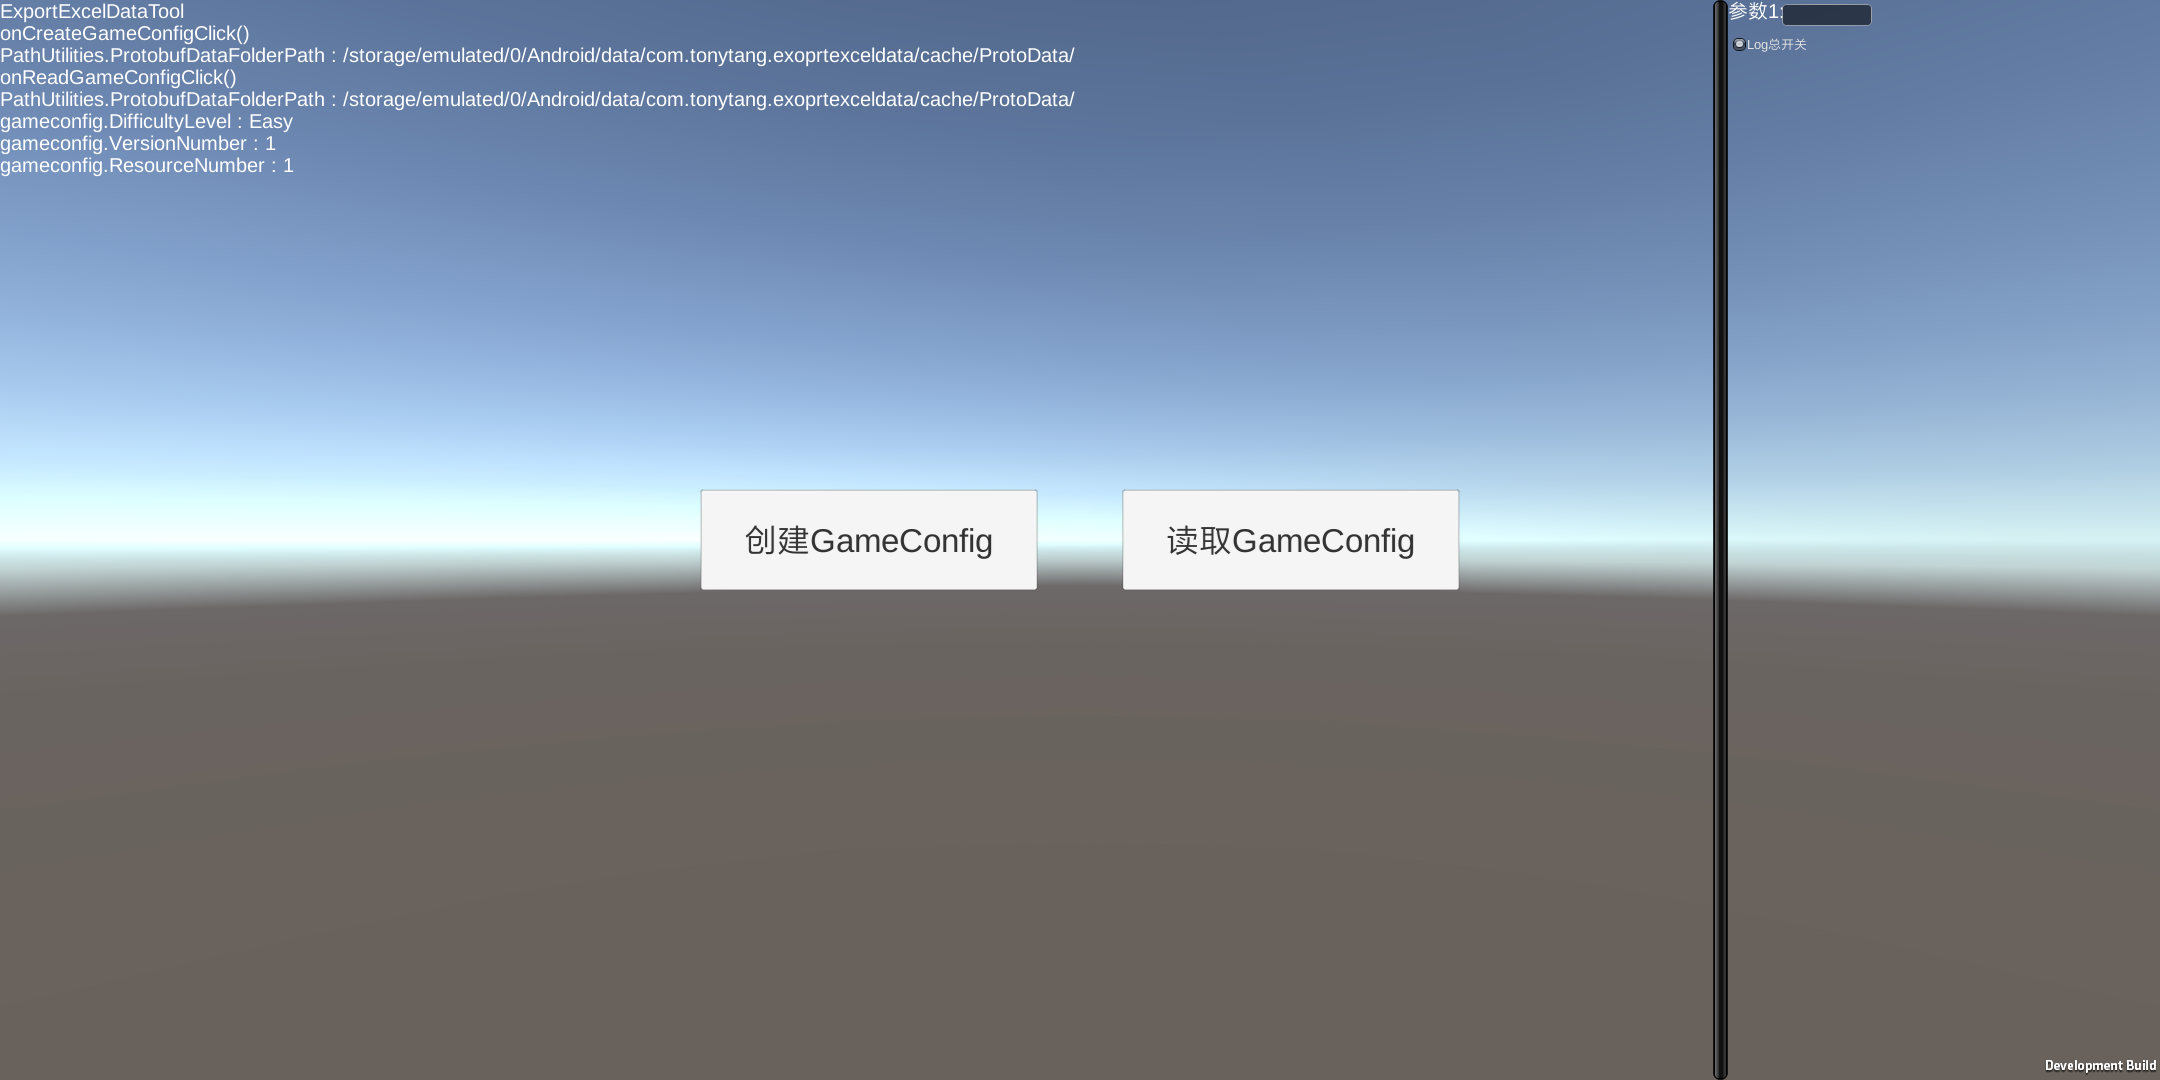
1 2 3 4 5 6 7 8 9 10 11 12 13 14 15 16 17 18 19 20 21 22 23 24 25 26 27 28 29 30 31 32 33 34 35 36 37 38 39 40 41 42 43 44 45 46 47 48 49 50 51 52 53 54 55 56 57 58 59 60 61 62 63 64 65 66 67 68 69 70 71 72 73 74 75 76 77 * Description: UIDebugMonoScript.cs * Author: TONYTANG * Create Date: 2018/08/19 */ using GameData;using Google.Protobuf;using System.Collections;using System.Collections.Generic;using System.IO;using UnityEngine;using UnityEngine.UI;public class UIDebugMonoScript : MonoBehaviour { public Button mBtnCreateGameConfig; public Button mBtnReadGameConfig; private void Start ( { mBtnCreateGameConfig.onClick.AddListener(onCreateGameConfigClick); mBtnReadGameConfig.onClick.AddListener(onReadGameConfigClick); } private void OnDestroy ( { mBtnCreateGameConfig.onClick.RemoveAllListeners(); mBtnReadGameConfig.onClick.RemoveAllListeners(); } private void onCreateGameConfigClick ( { Debug.Log("onCreateGameConfigClick()" ); Debug.Log("PathUtilities.ProtobufDataFolderPath : " + PathUtilities.ProtobufDataFolderPath); PathUtilities.checkAndCreateFolder(PathUtilities.ProtobufDataFolderPath); GameConfig gameconfig = new GameConfig(); gameconfig.DifficultyLevel = "Easy" ; gameconfig.VersionNumber = 1 ; gameconfig.ResourceNumber = 1 ; using (var output = File.Create(PathUtilities.ProtobufDataFolderPath + "GameConfig.data" )) { gameconfig.WriteTo(output); } } private void onReadGameConfigClick ( { Debug.Log("onReadGameConfigClick()" ); Debug.Log("PathUtilities.ProtobufDataFolderPath : " + PathUtilities.ProtobufDataFolderPath); GameConfig gameconfig; using (var intput = File.OpenRead(PathUtilities.ProtobufDataFolderPath + "GameConfig.data" )) { gameconfig = GameConfig.Parser.ParseFrom(intput); } Debug.Log("gameconfig.DifficultyLevel : " + gameconfig.DifficultyLevel); Debug.Log("gameconfig.VersionNumber : " + gameconfig.VersionNumber); Debug.Log("gameconfig.ResourceNumber : " + gameconfig.ResourceNumber); } }
PathUtilities.cs
1 2 3 4 5 6 7 8 9 10 11 12 13 14 15 16 17 18 19 20 21 22 23 24 25 26 27 28 29 30 31 32 33 34 35 36 37 38 39 40 41 42 43 44 45 * Description: 路径静态工具类 * Author: tanghuan * Create Date: 2018/03/12 */ using System.Collections;using System.Collections.Generic;using System.IO;using UnityEngine;public static class PathUtilities { #region Protobuf #if UNITY_EDITOR public static string ProtobufDataFolderPath = Application.dataPath + "/Resources/ProtoData/" ; #elif UNITY_ANDROID public static string ProtobufDataFolderPath = Application.temporaryCachePath + "/ProtoData/" ; #elif UNITY_IOS public static string ProtobufDataFolderPath = Application.temporaryCachePath + "/ProtoData/" ; #endif #endregion #region 公用方法 public static void checkAndCreateFolder (string folderpath { if (!Directory.Exists(folderpath)) { Directory.CreateDirectory(folderpath); } } #endregion }
PC:
Protobuf Python篇:
安装python
下载Protoc.exe 用于安装生成python版proto文件对应的解析所需文件
下载对应版本的Protobuf 3 Python版本 (这里我下的和Csharp版本的Protobuf3一样的版本3.6.1)
安装Protobuf 3 Python所需环境(在下载的Protobuf3 Python的Python原代码下运行python setup.py install)
安装完成后会发现Protobuf 3 For Python相关的Package环境都被下载到了site-packages目录:
编译Proto文件生成解析所需文件
1 protoc.exe --python_out=PythonCode -I=Proto GameConfig.proto
GameConfig_pb2.py
1 2 3 4 5 6 7 8 9 10 11 12 13 14 15 16 17 18 19 20 21 22 23 24 25 26 27 28 29 30 31 32 33 34 35 36 37 38 39 40 41 42 43 44 45 46 47 48 49 50 51 52 53 54 55 56 57 58 59 60 61 62 63 64 65 66 67 68 69 70 71 72 73 74 75 76 77 78 79 80 81 82 83 import sys_b=sys.version_info[0 ]<3 and (lambda x:x) or (lambda x:x.encode('latin1' )) from google.protobuf import descriptor as _descriptorfrom google.protobuf import message as _messagefrom google.protobuf import reflection as _reflectionfrom google.protobuf import symbol_database as _symbol_database_sym_db = _symbol_database.Default() DESCRIPTOR = _descriptor.FileDescriptor( name='GameConfig.proto' , package='GameData' , syntax='proto3' , serialized_options=None , serialized_pb=_b('\n\x10GameConfig.proto\x12\x08GameData\"T\n\nGameConfig\x12\x17\n\x0f\x64ifficultyLevel\x18\x01 \x01(\t\x12\x15\n\rversionNumber\x18\x02 \x01(\x05\x12\x16\n\x0eresourceNumber\x18\x03 \x01(\x05\x62\x06proto3' ) ) _GAMECONFIG = _descriptor.Descriptor( name='GameConfig' , full_name='GameData.GameConfig' , filename=None , file=DESCRIPTOR, containing_type=None , fields=[ _descriptor.FieldDescriptor( name='difficultyLevel' , full_name='GameData.GameConfig.difficultyLevel' , index=0 , number=1 , type=9 , cpp_type=9 , label=1 , has_default_value=False , default_value=_b("" ).decode('utf-8' ), message_type=None , enum_type=None , containing_type=None , is_extension=False , extension_scope=None , serialized_options=None , file=DESCRIPTOR), _descriptor.FieldDescriptor( name='versionNumber' , full_name='GameData.GameConfig.versionNumber' , index=1 , number=2 , type=5 , cpp_type=1 , label=1 , has_default_value=False , default_value=0 , message_type=None , enum_type=None , containing_type=None , is_extension=False , extension_scope=None , serialized_options=None , file=DESCRIPTOR), _descriptor.FieldDescriptor( name='resourceNumber' , full_name='GameData.GameConfig.resourceNumber' , index=2 , number=3 , type=5 , cpp_type=1 , label=1 , has_default_value=False , default_value=0 , message_type=None , enum_type=None , containing_type=None , is_extension=False , extension_scope=None , serialized_options=None , file=DESCRIPTOR), ], extensions=[ ], nested_types=[], enum_types=[ ], serialized_options=None , is_extendable=False , syntax='proto3' , extension_ranges=[], oneofs=[ ], serialized_start=30 , serialized_end=114 , ) DESCRIPTOR.message_types_by_name['GameConfig' ] = _GAMECONFIG _sym_db.RegisterFileDescriptor(DESCRIPTOR) GameConfig = _reflection.GeneratedProtocolMessageType('GameConfig' , (_message.Message,), dict( DESCRIPTOR = _GAMECONFIG, __module__ = 'GameConfig_pb2' )) _sym_db.RegisterMessage(GameConfig)
利用Python的Proto代码序列化(或者反序列化C#序列化的)数据
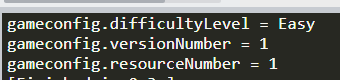
1 2 3 4 5 6 7 8 9 10 11 12 13 14 15 16 17 18 19 20 21 import GameConfig_pb2import sysgameconfig = GameConfig_pb2.GameConfig() f = open("GameConfig.data" , "rb" ) gameconfig.ParseFromString(f.read()) f.close() print("gameconfig.difficultyLevel = {}" .format(gameconfig.difficultyLevel)) print("gameconfig.versionNumber = {}" .format(gameconfig.versionNumber)) print("gameconfig.resourceNumber = {}" .format(gameconfig.resourceNumber))
Python PB3序列化数据事例:
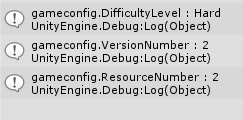
1 2 3 4 5 6 7 8 9 10 11 12 13 14 15 16 17 18 19 20 import GameConfig_pb2import sysgameconfig = GameConfig_pb2.GameConfig() gameconfig.difficultyLevel = "Hard" gameconfig.versionNumber = 2 gameconfig.resourceNumber = 2 f = open("GameConfig_Py.data" , "wb" ) f.write(gameconfig.SerializeToString()) f.close()
CSharp PB3反序列化:
1
2
3
4
5
6
7
8
GameConfig gameconfig; using (var intput = File.OpenRead(PathUtilities.ProtobufDataFolderPath + "GameConfig_Py.data" )){ gameconfig = GameConfig.Parser.ParseFrom(intput); } Debug.Log("gameconfig.DifficultyLevel : " + gameconfig.DifficultyLevel); Debug.Log("gameconfig.VersionNumber : " + gameconfig.VersionNumber); Debug.Log("gameconfig.ResourceNumber : " + gameconfig.ResourceNumber);
跨语言的特性 。
Note:
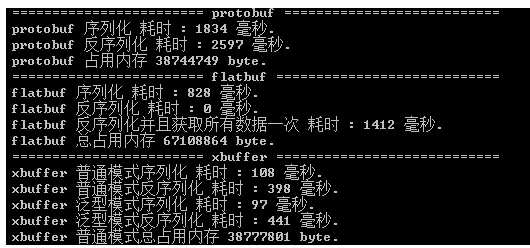
FlatBuff 在介绍FlatBuff前,让我们来看一张令人惊艳的各序列化方案测试性能对比图:图1来源至XBuffer的性能测试 :
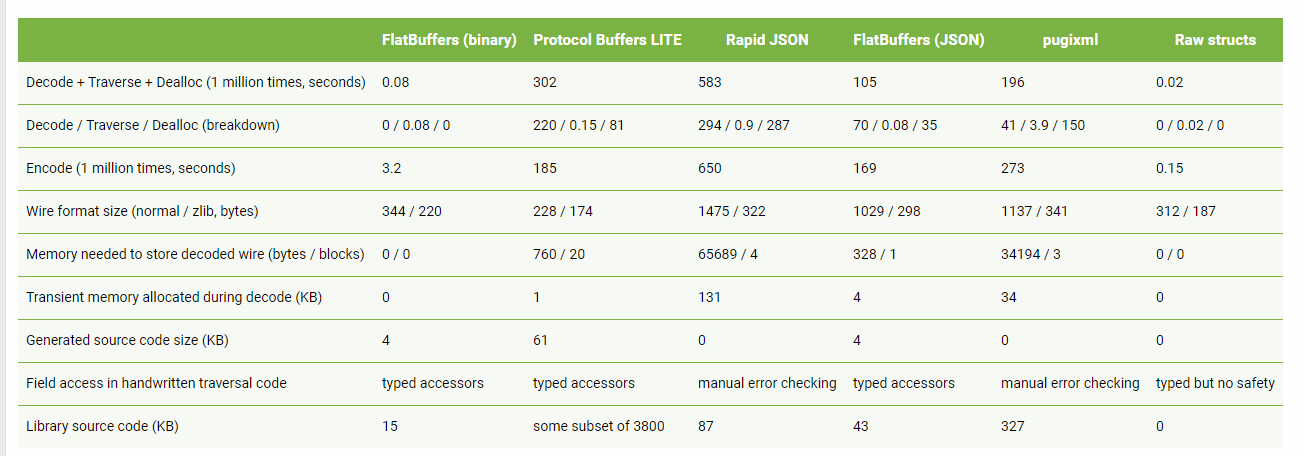
图2来源至FlatBuff官方性能Benchmark :
从上面两张图可以看到,令人惊讶的FlatBuff性能,无论是序列化还是反序列化,FlatBuff都相当高效,反序列化的时间居然几乎为0。
接下来我们深入学习了解FlatBuff,洞察其中的奥妙。
介绍 官网FlatBuffer Represents hierachical data in a flat binary buffer in such a way that it can still be acecssed directly without parsing/unpacking, while also still supporting data structure evolution(forwards/backwards compatibility)
这里简单列举下官方给出的FlatBuffer的好处:
Access to serialized data without parsing/unpacking(访问序列化数据块)
Memory efficiency and speed(内存和速度都很高效)
Flexible(向前向后兼容)
Tiny code footprint(生成代码量少且无依赖)
Strongly typed
Convenient to use(使用简单?)
Cross platform code with no dependencies(跨平台无依赖)
详情参考官网介绍
实战使用 接下来先按教程学习使用一波,再来看看底层的实现和优缺点:
编写schema文件(定义数据结构)
1 namespace GameData;
table GameConfigFB{
difficultyLevel:string; // 游戏难度
versionNumber:int; // 游戏版本号
resourceNumber:int; // 游戏资源版本号
}
root_type GameConfigFB;
schema文件编写参考
使用Flatc.exe(可以自己编译源码,也可以下载现成的 )编译解析schema文件生成序列化和反序列化数据所需代码
1 ./../flatc.exe --csharp .\GameConifgFB.fbs
GameConfigFB.cs
1
2
3
4
5
6
7
8
9
10
11
12
13
14
15
16
17
18
19
20
21
22
23
24
25
26
27
28
29
30
31
32
33
34
35
36
37
38
39
40
41
42
43
44
45
46
47
48
49
// <auto-generated> // automatically generated by the FlatBuffers compiler, do not modify // </auto-generated> namespace GameData { using global::System; using global::FlatBuffers; public struct GameConfigFB : IFlatbufferObject { private Table __p; public ByteBuffer ByteBuffer { get { return __p.bb; } } public static GameConfigFB GetRootAsGameConfigFB(ByteBuffer _bb) { return GetRootAsGameConfigFB(_bb, new GameConfigFB()); } public static GameConfigFB GetRootAsGameConfigFB(ByteBuffer _bb, GameConfigFB obj) { return (obj.__assign(_bb.GetInt(_bb.Position) + _bb.Position, _bb)); } public void __init(int _i, ByteBuffer _bb) { __p.bb_pos = _i; __p.bb = _bb; } public GameConfigFB __assign(int _i, ByteBuffer _bb) { __init(_i, _bb); return this; } public string DifficultyLevel { get { int o = __p.__offset(4); return o != 0 ? __p.__string(o + __p.bb_pos) : null; } } public ArraySegment<byte>? GetDifficultyLevelBytes() { return __p.__vector_as_arraysegment(4); } public int VersionNumber { get { int o = __p.__offset(6); return o != 0 ? __p.bb.GetInt(o + __p.bb_pos) : (int)0; } } public int ResourceNumber { get { int o = __p.__offset(8); return o != 0 ? __p.bb.GetInt(o + __p.bb_pos) : (int)0; } } public static Offset<GameConfigFB> CreateGameConfigFB(FlatBufferBuilder builder, StringOffset difficultyLevelOffset = default(StringOffset), int versionNumber = 0, int resourceNumber = 0) { builder.StartObject(3); GameConfigFB.AddResourceNumber(builder, resourceNumber); GameConfigFB.AddVersionNumber(builder, versionNumber); GameConfigFB.AddDifficultyLevel(builder, difficultyLevelOffset); return GameConfigFB.EndGameConfigFB(builder); } public static void StartGameConfigFB(FlatBufferBuilder builder) { builder.StartObject(3); } public static void AddDifficultyLevel(FlatBufferBuilder builder, StringOffset difficultyLevelOffset) { builder.AddOffset(0, difficultyLevelOffset.Value, 0); } public static void AddVersionNumber(FlatBufferBuilder builder, int versionNumber) { builder.AddInt(1, versionNumber, 0); } public static void AddResourceNumber(FlatBufferBuilder builder, int resourceNumber) { builder.AddInt(2, resourceNumber, 0); } public static Offset<GameConfigFB> EndGameConfigFB(FlatBufferBuilder builder) { int o = builder.EndObject(); return new Offset<GameConfigFB>(o); } public static void FinishGameConfigFBBuffer(FlatBufferBuilder builder, Offset<GameConfigFB> offset) { builder.Finish(offset.Value); } public static void FinishSizePrefixedGameConfigFBBuffer(FlatBufferBuilder builder, Offset<GameConfigFB> offset) { builder.FinishSizePrefixed(offset.Value); } }; }
使用FlatBufferBuilder(位于FlatBuff源码的/net/FlatBuffers目录下)根据schema生成代码序列化数据到二进制文件
1
2
3
4
5
6
7
8
9
10
11
12
13
14
15
16
17
18
19
20
21
22
23
24
25
26
27
28
29
30
31
32
33
34
35
36
37
38
39
40
41
42
43
44
45
46
47
48
49
50
51
52
53
54
55
56
57
58
59
60
61
62
63
64
65
66
67
68
69
70
71
72
73
74
75
76
77
78
79
80
81
82
83
84
85
using System;using System.Collections.Generic;using System.IO;using System.Linq;using System.Text;using System.Threading.Tasks;using FlatBuffers;using GameData;namespace FlatBufferStudy { class Program { public const string GameConfigDataFullPath = "./GameConfig.data" ; public static void SaveGameConfigData ( { var builder = new FlatBufferBuilder(4 ); var difficultylevel = builder.CreateString("Hard-困难" ); var gameconfig = GameConfigFB.CreateGameConfigFB(builder, difficultylevel, 1 , 1 ); builder.Finish(gameconfig.Value); var buf = builder.DataBuffer; byte [] bufbytes = builder.SizedByteArray(); using (var filestream = new FileStream(GameConfigDataFullPath, FileMode.Create)) { filestream.Write(bufbytes, 0 , bufbytes.Length); } } public static void ReadGameConfigData ( { using (var filestream = new FileStream(GameConfigDataFullPath, FileMode.Open)) { byte [] bufbytes = new byte [filestream.Length]; filestream.Read(bufbytes, 0 , bufbytes.Length); var buf = new ByteBuffer(bufbytes); var gameconfig = GameConfigFB.GetRootAsGameConfigFB(buf); Console.WriteLine("gameconfig.DifficultyLevel : " + gameconfig.DifficultyLevel); Console.WriteLine("gameconfig.VersionNumber : " + gameconfig.VersionNumber); Console.WriteLine("gameconfig.ResourceNumber : " + gameconfig.ResourceNumber); } } static void Main (string [] args { SaveGameConfigData(); ReadGameConfigData(); Console.WriteLine("结束!" ); Console.ReadKey(); } } }
通过上面的使用,可以看出FlatBuff在使用灵活度方面还是比较欠缺,对于数据的填充构建都是通过FlatBufferBuilder按指定填充方式构建数据并填充进去。
这里暂时没有对性能进行测试,具体性能对比参考前面给出过的对比图。
Note:
深入探究 这一步,让我们结合上面的学习用例来探究下FlatBuffer是如何实现高效的序列化和反序列化读取的。
通过学习了解FlatBuffer下面几个核心的类来理解学习:
FlatBufferBuilder.cs(FlatBuffer构建填充数据的对外接口)
1 2 3 4 5 6 7 8 9 10 11 12 13 14 15 16 17 18 19 20 21 22 23 24 25 26 27 28 29 30 31 32 33 34 35 36 37 38 39 40 41 42 43 44 45 46 47 48 public class FlatBufferBuilder { private int _space; private ByteBuffer _bb; private int _minAlign = 1 ; private int [] _vtable = new int [16 ]; private int _vtableSize = -1 ; private int _objectStart; private int [] _vtables = new int [16 ]; private int _numVtables = 0 ; private int _vectorNumElems = 0 ; public FlatBufferBuilder (int initialSize { if (initialSize <= 0 ) throw new ArgumentOutOfRangeException("initialSize" , initialSize, "Must be greater than zero" ); _space = initialSize; _bb = new ByteBuffer(initialSize); } public void AddInt (int o, int x, int d { if (ForceDefaults || x != d) { AddInt(x); Slot(o); } } ****** }
这里只截图了FlatBufferBuilder成员变量定义和部分函数定义。
ByteBuffer.cs(定义不同数据类型的byte数据分配以及填充,读取)
1
2
3
4
5
6
7
8
9
10
11
12
13
14
15
16
17
18
19
20
21
22
23
24
25
26
27
28
29
30
31
32
33
34
35
36
37
38
39
40
41
42
43
44
45
46
47
48
49
50
51
52
53
54
55
56
57
58
59
60
61
62
63
64
65
66
67
68
69
70
71
72
73
74
75
76
77
78
79
80
81
public class ByteBuffer : IDisposable { private ByteBufferAllocator _buffer; private int _pos; public ByteBuffer (ByteBufferAllocator allocator, int position ) { _buffer = allocator; _pos = position; } public ByteBuffer (int sizethis (new byte [size] ) public ByteBuffer (byte [] bufferthis (buffer, 0 ) public ByteBuffer (byte [] buffer, int pos { _buffer = new ByteArrayAllocator(buffer); _pos = pos; } public void Dispose ( { if (_buffer != null ) { _buffer.Dispose(); } } public int Position { get { return _pos; } set { _pos = value ; } } public int Length { get { return _buffer.Length; } } public void Reset ( { _pos = 0 ; } public void GrowFront (int newSize { _buffer.GrowFront(newSize); } public void PutStringUTF8 (int offset, string value { AssertOffsetAndLength(offset, value .Length); Encoding.UTF8.GetBytes(value , 0 , value .Length, _buffer.ByteArray, offset); } #endif public void PutInt (int offset, int value { PutUint(offset, (uint )value ); } protected void WriteLittleEndian (int offset, int count, ulong data { if (BitConverter.IsLittleEndian) { for (int i = 0 ; i < count; i++) { _buffer.Buffer[offset + i] = (byte )(data >> i * 8 ); } } else { for (int i = 0 ; i < count; i++) { _buffer.Buffer[offset + count - 1 - i] = (byte )(data >> i * 8 ); } } } ****** }
ByteBufferAllocator.cs(抽象二进制byte数据的分配管理)
1
2
3
4
5
6
7
8
9
10
11
12
13
14
15
16
17
18
19
20
21
22
23
24
25
26
27
28
29
30
public abstract class ByteBufferAllocator : IDisposable { #if UNSAFE_BYTEBUFFER public unsafe byte * Buffer { get ; protected set ; } #else public byte [] Buffer { get ; protected set ; } #endif public int Length { get ; protected set ; } public abstract void Dispose ( public abstract void GrowFront (int newSize #if !ENABLE_SPAN_T public abstract byte [] ByteArray { get ; } #endif }
Table.cs(抽象FlatBuffer自定义结构的数据存储以及读取)
1
2
3
4
5
6
7
8
9
public struct Table{ public int bb_pos; public ByteBuffer bb; public ByteBuffer ByteBuffer { get { return bb; } } ******* }
数据序列化存储部分:
1
2
3
4
5
6
7
8
9
10
11
12
13
14
15
16
17
18
19
20
21
22
23
24
25
26
27
28
29
30
31
32
33
34
35
36
37
38
39
40
public class FlatBufferBuilder { private ByteBuffer _bb; ******* } public class ByteBuffer : IDisposable { private ByteBufferAllocator _buffer; public void PutStringUTF8 (int offset, string value { ****** } public void PutInt (int offset, int value { PutUint(offset, (uint )value ); } protected void WriteLittleEndian (int offset, int count, ulong data { ****** } ****** } public class ByteArrayAllocator : ByteBufferAllocator { private byte [] _buffer; public void GrowFront (int newSize { _buffer.GrowFront(newSize); } ****** }
数据反序列化读取部分;
1
2
3
4
5
6
7
8
9
10
11
12
13
14
15
16
17
18
19
20
21
22
23
24
25
26
27
28
29
30
31
32
33
34
35
36
37
public struct GameConfigFB : IFlatbufferObject{ private Table __p; public ByteBuffer ByteBuffer { get { return __p.bb; } } public static GameConfigFB GetRootAsGameConfigFB (ByteBuffer _bb ) { return GetRootAsGameConfigFB(_bb, new GameConfigFB()); } public static GameConfigFB GetRootAsGameConfigFB (ByteBuffer _bb, GameConfigFB obj ) { return (obj.__assign(_bb.GetInt(_bb.Position) + _bb.Position, _bb)); } public void __init(int _i, ByteBuffer _bb) { __p.bb_pos = _i; __p.bb = _bb; } public GameConfigFB __assign(int _i, ByteBuffer _bb) { __init(_i, _bb); return this ; } public string DifficultyLevel { get { int o = __p.__offset(4 ); return o != 0 ? __p.__string(o + __p.bb_pos) : null ; } } ****** }
可以看到当我们通过以下代码读取二进制数据构建我们自定义的GameConfigFB对象时,我们已经把二进制数据按FlatBuffer存储的方式读取进来:
1
2
var buf = new ByteBuffer(bufbytes);var gameconfig = GameConfigFB.GetRootAsGameConfigFB(buf);
然后通过Table按自定义的数据结构读取指定的偏移把数据成功读取出来(这应该也是为什么FlatBuffer反序列化读取能这么高效的原因):
1
2
3
4
5
6
7
8
9
10
11
12
13
14
15
16
17
18
19
public struct GameConfigFB : IFlatbufferObject{ public ArraySegment<byte >? GetDifficultyLevelBytes() { return __p.__vector_as_arraysegment(4 ); } public int VersionNumber { get { int o = __p.__offset(6 ); return o != 0 ? __p.bb.GetInt(o + __p.bb_pos) : (int )0 ; } } public int ResourceNumber { get { int o = __p.__offset(8 ); return o != 0 ? __p.bb.GetInt(o + __p.bb_pos) : (int )0 ; } } ****** }
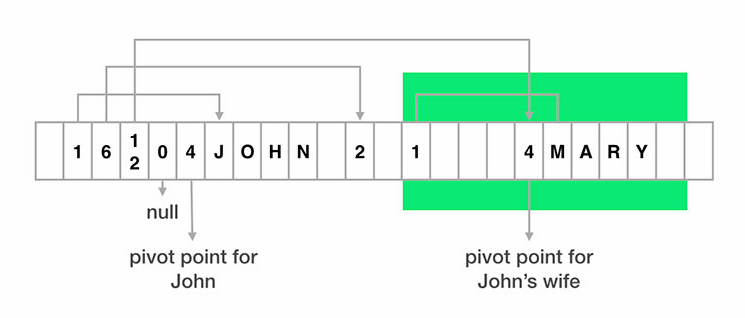
这里放一张其他博客上给出的一张FlatBuffer数据存储图解加深印象,下图来源 :
Xbuffer 公司一前同事写的基于C#的简化版的Flatbuffer。
接下来我们通过实战使用和深入探究来学习其中的奥妙。
实战使用 使用流程:
定义数据结构文件
1 // 游戏版本信息
class GameConfigXB
{
difficultyLevel:string; // 游戏难度
versionNumber:int; // 游戏版本号
resourceNumber:int; // 游戏资源版本号
}
使用xbuffer_parser.exe根据模板文件解析数据结构文件生成对应类文件以及对应类Xbuffer序列化反序列化所需的代码
1 xbuffer_parser.exe input=GameConfigXB.xb template="templates/csharp_class.ftl" output_dir="output/csharp/csharp_class/" suffix=".cs"
xbuffer_parser.exe input=GameConfigXB.xb template="templates/csharp_buffer.ftl" output_dir="output/csharp/csharp_buffer/" suffix="Buffer.cs"
pause
GameConfigXB.cs(对应数据结构文件)
1 2 3 4 5 6 7 8 9 public partial class GameConfigXB { public string difficultyLevel; public int versionNumber; public int resourceNumber; }
GameConfigXBBuffer.cs(对应数据结构Xbuffer序列化反序列化所需文件)
1
2
3
4
5
6
7
8
9
10
11
12
13
14
15
16
17
18
19
20
21
22
23
24
25
26
27
28
29
30
31
32
33
34
35
36
37
38
39
40
41
42
43
44
45
46
47
namespace xbuffer { public static class GameConfigXBBuffer { public static GameConfigXB deserialize (byte [] buffer, ref int offset { bool _null = boolBuffer.deserialize(buffer, ref offset); if (_null) return null ; string _difficultyLevel = stringBuffer.deserialize(buffer, ref offset); int _versionNumber = intBuffer.deserialize(buffer, ref offset); int _resourceNumber = intBuffer.deserialize(buffer, ref offset); return new GameConfigXB() { difficultyLevel = _difficultyLevel, versionNumber = _versionNumber, resourceNumber = _resourceNumber, }; } public static void serialize (GameConfigXB value , XSteam steam ) { boolBuffer.serialize(value == null , steam); if (value == null ) return ; stringBuffer.serialize(value .difficultyLevel, steam); intBuffer.serialize(value .versionNumber, steam); intBuffer.serialize(value .resourceNumber, steam); } } }
上面生成默认的模板生成的GameConfigXBBuffer.cs貌似跟源码测试使用的接口对不上,需要把模板改成如下:
1
2
3
4
5
6
7
8
9
10
11
12
13
14
15
16
17
18
19
20
21
22
23
24
25
26
27
28
29
30
31
32
33
34
35
36
37
38
39
40
41
42
43
44
45
46
47
48
49
50
51
52
53
54
55
56
57
namespace xbuffer { public static class #CLASS _NAME #Buffer { public static #CLASS _NAME # deserialize (byte [] buffer , ref uint offset ) { #IF _DESERIALIZE _CLASS # // null bool _null = boolBuffer.deserialize (buffer , ref offset ); if null ) return null ; #END _DESERIALIZE _CLASS ##DESERIALIZE _PROCESS # // #VAR _NAME # #IF _SINGLE # #VAR _TYPE # _#VAR _NAME # = #VAR _TYPE #Buffer.deserialize (buffer , ref offset ); #END _SINGLE ##IF _ARRAY # int _#VAR _NAME #_length = intBuffer.deserialize (buffer , ref offset ); #VAR _TYPE #[] _#VAR _NAME # = new #VAR _TYPE #[_#VAR _NAME #_length ]; for (int i = 0; i < _#VAR _NAME #_length ; i ++) { _#VAR _NAME #[i ] = #VAR _TYPE #Buffer.deserialize (buffer , ref offset ); } #END_ARRAY# #DESERIALIZE_PROCESS# // value return new #CLASS_NAME#() { #DESERIALIZE _RETURN # #VAR _NAME # = _#VAR _NAME #, #DESERIALIZE _RETURN # } ; } public static void serialize(#CLASS_NAME# value, XSteam steam) { #IF _SERIALIZE _CLASS # // null boolBuffer.serialize (value == null , steam ); if value == null ) return ; #END _SERIALIZE _CLASS ##SERIALIZE _PROCESS # // #VAR _NAME # #IF _SINGLE # #VAR _TYPE #Buffer.serialize (value. #VAR _NAME #, steam ); #END _SINGLE ##IF _ARRAY # intBuffer.serialize (value. #VAR _NAME #.Length , steam ); for (int i = 0; i < value. #VAR _NAME #.Length ; i ++) { #VAR _TYPE #Buffer.serialize (value. #VAR _NAME #[i ], steam ); } #END_ARRAY# #SERIALIZE_PROCESS# } } }
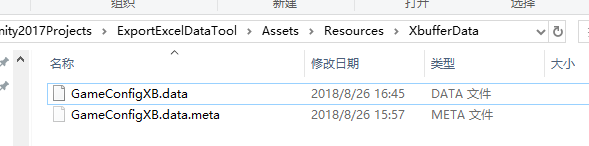
把Xbuffer核心代码xbuffer_runtime.dll放到项目目录下。
使用Xbuffer生成的对应Buffer类序列化和反序列化数据
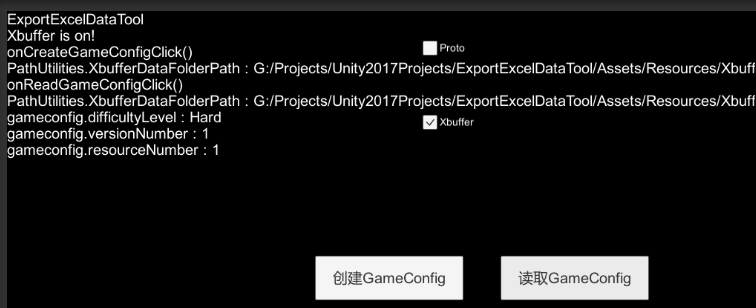
1 2 3 4 5 6 7 8 9 10 11 12 13 14 15 16 17 18 19 20 21 22 23 24 25 26 27 28 29 30 31 32 33 34 35 36 37 38 39 40 41 42 43 44 45 46 47 48 49 50 51 52 53 54 55 56 57 58 59 60 61 62 63 64 65 66 67 68 69 70 * Description: UIDebugMonoScript.cs * Author: TONYTANG * Create Date: 2018/08/19 */ using GameData;using Google.Protobuf;using System.Collections;using System.Collections.Generic;using System.IO;using System.Text;using UnityEngine;using UnityEngine.UI;using xbuffer;public class UIDebugMonoScript : MonoBehaviour { ****** private XSteam mXbufferStream; private void onCreateGameConfigClick ( { Debug.Log("onCreateGameConfigClick()" ); Debug.Log("PathUtilities.XbufferDataFolderPath : " + PathUtilities.XbufferDataFolderPath); PathUtilities.checkAndCreateFolder(PathUtilities.XbufferDataFolderPath); mXbufferStream = new XSteam(1 , 1024 * 1024 * 1000 ); GameConfigXB gameconfigxb = new GameConfigXB(); gameconfigxb.difficultyLevel = "Hard" ; gameconfigxb.versionNumber = 1 ; gameconfigxb.resourceNumber = 1 ; GameConfigXBBuffer.serialize(gameconfigxb, mXbufferStream); var bytes = mXbufferStream.getBytes(); using (var output = File.Create(PathUtilities.XbufferDataFolderPath + "GameConfigXB.data" )) { output.Write(bytes, 0 , bytes.Length); } } private void onReadGameConfigClick ( { Debug.Log("onReadGameConfigClick()" ); Debug.Log("PathUtilities.XbufferDataFolderPath : " + PathUtilities.XbufferDataFolderPath); using (var intput = File.OpenRead(PathUtilities.XbufferDataFolderPath + "GameConfigXB.data" )) { var bytes = new byte [intput.Length]; intput.Read(bytes, 0 , bytes.Length); uint offset = 0 ; var gameconfig = GameConfigXBBuffer.deserialize(bytes, ref offset); Debug.Log("gameconfig.difficultyLevel : " + gameconfig.difficultyLevel); Debug.Log("gameconfig.versionNumber : " + gameconfig.versionNumber); Debug.Log("gameconfig.resourceNumber : " + gameconfig.resourceNumber); } } }
深入探究 接下来结合源码,让我们深入Xbuffer内部去看看是如何实现高效的序列化和反序列以及挂镀可配置的。
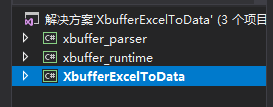
xbuffe_parser.exe
xbuffer_runtime.dll
xbuffer_parser xbuffer_parser负责根据模板自动化生成对应类以及Xbuffer序列化反序列化所需文件代码。
Config.cs(负责参数的检查 — 这个就不详细介绍了)
Proto.cs(抽象数据结构文件的各个组成部分)
1 2 3 4 5 6 7 8 9 10 11 12 13 14 15 16 17 18 19 20 21 22 23 24 25 26 27 28 29 30 31 32 33 34 35 36 37 38 39 40 41 42 43 44 45 46 47 48 49 50 51 52 53 54 55 56 57 58 59 60 61 62 63 64 65 66 67 68 69 70 71 72 73 74 75 76 77 78 79 80 81 * File Name: Proto.cs * * Description: 原型语法解析工具 * Author: lisiyu <576603306@qq.com> * Create Date: 2017/10/25 */ using System.Text.RegularExpressions;namespace xbuffer { public class Proto { public Proto_Class[] class_protos; public Proto (string proto { var matchs = Regex.Matches(proto, @"//\s*(\S*)\s*((class)|(struct))\s*(\w+)\s*{\s*((\w+):([\[|\]|\w]+);\s*//\s*(\S*)\s*)*}" ); class_protos = new Proto_Class[matchs.Count]; for (int i = 0 ; i < matchs.Count; i++) { class_protos[i] = new Proto_Class(matchs[i]); } } } public class Proto_Variable { public string Var_Type; public string Var_Name; public bool IsArray; public string Var_Comment; public Proto_Variable (string name, string type, string comment { Var_Name = name; if (type.Contains("[" )) { Var_Type = type.Substring(1 , type.Length - 2 ); IsArray = true ; } else { Var_Type = type; IsArray = false ; } Var_Comment = comment; } } public class Proto_Class { public string Class_Comment; public string Class_Type; public string Class_Name; public Proto_Variable[] Class_Variables; public Proto_Class (Match match ) { Class_Comment = match.Groups[1 ].Value; Class_Type = match.Groups[2 ].Value; Class_Name = match.Groups[5 ].Value; var varNames = match.Groups[7 ].Captures; var varTypes = match.Groups[8 ].Captures; var varComments = match.Groups[9 ].Captures; Class_Variables = new Proto_Variable[varNames.Count]; for (int i = 0 ; i < Class_Variables.Length; i++) { Class_Variables[i] = new Proto_Variable(varNames[i].Value, varTypes[i].Value, varComments[i].Value); } } } }
核心思想是通过正则匹配文本内容后,分别将对应内容填充到抽象的Proto类对象里。
Parser.cs(负责将抽象后的数据结构数据结合模板文件转换成对应代码) & Xtemplate.cs(负责模板与代码生成部分的逻辑处理)
1 2 3 4 5 6 7 8 9 10 11 12 13 14 15 16 17 18 19 20 21 22 23 24 25 26 27 28 29 30 31 32 33 34 35 36 37 38 39 40 41 42 43 44 45 46 47 48 49 50 51 52 53 54 55 56 57 58 59 60 61 62 63 64 65 66 67 68 69 70 71 72 73 74 75 76 77 78 79 80 81 82 83 84 85 86 87 88 * File Name: Parser.cs * * Description: 将类对象转化成代码文本 * Author: lisiyu <576603306@qq.com> * Create Date: 2017/10/25 */ namespace xbuffer { public class Parser { public static string parse (Proto_Class proto_class, string template_str, bool showHead ) { var template = new XTemplate(template_str); template.setCondition("HEAD" , showHead); template.setValue("#CLASS_TYPE#" , proto_class.Class_Type); template.setValue("#CLASS_NAME#" , proto_class.Class_Name); template.setValue("#CLASS_COMMENT#" , proto_class.Class_Comment); template.setCondition("DESERIALIZE_CLASS" , proto_class.Class_Type == "class" ); template.setCondition("SERIALIZE_CLASS" , proto_class.Class_Type == "class" ); if (template.beginLoop("#VARIABLES#" )) { foreach (var item in proto_class.Class_Variables) { template.setCondition("SINGLE" , !item.IsArray); template.setCondition("ARRAY" , item.IsArray); template.setValue("#VAR_TYPE#" , item.Var_Type); template.setValue("#VAR_NAME#" , item.Var_Name); template.setValue("#VAR_COMMENT#" , item.Var_Comment); template.nextLoop(); } template.endLoop(); } if (template.beginLoop("#DESERIALIZE_PROCESS#" )) { foreach (var item in proto_class.Class_Variables) { template.setCondition("SINGLE" , !item.IsArray); template.setCondition("ARRAY" , item.IsArray); template.setValue("#VAR_TYPE#" , item.Var_Type); template.setValue("#VAR_NAME#" , item.Var_Name); template.setValue("#VAR_COMMENT#" , item.Var_Comment); template.nextLoop(); } template.endLoop(); } if (template.beginLoop("#DESERIALIZE_RETURN#" )) { foreach (var item in proto_class.Class_Variables) { template.setValue("#VAR_TYPE#" , item.Var_Type); template.setValue("#VAR_NAME#" , item.Var_Name); template.setValue("#VAR_COMMENT#" , item.Var_Comment); template.nextLoop(); } template.endLoop(); } if (template.beginLoop("#SERIALIZE_PROCESS#" )) { foreach (var item in proto_class.Class_Variables) { template.setCondition("SINGLE" , !item.IsArray); template.setCondition("ARRAY" , item.IsArray); template.setValue("#VAR_TYPE#" , item.Var_Type); template.setValue("#VAR_NAME#" , item.Var_Name); template.setValue("#VAR_COMMENT#" , item.Var_Comment); template.nextLoop(); } template.endLoop(); } return template.getContent(); } } }
核心依然是通过正则匹配替换模板文本内容。
上面几个文件就是解析模板文件以及根据数据结构定义文件生成对应Xbuffer所需代码的核心逻辑。可以看到模板的高自由度配置,让Xbuffer具备了对多语言的快速支持以及灵活配置的能力。
xbuffer_runtime xbuffer_runtime.dll是xbuffer对数据进行序列化和反序列化的核心类。
XSteam.cs(Xbuffer核心字节流序列化反序列化的关键类)
1 2 3 4 5 6 7 8 9 10 11 12 13 14 15 16 17 18 19 20 21 22 23 24 25 26 27 28 29 30 31 32 33 34 35 36 37 38 39 40 41 42 43 44 45 46 47 48 49 50 51 52 53 54 55 56 57 58 59 60 61 62 63 64 65 66 67 68 69 70 71 72 73 74 75 76 77 78 79 80 81 82 83 84 85 86 87 88 89 90 91 92 93 94 95 96 97 98 99 100 101 * File Name: XSteam.cs * * Description: 一个简单的内存流实现 用于精准的控制内存管理 * Author: lisiyu <576603306@qq.com> * Create Date: 2018/04/09 */ namespace xbuffer { public class XSteam { public uint index_group; public uint index_cell; public uint capacity_group; public uint capacity_cell; public byte [][] contents; public uint [] wastes; public XSteam (uint capacity_group, uint capacity_cell { this .capacity_group = capacity_group; this .capacity_cell = capacity_cell; contents = new byte [capacity_group][]; for (int i = 0 ; i < capacity_group; i++) { contents[i] = new byte [capacity_cell]; } wastes = new uint [capacity_group]; } public void applySize (uint size { if (index_cell + size > capacity_cell) { wastes[index_group] = capacity_cell - index_cell; index_cell = 0 ; index_group++; if (index_group >= capacity_group) { var nCapacity_Group = capacity_group + 1 ; var nContents = new byte [nCapacity_Group][]; for (uint i = 0 ; i < nCapacity_Group; i++) { if (i < capacity_group) nContents[i] = contents[i]; else nContents[i] = new byte [capacity_cell]; } contents = nContents; var nWastes = new uint [nCapacity_Group]; for (uint i = 0 ; i < capacity_group; i++) { nWastes[i] = wastes[i]; } wastes = nWastes; capacity_group = nCapacity_Group; } } } public byte [] getBytes() { var len = index_group * capacity_cell + index_cell; for (int i = 0 ; i < index_group; i++) { len -= wastes[i]; } var ret = new byte [len]; var idx = 0 ; for (int i = 0 ; i < index_group; i++) { for (int j = 0 ; j < capacity_cell - wastes[i]; j++) { ret[idx++] = contents[i][j]; } } for (int i = 0 ; i < index_cell; i++) { ret[idx++] = contents[index_group][i]; } return ret; } } }
从上面源码可以看出,Xbuffer是采用了一个二维的byte数组来存储原始数据的(*实现固定内存大小的数据分配* )。空间容量不够的时候在扩容处理,这一点和Flatbuffer是类似的(Flatbuffer貌似是个一维数组)。当现有定义的空间不足时,Xbuffer采取的是翻倍处理(数据存储上是采用扩展二维数组的第二维度实现扩容)。这里可以想成,
举个例子,一开始是byte[1 ][1024 ]的byte数组容量。当不够的时候,会扩展成byte[2 ][1024 ]的容量,然后从byte[2 ][1 ][*但最后返回Xstream的byte数据时,是返回的一个一维byte数组,并且是剔除了wast部分的byte分配,详情见Xstream的getBytes方法*
boolBuffer.cs & byteBuffer.cs & floatBuffer.cs & intBuffer.cs & longBuffer.cs & stringBuffer.cs & uintBuffer.cs(负责对各数据类型的数据序列化写入和反序列化读取进行实现)
1 2 3 4 5 6 7 8 9 10 11 12 13 14 15 16 17 18 19 20 21 22 23 24 25 26 27 28 29 30 31 32 33 34 35 36 37 * File Name: intBuffer.cs * * Description: 基本类型处理 * Author: lisiyu <576603306@qq.com> * Create Date: 2017/10/25 */ using System;namespace xbuffer { public class intBuffer { private static readonly uint size = sizeof (int ); public unsafe static int deserialize (byte [] buffer, ref uint offset { fixed (byte * ptr = buffer) { var value = *(int *)(ptr + offset); offset += size; return BitConverter.IsLittleEndian ? value : (int )utils.toLittleEndian((uint )value ); } } public unsafe static void serialize (int value , XSteam steam { steam.applySize(size); fixed (byte * ptr = steam.contents[steam.index_group]) { *(int *)(ptr + steam.index_cell) = BitConverter.IsLittleEndian ? value : (int )utils.toLittleEndian((uint )value ); steam.index_cell += size; } } } }
从上面可以看出,底层的数据写入是根据数据类型大小,通过fixed使用非托管的内存分配方式进行指定内存位置指定数据byte的写入和读取。
举个例子,一开始分配了byte[1 ][1024*1024 ]也就是1M的内存,当我们写入一个int数据时,因为int类型的byte大小是4bytes也就是32bits,也就是说byte[1 ][0 ] - byte[1 ][4 ]的内存数据时用于存储这个int的值。其他类型同理。
utils.cs(负责一些细节处理,比如大小端问题,这里就不放源码了)
Serializer.cs(提供模板化的序列化反序列化读取加载接口)
* Buffer.cs(自动化生成的序列化反序列化所需的类代码)
1
2
3
4
5
6
7
8
9
10
11
12
13
14
15
16
17
18
19
20
21
22
23
24
25
26
27
28
29
30
31
32
33
34
35
36
37
38
39
40
41
42
43
44
45
46
47
namespace xbuffer { public static class GameConfigXBBuffer { public static GameConfigXB deserialize (byte [] buffer, ref uint offset { bool _null = boolBuffer.deserialize(buffer, ref offset); if (_null) return null ; string _difficultyLevel = stringBuffer.deserialize(buffer, ref offset); int _versionNumber = intBuffer.deserialize(buffer, ref offset); int _resourceNumber = intBuffer.deserialize(buffer, ref offset); return new GameConfigXB() { difficultyLevel = _difficultyLevel, versionNumber = _versionNumber, resourceNumber = _resourceNumber, }; } public static void serialize (GameConfigXB value , XSteam steam ) { boolBuffer.serialize(value == null , steam); if (value == null ) return ; stringBuffer.serialize(value .difficultyLevel, steam); intBuffer.serialize(value .versionNumber, steam); intBuffer.serialize(value .resourceNumber, steam); } } }
从上面可以看到,根据数据结构定义文件生成对应的序列化和反序列化代码核心是通过各成员数据按循序依次以各自类型的写入方式将数据写入XStream里。
反序列化时同理依次从byte数据里读取出来。
不难看出,数据存储确实和Flatbuffer类似,存储在一个固定的内存byte[]数组里,只不过是一维和二维数组的区别。数据序列化和反序列化都是读取指定内存位置按指定数据类型读取出来即可,这应该就是Xbuffer和Flatbuffer序列化和反序列化高效的原因吧。
方案比较 不同的序列化反序列化库的优劣比较:
自定义数据填充和读取
实现简单
序列化和反序列化速度慢,内存开销大
不适合数据量大和频繁使用的情况
适用于数据量不大且不需要跨语言的情况,不适合对性能要求高的场合。
ProtoBuff
序列化和反序列化速度和内存开销都很不错
数据定义向后兼容
高度自定义配置数据结构(proto文件)
数据序列化反序列化代码简介,接口简单
社区强大
相比FlatBuffer和Xbuffer速度和内存开销上不占优势
很适合作为网络数据传输方案(向后兼容)。
FlatBuff
序列化和反序列化速度快,内存开销小
支持自定义配置数据结构(schema文件)
序列化反序列化代码编写过于面向内存结构,不符合平时面向对象的编写风格,编写复杂(这一层被Xbuffer封装成自动化生成* Buffer.cs的代码类)
XBuffer
序列化和反序列化速度快,内存开销小
高度自由配置(基于模板配置且自定义配置文件配置)
接口简单方便使用,支持泛型和非泛型序列化反序列化
根据需求可以快速修改来符合自身需求(比如要做导表工具,只需在上层再封一层即可)
向后不兼容(因为数据是严格按照数据结构按顺序读取的,所以当已经存储进数据库的数据,在扩展字段内容后是无法正常反序列化读取出来的)
不适合作为网络序列化数据方案,更适合表格数据序列化反序列化方案。
实战 方案选择 学习了解了那么多序列化和反序列化的库,根据我现有的需求是制作一个导表工具(速度和内存开销以及配置灵活度都要求比较高)来看,个人认为基于Xbuffer来编写是比较适合的一种方案。
原因如下:
速度快
内存开销小
高度可配置
基于Xbuffer的导表工具 流程:
定义导表工具基础功能需求
XML配置导表相关路径数据(比如表格路径配置,输出目录配置等)
定义excel表格格式规则
读取excel数据(Window可以使用ExcelRead库)
创建excel对应Xbuffer数据结构文件(这一步需要自己去写)
使用Xbuffer_parser解析新生成的数据结构文件,生成所需类文件以及序列化相关文件(使用Xbuffer_parser解析即可)
使用生成的代码序列化excel数据到二进制数据流(这一步需要自己去写)
封装一层表格数据读取快速读取管理类,负责统一管理表格数据的加载和读取(这一步需要自己去写)
通过统一管理类使用Xbuffer去加载读取序列化的二进制数据(结合自身代码,使用Xbuffer_runtime.dll里的核心代码去反序列化)
相关语言及工具:
接下将来针对每一步的实现进行实战学习。
导表功能需求
支持int,float,long, string, bool基础数据配置
支持一维和多维数据配置(进阶功能,理论上,对于xbuffer而言,数组的维度扩展就能支持多维数据)
自动生成表格数据以及表格读取相关代码
工具独立于Unity存在使用
支持跨语言(xbuffer理论上通过模板生成不同语言版本的相关代码即可)
支持XML配置相关工具配置(比如表格路径配置,输出目录配置等。)
支持导表路径配置 因为工具是独立于Unity所以不受Unity .Net版本的限制,这里决定使用.Net自身的XML解析库System.XML。
ExportConfig.xml
1
2
3
4
5
6
7
8
9
10
11
<?xml version="1.0" encoding="utf-8"?> <ExportConfig > <ExcelInputPath > ./Excels/</ExcelInputPath > <TemplatePath > ./Templates/</TemplatePath > <DesFileOutputPath > ./DesFiles/</DesFileOutputPath > <ByteDataOutputPath > ./../Assets/Resources/DataBytes/</ByteDataOutputPath > <CSClassCodeOutputPath > ./../Assets/Scripts/Data/CSOutput/ClassCode/</CSClassCodeOutputPath > <CSBufferCodeOutputPath > ./../Assets/Scripts/Data/CSOutput/BufferCode/</CSBufferCodeOutputPath > <CSTemplateOutputPath > ./../Assets/Scripts/Data/CSTemplateOutput/</CSTemplateOutputPath > <OtherLanguageCodeOutputPath > ./OtherOutput/</OtherLanguageCodeOutputPath > </ExportConfig >
ExportConfig.cs
1 2 3 4 5 6 7 8 9 10 11 12 13 14 15 16 17 18 19 20 21 22 23 24 25 26 27 28 29 30 31 32 33 34 35 36 37 38 39 40 41 42 43 44 45 46 47 48 49 50 51 52 53 54 55 * Description: 导表工具导出配置数据抽象 * Author: tanghuan * Create Date: 2018/09/01 */ using System; using System.Collections.Generic;using System.Linq;using System.Text;using System.Threading.Tasks;namespace XbufferExcelToData { public class ExportConfig { public string ExcelInputPath { get ; set ; } public string TemplatePath { get ; set ; } public string ByteDataOutputPath { get ; set ; } public string CSCodeOutputPath { get ; set ; } public string OtherLanguageCodeOutputPath { get ; set ; } public void printOutAllInfo ( { Console.WriteLine(string .Format("ExcelInputPath : {0}" , ExcelInputPath)); Console.WriteLine(string .Format("TemplatePath : {0}" , TemplatePath)); Console.WriteLine(string .Format("DesFileOutputPath : {0}" , DesFileOutputPath)); Console.WriteLine(string .Format("ByteDataOutputPath : {0}" , ByteDataOutputPath)); Console.WriteLine(string .Format("CSCodeOutputPath : {0}" , CSCodeOutputPath)); Console.WriteLine(string .Format("OtherLanguageCodeOutputPath : {0}" , OtherLanguageCodeOutputPath)); } } }
XbufferExcelToDataConfig.cs
1
2
3
4
5
6
7
8
9
10
11
12
13
14
15
16
17
18
19
20
21
22
23
24
25
26
27
28
29
30
31
32
33
34
35
36
37
38
39
40
41
42
43
44
45
46
47
48
49
50
51
52
53
54
55
56
57
58
59
60
61
62
63
64
65
66
67
68
69
70
71
72
73
74
75
76
77
78
79
80
81
82
83
/* * Description: 导表工具相关配置单例类 * Author: tanghuan * Create Date: 2018/09/01 */ using System; using System.Collections.Generic; using System.IO; using System.Linq; using System.Text; using System.Threading.Tasks; using System.Xml; namespace XbufferExcelToData { /// <summary> /// 导表工具相关配置单例类 /// </summary> public class XbufferExcelToDataConfig : SingletonTemplate<XbufferExcelToDataConfig> { /// <summary> /// XML配置文件全路径 /// </summary> public string XMLConfigFileFullPath { get; private set; } /// <summary> /// 导出配置数据 /// </summary> public ExportConfig ExportConfigInfo { get; private set; } public XbufferExcelToDataConfig() { XMLConfigFileFullPath = "./ExportConfig.xml"; ExportConfigInfo = null; } /// <summary> /// 加载导出配置数据 /// </summary> public bool LoadExportConfigData() { if(File.Exists(XMLConfigFileFullPath)) { XmlDocument xmldoc = new XmlDocument(); xmldoc.Load(XMLConfigFileFullPath); var rootnode = xmldoc.DocumentElement; var rootnodename = rootnode.Name; var reflecttype = this.GetType().Assembly.GetType("XbufferExcelToData." + rootnodename); if(reflecttype == typeof(ExportConfig)) { ExportConfigInfo = new ExportConfig(); var childnodes = rootnode.ChildNodes; for(int i = 0, length = childnodes.Count; i < length; i++) { var property = ExportConfigInfo.GetType().GetProperty(childnodes[i].Name); if(property != null) { property.SetValue(ExportConfigInfo, childnodes[i].InnerText); } else { Console.WriteLine(string.Format("不支持的属性配置 : {0}", childnodes[i].Name)); } } ExportConfigInfo.printOutAllInfo(); return true; } else { Console.WriteLine(string.Format("找不到配置的类型数据信息 : {0}", rootnodename)); Console.WriteLine("当前只支持ExportConfig类型信息配置"); return false; } } else { Console.WriteLine(string.Format("导出配置文件不存在 : {0}", XMLConfigFileFullPath)); return false; } } } }
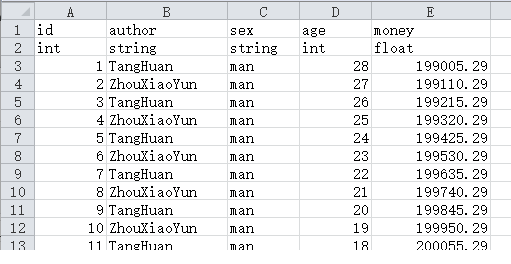
定义表格规则
第一行定义字段
第二行写字段注释
第三行定义字段类型
第四行表示分割符(只对一维数组类型有用)
第五和第六行保留为未来扩展使用
第七行及以后正式填写数据(数据不填采用对应类型的默认值,比如int为0,bool为false,int[]为null)
读取excel数据 Windows PC端决定使用ExcelRead库来解决excel读取问题。
核心代码是下面两个文件:
考虑到博客暂时不支持代码折叠,这里就不直接放源代码了,整个工程源代码会在博客最后给出链接。
按表格规则解析
检查表格配置是否正确(1. 不允许同名excel sheet 2. 字段名不允许重复 3. 支持的数据类型检查 4. id第一列必须为int类型且不允许不填且同一个表格id不能重复 5. 支持的分隔符检查配置)
这里直接验证下读取Excel数据的结果:
创建对应数据结构文件 这一步,我们需要自动化生成Xbuffer用于自动化生成相关序列化代码的数据结构定义文件。
还记的我们前面学习Xbuffer时定义的GameConfigXB.xb吗?
1 2 3 4 5 6 7 class GameConfigXB { difficultyLevel:string ; versionNumber:int ; resourceNumber:int ; }
我们现在的目标就是将我们的Excel定义的数据内容转换成对应的数据结构定义文件。
实现方案思考:
代码很简单,就是利用之前存储的表格数据信息,一次写入字符串信息,最后通过文件流写入文件,这里就不放源代码了。
核心类是:
直接来看下最终生成的结果:
1 2 3 4 5 6 7 8 9 10 11 class t_AuthorInfo { id:int ; author:string ; age:int ; money:float ; hashouse:bool ; pbutctime:long ; luckynumber:[int ]; }
这一步,我们成功自动化生成了Xbuffer需要的Excel对应的数据结构定义文件。
生成序列化所需文件 为了便于修改Xbuffer满足我们新的需求,这里直接把Xbuffer的两个核心工程(xbuffer_parser & xbuffer_runtime)集成到我们的导表工具里来:
然后修改Xbuffer两个核心工程的输出路径和我们主工程一致(便于主工程使用):
然后编译出两个工程各自的核心文件:
为了不修改原有Xbuffer的使用方式,这里采用通过跨程序调用exe的方式来使用Xbuffer。
成功生成序列化相关代码:
1
2
3
4
5
6
7
8
9
10
11
12
13
14
15
16
17
18
19
20
21
22
23
24
25
26
27
28
29
30
31
32
33
34
35
36
37
38
39
40
41
42
43
44
45
46
47
48
49
50
51
52
53
54
55
56
57
58
59
60
61
62
63
64
65
66
67
68
69
70
71
72
73
74
75
76
77
78
79
80
81
namespace xbuffer { public static class t_AuthorInfoBuffer { public static t_AuthorInfo deserialize (byte [] buffer, ref uint offset { bool _null = boolBuffer.deserialize(buffer, ref offset); if (_null) return null ; int _id = intBuffer.deserialize(buffer, ref offset); string _author = stringBuffer.deserialize(buffer, ref offset); int _age = intBuffer.deserialize(buffer, ref offset); float _money = floatBuffer.deserialize(buffer, ref offset); bool _hashouse = boolBuffer.deserialize(buffer, ref offset); long _pbutctime = longBuffer.deserialize(buffer, ref offset); int _luckynumber_length = intBuffer.deserialize(buffer, ref offset); int [] _luckynumber = new int [_luckynumber_length]; for (int i = 0 ; i < _luckynumber_length; i++) { _luckynumber[i] = intBuffer.deserialize(buffer, ref offset); } return new t_AuthorInfo() { id = _id, author = _author, age = _age, money = _money, hashouse = _hashouse, pbutctime = _pbutctime, luckynumber = _luckynumber, }; } public static void serialize (t_AuthorInfo value , XSteam steam ) { boolBuffer.serialize(value == null , steam); if (value == null ) return ; intBuffer.serialize(value .id, steam); stringBuffer.serialize(value .author, steam); intBuffer.serialize(value .age, steam); floatBuffer.serialize(value .money, steam); boolBuffer.serialize(value .hashouse, steam); longBuffer.serialize(value .pbutctime, steam); intBuffer.serialize(value .luckynumber.Length, steam); for (int i = 0 ; i < value .luckynumber.Length; i++) { intBuffer.serialize(value .luckynumber[i], steam); } } } }
t_AuthorInfo.cs
1 2 3 4 5 6 7 8 9 10 11 public partial class t_AuthorInfo { public int id; public string author; public int age; public float money; public bool hashouse; public long pbutctime; public int [] luckynumber; }
Note:
序列化数据 Xbuffer序列化相关的代码自动生成完成后,下一步就是把Excel的数据序列化到我们指定的二进制文件流了。
实现方案思考:
这一步主要依赖于最初存储的Excel数据以及前面生成的Xbuffer相关的序列化代码来进行序列化数据。
但序列化的代码是动态生成的没有被编译到工具代码里的,我们无法利用现成的序列化代码来进行数据序列化。
只能根据表格数据以及类型信息通过Xbuffer的基础数据类型写入对应数据,反序列化时再利用反序列化代码进行数据读取。
除了写入数据信息,我们还需要在写入数据信息之前,写入两个关键信息(1. 数据数量(行数) 2. 数据长度(字节数)),用于我们后面去读取加载存储数据时使用,后者如果完全是一个byte对应一个excel数据的话倒是可以不用存储,因为加载后就已经知道总长度了,但如果是所有byte通过zip压缩到一起的话就需要知道每个byte的数据长度。
序列化的核心代码文件:
Note:
暂时是一个Excel文件对应一个bytes数据的方式进行存储。(2022/1/22完成了单Excel多Sheet导出的支持 )
如果想对数据进行压缩或者加密验证,都可以在序列化这一步或者压缩之后写入数据,然后在加载时反向操作判定对比即可。(TODO:优化)
统一表格数据加载和读取 这一步是属于加载一测的了,是需要运用在Unity里的代码,统一表格加载管理是为了对于表格数据进行快速的访问和管理(一般都会有个GameDataManager之类的单例类负责管理)。
实现方案思考:
这一步因为涉及到自动化的加载代码生成,会涉及到多语言支持问题,所以如果想要支持多语言最好通过模板一类的方式来动态生成代码。
虽然Xbuffer里有一套根据模板生成代码的方案,但想自己尝试实现一下,所以不准备直接拿过来用,准备参考Xbuffer模板替换思路自己模仿写一份(尝试写了这个才发现正则的强大之处)。
模板功能需求:
支持模板内容基于占位符替换
支持模板内容基于占位符循环替换
实现方案跟Xbuffer的一样,支持如下功能:
支持两种替换规则(1. 占位符单次替换 2. 限定模板内容多次替换累加)
前者作用范围整个模板(不包含多次替换模板内容部分 — 通过定义不重复的占位符来实现),后者允许指定局部内容作为模板用于多次替换累加
多次替换模板内容允许跨行
模板占位符可自定义名字,但格式必须是:#名字#
多次替换模板内可定义占位符,支持占位符单次替换
比如如下定义方式:
1 2 3 4 5 6 7 8 9 10 11 12 13 14 15 16 17 18 19 20 21 22 23 24 25 26 27 * Auto generated, do not edit it */ using Xbuffer;namespace Data { public class GameDataManager { #循环标签名1# public #循环占位符名1#Container #循环占位符名1#Container = new #循环占位符名1#Container(); #循环标签名1# } public void loadAll ( { #循环标签名2# #循环占位符名2#Container.loadDataFromBin(); #循环标签名2# } private GameDataManager ( { } public static readonly GameDataManager Instance = new GameDataManager(); }
模板文件定义分析:
整个文件内容是作为完整的模板内容。
在非循环占位符标签内的#占位符名#会用于作为单次替换占位符
循环标签名1和循环标签名2定义一个局部模板内容作为多次替换的模板(循环标签必须配对使用,且不允许同一个模板里重复使用)
循环占位符名1和循环占位符名2表示多次替换模板里的占位符(注意不能和单次占位符名字重复,不然会被单次替换掉)
这里主要需要以下几个文件的模板:
GameDataManager.ftl — GameDataManager.cs(表数据统一加载管理类)
1 2 3 4 5 6 7 8 9 10 11 12 13 14 15 16 17 18 19 20 21 22 23 24 25 26 27 28 29 30 31 32 33 34 35 36 37 38 39 40 41 * Auto generated, do not edit it */ using System.Collections.Generic;using xbuffer;namespace Data { public class GameDataManager { public static readonly GameDataManager Singleton = new GameDataManager(); #CONTAINER_MEMBER_LOOP# private #CLASS_NAME#Container m#CLASS_NAME#Container = new #CLASS_NAME#Container(); #CONTAINER_MEMBER_LOOP# private GameDataManager ( { } public void loadAll ( { #CONTAINER_LOAD_LOOP# m#LOOP_CLASS_NAME#Container.loadDataFromBin(); #CONTAINER_LOAD_LOOP# } #CONTAINER_GET_LOOP# public List<#LOOP_CLASS_NAME#> Get#LOOP_CLASS_NAME#List() { return m#LOOP_CLASS_NAME#Container.getList(); } public Dictionary<#ID_TYPE#, #LOOP_CLASS_NAME#> Get#LOOP_CLASS_NAME#Map() { return m#LOOP_CLASS_NAME#Container.getMap(); } #CONTAINER_GET_LOOP# } }
excelContainer.ftl — excelContainer.cs(表格数据存储类)
1
2
3
4
5
6
7
8
9
10
11
12
13
14
15
16
17
18
19
20
21
22
23
24
25
26
27
28
29
30
31
32
33
34
35
36
37
38
39
40
41
42
43
44
45
46
47
48
49
50
51
52
53
54
55
56
57
58
59
60
61
62
63
64
65
66
67
68
69
70
71
72
73
74
75
76
/** * Auto generated by XbufferExcelToData, do not edit it * 表格名字 */ using System; using System.Collections.Generic; using System.IO; using UnityEngine; using xbuffer; namespace Data { public class #CLASS_NAME#Container { private List<#CLASS_NAME#> list = null; private Dictionary<#ID_TYPE#, #CLASS_NAME#> map = null; public List<#CLASS_NAME#> getList() { if (list == null || list.Count <= 0) loadDataFromBin(); return list; } public Dictionary<#ID_TYPE#, #CLASS_NAME#> getMap() { if (map == null || map.Count <= 0) loadDataFromBin(); return map; } public void ClearList() { if (list != null && list.Count > 0) list.Clear(); if (map != null && map.Count > 0) map.Clear(); } public void loadDataFromBin() { Stream fs = ConfLoader.Singleton.getStreamByteName(typeof(#CLASS_NAME#).Name); if(fs != null) { BinaryReader br = new BinaryReader(fs); uint offset = 0; bool frist = true; try{ while (fs.Length - fs.Position > 0) { if (frist) { frist = false; ClearList(); var count = br.ReadInt32(); list = new List<#CLASS_NAME#>(count); map = new Dictionary<#ID_TYPE#, #CLASS_NAME#>(count); } var length = br.ReadInt32(); var data = br.ReadBytes(length); var obj= #CLASS_NAME#Buffer.deserialize(data, ref offset); offset = 0; list.Add(obj); map.Add(obj.#ID_NAME#, obj); } }catch (Exception ex) { Debug.LogError("import data error: " + ex.ToString()); } br.Close(); fs.Close(); } } } }
ConfLoader.cs(二进制配置数据文件加载类 - 这个不需要自动化生成)
这里只支持了一维数组维度的配置:
1 2 3 4 5 6 7 8 9 10 11 12 13 14 15 16 17 18 19 20 21 22 23 24 25 26 27 28 29 30 31 32 33 34 35 36 37 38 39 40 41 42 43 44 45 46 47 48 49 50 51 52 53 54 55 56 57 58 59 60 61 62 63 64 65 * Auto generated, do not edit it */ using System.Collections.Generic;using xbuffer;namespace Data { public class GameDataManager { public static readonly GameDataManager Instance = new GameDataManager(); private t_AuthorInfoContainer mt_AuthorInfoContainer = new t_AuthorInfoContainer(); ****** private t_language_cnContainer mt_language_cnContainer = new t_language_cnContainer(); private t_uiContainer mt_uiContainer = new t_uiContainer(); private GameDataManager ( { } public void loadAll ( { mt_AuthorInfoContainer.loadDataFromBin(); ****** mt_language_cnContainer.loadDataFromBin(); mt_uiContainer.loadDataFromBin(); } public List<t_AuthorInfo> Gett_AuthorInfoList ( { return mt_AuthorInfoContainer.getList(); } public Dictionary<int , t_AuthorInfo> Gett_AuthorInfoMap() { return mt_AuthorInfoContainer.getMap(); } ****** public List<t_ui> Gett_uiList ( { return mt_uiContainer.getList(); } public Dictionary<string , t_ui> Gett_uiMap() { return mt_uiContainer.getMap(); } } }
t_AuthorInfoContainer.cs
1 2 3 4 5 6 7 8 9 10 11 12 13 14 15 16 17 18 19 20 21 22 23 24 25 26 27 28 29 30 31 32 33 34 35 36 37 38 39 40 41 42 43 44 45 46 47 48 49 50 51 52 53 54 55 56 57 58 59 60 61 62 63 64 65 66 67 68 69 70 71 72 73 74 75 76 * Auto generated by XbufferExcelToData, do not edit it * 表格名字 */ using System;using System.Collections.Generic;using System.IO;using UnityEngine;using xbuffer;namespace Data { public class t_AuthorInfoContainer { private List<t_AuthorInfo> list = null ; private Dictionary<int , t_AuthorInfo> map = null ; public List<t_AuthorInfo> getList ( { if (list == null || list.Count <= 0 ) loadDataFromBin(); return list; } public Dictionary<int , t_AuthorInfo> getMap() { if (map == null || map.Count <= 0 ) loadDataFromBin(); return map; } public void ClearList ( { if (list != null && list.Count > 0 ) list.Clear(); if (map != null && map.Count > 0 ) map.Clear(); } public void loadDataFromBin ( { Stream fs = ConfLoader.Singleton.getStreamByteName(typeof (t_AuthorInfo).Name); if (fs != null ) { BinaryReader br = new BinaryReader(fs); uint offset = 0 ; bool frist = true ; try { while (fs.Length - fs.Position > 0 ) { if (frist) { frist = false ; ClearList(); var count = br.ReadInt32(); list = new List<t_AuthorInfo>(count); map = new Dictionary<int , t_AuthorInfo>(count); } var length = br.ReadInt32(); var data = br.ReadBytes(length); var obj= t_AuthorInfoBuffer.deserialize(data, ref offset); offset = 0 ; list.Add(obj); map.Add(obj.id, obj); } }catch (Exception ex) { Debug.LogError("import data error: " + ex.ToString()); } br.Close(); fs.Close(); } } } }
Note:
占时我ConfLoad.cs加载二进制文件是通过放在Resources目录下以TextAsset形式加载进来,所以加载的时候是没带后缀的,具体ConfLoad代码根据不同的存储位置和加载方式会稍作改动。
读取序列化数据 终于走到最后一步了,完成这一步,导表工具的工具链基本就算打通了。
ConfLoader.cs
1
2
3
4
5
6
7
8
9
10
11
12
13
14
15
16
17
18
19
20
21
22
23
24
25
26
27
28
29
30
31
32
33
34
35
36
37
38
/* * Description: 配置表加载辅助单例类 * Author: tanghuan * Create Date: 2018/09/05 */ using System.Collections; using System.Collections.Generic; using System.IO; using UnityEngine; /// <summary> /// 配置表加载辅助单例类 /// </summary> public class ConfLoader : SingletonTemplate<ConfLoader> { /// <summary> /// Excel表格数据存储目录 /// </summary> public const string ExcelDataFolderPath = "DataBytes/"; public ConfLoader() { } /// <summary> /// 获取表格配置数据的二进制流数据 /// </summary> /// <param name="bytefilename"></param> /// <returns></returns> public Stream getStreamByteName(string bytefilename) { var textasset = Resources.Load(ExcelDataFolderPath + bytefilename) as TextAsset; var memorystream = new MemoryStream(textasset.bytes); return memorystream; } }
结合前面的GameManager.cs和所有对应的* Container.cs文件,完成我们对于序列化数据的加载。
激动人心的一刻,PC上成功加载表格数据代码并打印出来:
遇到个严峻的问题,真机上读取float数据时出了空引用:
问题猜想2:
问题猜想3:(float )(ptr + offset);时报空,那肯定跟字节数据float解析有关。https://stackoverflow.com/questions/28436327/monotouch-floating-point-pointer-throws-nullreferenceexception-when-not-4-byte-a ]
原因:
相关知识储备:浅谈字节序(Byte Order)及其相关操作 Data alignment: Straighten up and fly right
分析当前情况:
解决方案:
floatBuffer.cs
1
2
3
4
5
6
7
8
9
10
11
12
13
14
15
16
17
18
19
20
21
22
23
24
25
26
27
28
29
30
31
32
33
34
35
36
37
38
39
40
41
42
43
44
45
46
47
****** using System;namespace xbuffer { public class floatBuffer { private static readonly uint size = sizeof (float ); private static readonly byte [] fourByteAlginedArray = new byte [4 ]; public unsafe static float deserialize (byte [] buffer, ref uint offset { fixed (byte * ptr = buffer) { float value ; if ((int )(ptr + offset) % 4 == 0 ) { value = *(float *)(ptr + offset); } else { for (int i = 0 ; i < 4 ; i++) { fourByteAlginedArray[i] = (ptr + offset)[i]; } fixed (byte * ptr2 = fourByteAlginedArray) { value = *(float *)(ptr2); } } offset += size; return BitConverter.IsLittleEndian ? value : utils.toLittleEndian((uint )value ); } } ****** } }
真正激动人心的时刻,真机运行反序列化数据:
性能和内存开销 工具链虽然打通了,但是我们我不只是要考虑能不能用,更多的我们还要关心内存开始以及序列化反序列化的速度性能问题。
接下来就是通过大数据配置来测试内存分配和序列化性能问题。
测试用例:
测试平台:
导表耗时:
导表后的二进制文件大小(未压缩):
表格数据读取内存以及反序列化时间开销:
1
2
3
4
5
6
7
8
9
10
11
12
13
14
15
16
17
18
19
20
21
22
23
24
25
26
27
28
29
30
31
32
33
34
35
36
37
38
39
40
41
42
43
44
45
46
47
48
49
50
51
52
53
54
55
56
57
58
59
60
61
62
63
64
65
66
67
68
69
70
71
72
73
74
75
76
77
78
79
80
81
82
83
84
85
86
87
88
89
90
91
92
93
94
95
96
97
98
99
100
101
102
103
104
105
106
107
108
/* * Description: MemoryProfiler.cs * Author: TONYTANG * Create Date: 2018/08/08 */ using System; using System.Collections; using System.Collections.Generic; using UnityEngine; using UnityEngine.Profiling; /// <summary> /// MemoryProfiler.cs /// 简陋的内存统计工具(统计托管的Mono内存) /// </summary> public class MonoMemoryProfiler : SingletonTemplate<MonoMemoryProfiler> { /// <summary> /// 内存Profile类型 /// </summary> public enum MemoryProfilerType { CSharp_GC = 1, // CS GC统计 Unity_Profiler = 2 // Unity Profiler接口统计 } /// <summary> /// 当前内存统计类型 /// </summary> private MemoryProfilerType mCurrentMemoryProfilerType = MemoryProfilerType.Unity_Profiler; /// <summary> /// 内存标签名 /// </summary> private string mTagName; /// <summary> /// 开始统计时总共使用的Mono内存 /// </summary> private long mTotalUsedMonoMemory_Begin; /// <summary> /// 结束统计时总共使用的Mono内存 /// </summary> private long mTotalUsedMonoMemory_End; /// <summary> /// 设置当前内存统计类型 /// </summary> /// <param name="mpt"></param> public void setMemoryProfilerType(MemoryProfilerType mpt) { mCurrentMemoryProfilerType = mpt; } /// <summary> /// 开启内存统计Tag /// </summary> /// <param name="tag"></param> public void beginMemorySample(string tag) { if(!tag.IsNullOrEmpty()) { mTagName = tag; if (mCurrentMemoryProfilerType == MemoryProfilerType.CSharp_GC) { // 确保得到正确的起始Heap Memory Size mTotalUsedMonoMemory_Begin = GC.GetTotalMemory(true); } else if (mCurrentMemoryProfilerType == MemoryProfilerType.Unity_Profiler) { GC.Collect(); mTotalUsedMonoMemory_Begin = Profiler.GetMonoUsedSizeLong(); } } else { Debug.LogError("MonoMemoryProfiler的Tag不能为空!"); } } /// <summary> /// 结束内存统计 /// </summary> public void endMemorySample() { if(!mTagName.IsNullOrEmpty()) { if (mCurrentMemoryProfilerType == MemoryProfilerType.CSharp_GC) { mTotalUsedMonoMemory_End = GC.GetTotalMemory(false); } else if (mCurrentMemoryProfilerType == MemoryProfilerType.Unity_Profiler) { GC.Collect(); mTotalUsedMonoMemory_End = Profiler.GetMonoUsedSizeLong(); } var heapmemoryoffset = mTotalUsedMonoMemory_End - mTotalUsedMonoMemory_Begin; Debug.Log(string.Format("内存统计标签 : {0}", mTagName)); Debug.Log(string.Format("当前Mono内存大小 = {0} Bytes", mTotalUsedMonoMemory_End)); Debug.Log(string.Format("之前Mono内存大小 = {0} Bytes", mTotalUsedMonoMemory_Begin)); Debug.Log(string.Format("总共Mono内存占用 = {0} Bytes == {1} KB == {2} M", heapmemoryoffset, heapmemoryoffset / 1024 , heapmemoryoffset / (1024 * 1024))); mTagName = string.Empty; } } }
PC:
Android真机:
可以看到两种方式统计有不少误差,在5M左右的堆内存开销。
从20张表,每张表大概4-7个字段,各1000行数据来看,内存和序列化,反序列化速度都还是相当可观的。这里因为没有集成支持其他序列化方式,所以没法做详细的对比,详细各序列化库性能对比参考Xbuffer作者在Github上的对比Xbuffer 。
优化点 未来需要支持和优化的工作点:
支持多维数据的配置(放弃支持)- 扩展到多维不定长数组
- 每一个维度上的数组长度都是不定长的,用多维数组存储会伴随多维数组的维度以及各维度的数量级增长,导致各维度各数量级上的长度信息存储过多(占用过多的二进制字节数据)。
- 同时会需要不定长的多维数组来支持,序列化和反序列化都很复杂
- 需要扩展Xbuffer 的维度支持
- 扩展到多维定长数组
不太可行,空间不浪费,各维度数组长度信息过于复杂,实现过于复杂
- 只需要存储各个维度上的长度信息,维度长度信息和维度成正比,数量级小易存储
- 在配置复杂的不定长数据时,定长数组存储会造成大量的数据空间浪费
- 序列化代码依然复杂,反序列化代码相对简单
- 需要扩展Xbuffer 的维度支持
可行,空间比较浪费,多维度数组信息存储简单,实现相对复杂
- 多维数据依然存储在一个一维数组里,通过一维数组索引去访问
- 数据存储空间不存在浪费
- 不需要扩展Xbuffer 多维度支持
- 序列化和反序列化代码简单
- 无法像多维数组形式方便快速索引数据,只能计算好对应索引值去访问索引数据(数据量配置一旦大了,访问复杂度成指数级成长)
- 对于数据配置的抽象不友好们无法快速访问指定部分数据(相当于一维数组的单个字符分割,这样一来没有意义了)
可行,空间不浪费,实现简单,访问和理解都不友好,配置复杂度影响访问复杂度。但变相成了一维数组的单个字符分割,没有意义了。
- 可以采用配置多个一维数组映射来支持。
- 获取一维数组配置后,自己去split分割访问解析。
支持单列允许填写notation数据类型作为注释类型,单纯作为excel可查看的注释不序列化到数据里。(完成 )
修改导表工具支持notation数据类型配置作为注释类型
修改导表生成二进制数据那里不序列化注释类型数据
支持个数据类型不配置,直接使用各类型默认值的方式(完成 )
修改导表公安局二进制数据序列化时判定书否有数据,没有数据用各类型默认数据
二进制数据的压缩(暂时未做)
对序列化好的二进制数据可以进行一些压缩格式的压缩后然后运行时解压的形式实现数据压缩
支持单Excel多Sheet导出(2022/1/20完成 )
支持Sheet黑名单,blacklist开头的Sheet名不参与导表(2022/1/20完成 )
第一列字段名不限,同时类型支持int和string(2022/1/20完成 )
Github 最后给出工具的Github链接:XbufferExcelToData
学习总结
高效的数据序列化和反序列化不是语言自带的序列化和反序列化方式(很有可能默认使用了反射之类的)而是直接对于内存的数据的快速访问解析(比如flatbuffer,Xbuffer最终都是采用一个扁平化的字节数组对数据进行存储访问)
更进一步的数据压缩是对于基础数据类型的存储格式与数据解析定义(比如Protobuf里Varint数据存储方式)
跨语言的序列化反序列化只要定义统一的字节流写入和读取即可。
数据向后兼容问题(这里需要向Flatbuffer和Protobuf对于数据的存储做更多的处理才能做到)
完整的工具链要考虑的不仅仅是数据的存储和加载,还要关注自动化相关代码的生成(比如通过模板定义做到对多语言工具链的支持)。
二进制数据的处理需要关注大小端问题(不同CPU数据存储方式不一样),内存对齐问题(不同架构比如ARM和Intel对于浮点数的dereference就有内存4字节对齐的要求)。
强大的正则表达式在做模板问题处理时,相当优秀。
Reference Conception Part protobuf FlatBuff Xbuffer
Knowlodge Part FlatBuffers 体验 Flatc Protocol Buffer 序列化原理大揭秘 - 为什么Protocol Buffer性能这么好? Microsoft .NET Framework 版本定义 Data alignment: Straighten up and fly right 详解大端模式和小端模式 理解字节序 浅谈字节序(Byte Order)及其相关操作
Other Part Unity C#配置表工具 Unity3D游戏开发之当游戏开发遇上Excel Unity3D研究院之MAC&Windows跨平台解析Excel(六十五) ExcelReader FlatBuffers 体验