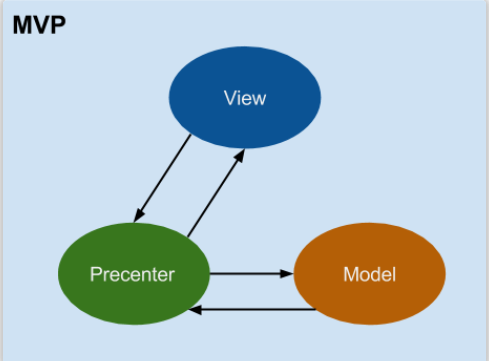
再看看四人帮是如何定义命令模式的: “Encapsulate a request as an object, thereby letting users parameterize clients with different requests, queue or log requests, and support undoable operations”(将一个请求封装为一个对象,从而使你可用不同的请求对客户进行参数化; 对请求排队或记录请求日志,以及支持可撤销的操作。)
// Use this for initialization voidStart () { // 添加UIController对UI点击事件的响应 mBtnRandomNumber.onClick.AddListener(UIController.Instance.OnBtnRandomNumberClick); }
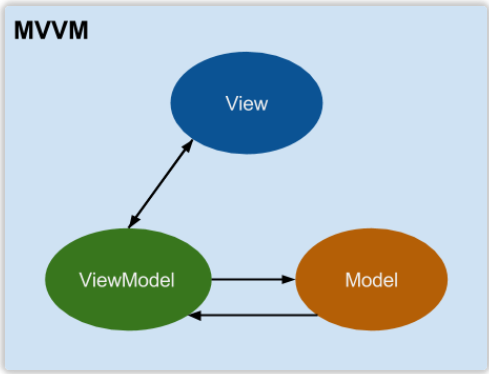
如何在Unity里实现Data Bidning? Data Binding的核心是在修改数据时能触发回调通知,能将数据和回调绑定起来。 明白了这一点,回顾C#里设置数据一般是通过方法或者属性或者直接访问public成员变量,要想实现回调触发,我们可以通过C#里的Property设置(set)的形式去确保回调相应。
///<summary> /// 属性值变化回调 ///</summary> public ValueChangedDelegate OnValueChanged;
///<summary> /// 属性 ///</summary> public T Value { get { return mValue; } set { T oldvalue = mValue; mValue = value; ValueChanged(oldvalue, mValue); } } private T mValue;
publicreadonly BindableProperty<string> Name = new BindableProperty<string>(); publicreadonly BindableProperty<int> AgeDetail = new BindableProperty<int>();
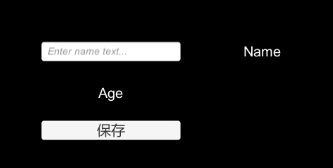
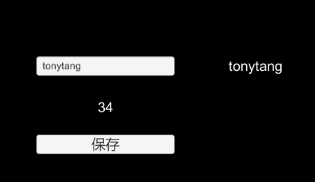
///<summary> /// 初始化View(主要是V到VM之间的绑定) ///</summary> publicvoidinitialize() { #region Bind VM to V Part mViewModel.Name.OnValueChanged = onNameChanged; mViewModel.Age.OnValueChanged = onAgeChanged; #endregion
#region Bind V To VM mInputFieldName.onValueChanged.AddListener(onInputNameChanged); mBtnSave.onClick.AddListener(onSaveClick); #endregion }
#region Bind VM to V Part privatevoidonNameChanged(string oldname, string newname) { mInputFieldName.text = newname; mTxtName.text = newname; }
privatevoidonAgeChanged(int oldvalue, int newvalue) { mTxtAge.text = newvalue.ToString(); } #endregion
#region Bind V To VM privatevoidonInputNameChanged(string newname) { mViewModel.Name.Value = newname; }
///<summary> Name输入文本(用于View输入改变Name) ///</summary> public InputField mInputFieldName;
///<summary> Name值展示文本 ///</summary> public Text mTxtName; ///<summary> Age值展示文本 ///</summary> public Text mTxtAge;
///<summary> Model数据保存按钮 ///</summary> public Button mBtnSave;
///<summary> /// 真实绑定的VM对象访问入口 ///</summary> public MVVMViewModel ViewModel { get { return (MVVMViewModel)mMVVMViewModelContext; } }
///<summary> /// 响应VM绑定变化回调 /// 在这里做V和VM绑定相关的事 ///</summary> ///<param name="oldvm"></param> ///<param name="newvm"></param> protectedoverridevoidOnBindingContextChanged(IMVVMViewModel oldvm, IMVVMViewModel newvm) { base.OnBindingContextChanged(oldvm, newvm); // 解除老的VM相关绑定 if(oldvm != null) { #region Bind VM to V Part MVVMViewModel ovm = oldvm as MVVMViewModel; ovm.Name.OnValueChanged -= onNameChanged; ovm.Age.OnValueChanged -= onAgeChanged; #endregion
#region Bind V To VM mInputFieldName.onValueChanged.RemoveListener(onInputNameChanged); mBtnSave.onClick.RemoveListener(onSaveClick); #endregion }
// 添加新的VM相关绑定 if (ViewModel != null) { #region Bind VM to V Part ViewModel.Name.OnValueChanged += onNameChanged; ViewModel.Age.OnValueChanged += onAgeChanged; #endregion
#region Bind V To VM mInputFieldName.onValueChanged.AddListener(onInputNameChanged); mBtnSave.onClick.AddListener(onSaveClick); #endregion } } #region Bind VM to V Part privatevoidonNameChanged(string oldname, string newname) { mInputFieldName.text = newname; mTxtName.text = newname; }
privatevoidonAgeChanged(int oldvalue, int newvalue) { mTxtAge.text = newvalue.ToString(); } #endregion
#region Bind V To VM privatevoidonInputNameChanged(string newname) { ViewModel.Name.Value = newname; }
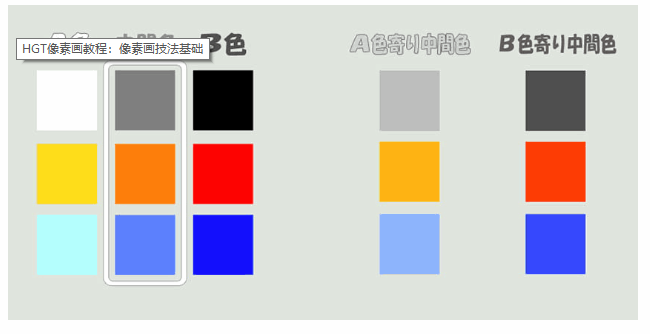
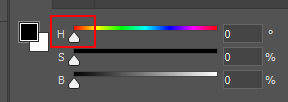
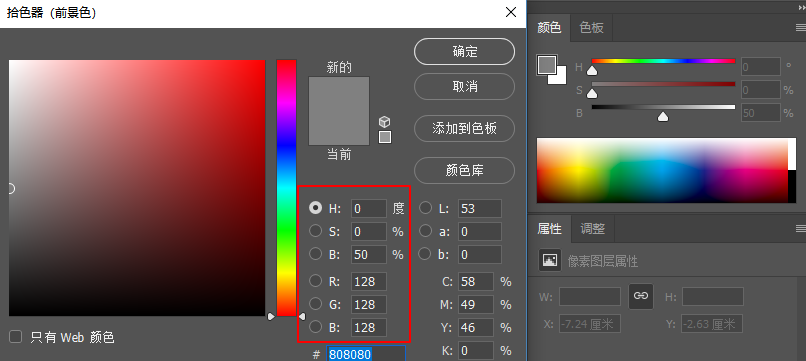
亮度决定了黑白的颜色量,这里可以理解成白色颜色的占比比重((255,255,255) X 0-1(亮度)),从而影响最终颜色的颜色占比,比如我们设置B亮度50%: 可以看到,我们的色相颜色红色(255,0,0)因为B亮度50%的设置,变成了RBG颜色信息是128,128,128,这真是因为50%的亮度决定了整体颜色的颜色基础值。
using System; using System.Collections; using System.Collections.Generic; using System.IO; using System.Security.Principal; using UnityEditor; using UnityEngine;
using System.Collections; using System.Collections.Generic; using UnityEngine;
using UnityEditor;
using Excel; using System.IO; using System.Data; using System.Reflection; using System.Text; using Microsoft.CSharp; using System.CodeDom.Compiler; using System; using System.Runtime.Serialization.Formatters.Binary;
//将数据序列化到本地文件 var bf = new BinaryFormatter(); var s = new FileStream(outputpath + type.Name + ".bytes", FileMode.CreateNew, FileAccess.Write); bf.Serialize(s, container); s.Close(); returntrue; }
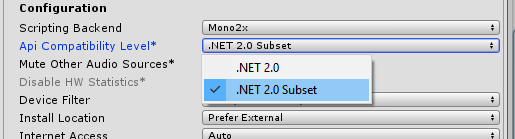
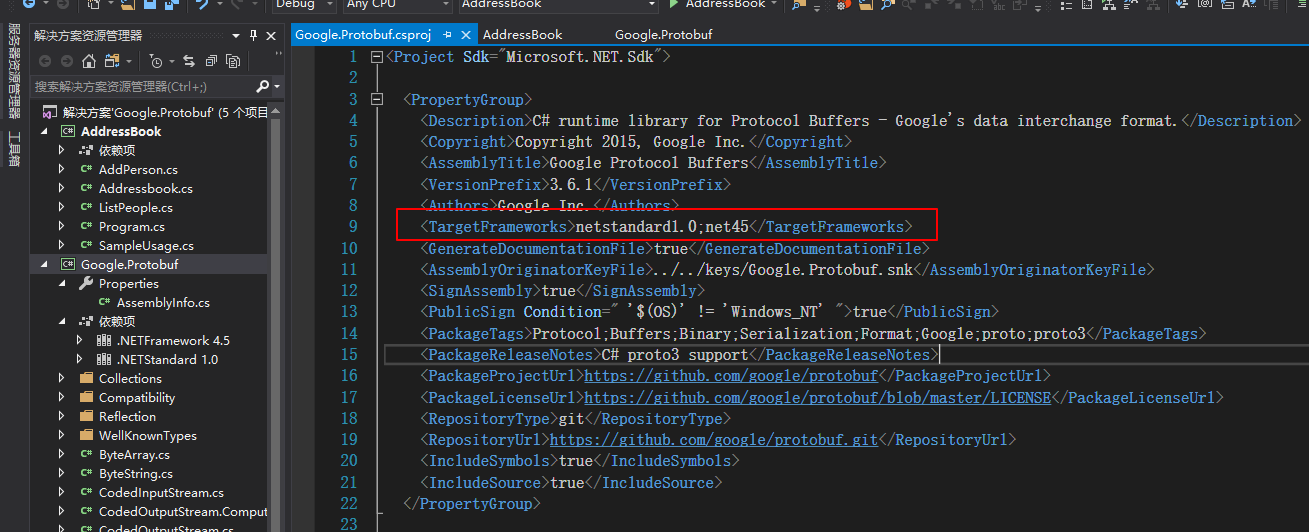
运用Protocol buffer编译器编译出我们对应语言的解析该数据结构的代码类。 首先下载对应语言的Protocol buffer编译器 “There are two NuGet packages: Google.Protobuf (the support library) and Google.Protobuf.Tools (containing protoc)” 根据上面写的,C#现在貌似有两个版本支持Protocol Buffer,但原生的Protobuf版本支持的.NET版本很高,所以不适合Unity(Unity是基于Mono的,Mono现在对.NET的支持还停留在.NET 2.0和.NET 2.0 subset)。
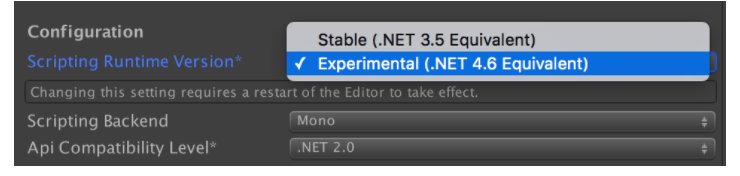
但只是这样的话,会报如下错误: NotSupportException: …… System.Reflection.Emit is not supported 这里出现了Emit类的使用,显然是用到了动态生成代码,根据我们之前讲到的IOS是在Full-AOT模式下运行不允许动态生成代码的。 所以直接使用.NET风格的Attribute会触发动态代码生成,那么我们就需要想办法提前生成,这里就需要使用.proto文件然后通过预编译的方式生成对应的代码类。 所以现在我们需要先定义.proto文件(Protobuf-net只支持Proto2),所以编写proto2参考
//PlayerData.cs //------------------------------------------------------------------------------ // <auto-generated> // This code was generated by a tool. // // Changes to this file may cause incorrect behavior and will be lost if // the code is regenerated. // </auto-generated> //------------------------------------------------------------------------------
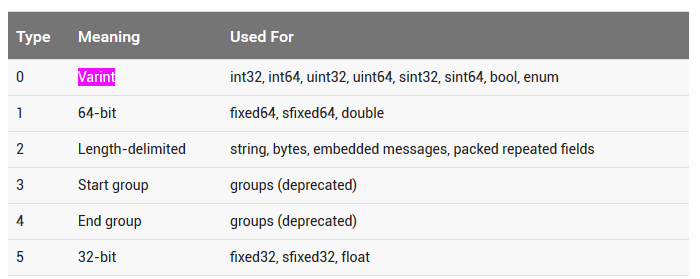
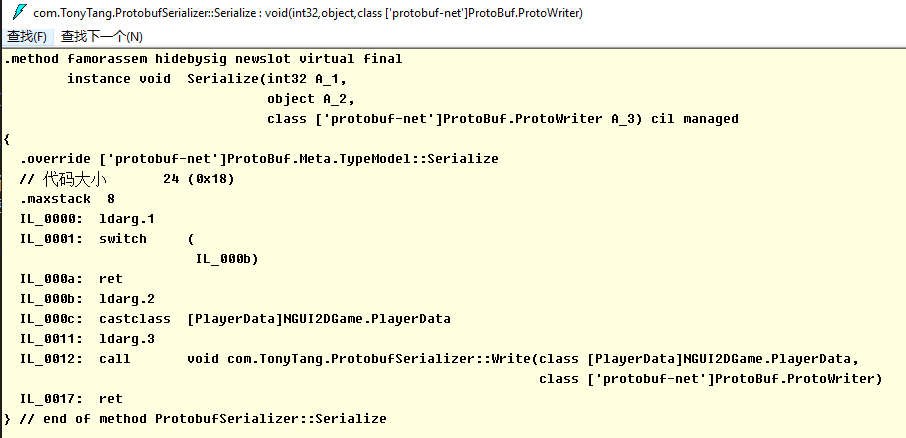
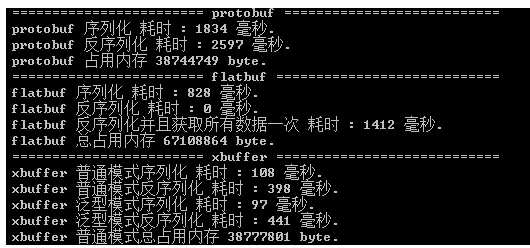
了解了什么(What)是Protobuf,如何(How)使用Protobuf,那么我们也应该大概了解下为什么(Why)Protobuf高效,更小,更快,更简单….. 参考下面两篇文章: Google Protocol Buffer 的使用和原理 官网讲到的Protocol buffer的Encode技术 从上面可以看出,更小更快是因为Protocol buffer采用了巧妙的Encoding方法。 而这个Encoding方法利用了Varint技术,那么什么是Varint了? “Varints are a method of serializing integers using one or more bytes. Smaller numbers take a smaller number of bytes. “ Varints通过更少的字节来表达准确的数据,比如0-127只需要1个字节就能表示。 当需要多个字节表达的时候,通过利用1byte里的first bit来区分,如果first bit是1表示后续的7个bit都表示数据,如果first bit是0表示这是最后一个字节用于表示数据。 同时Protocol buffer在Encode的时候通过key和value来存储数据。key只包含filed的名字和类型,value包含数据。 类型数据映射 当Decode的时候,如果遇到不识别的key值,只需要skip即可,保证了程序的老版本兼容。 更方便在于,我们只需通过编写简单易懂的.proto文件然后通过ProtoGen,Precompile工具就能生成对应的Message,Encode和Decode类。 结合前面的事例,让我们窥探一下到底Protocol-net是如何实现编写.proto文件结合编译生成Message类和序列化类来实现数据的Encode和Decode的。 首先反编译的ProtovufSerializer.dll,查看Serialize方法 可以看到ProtobufSerializer调用了Write方法,接下来查看Write方法 可以看到我们ProtobufSerializer实际是通过调用ProtoBuf.ProtoWriter::WriteFieldHeader(Protobuf-net库)实现数据的Encode的。同时因为ProtobufSerializer是根据PlayerData.dll编译而成,所以Write方法里的实现针对每一个需要Encode的Message成员进行数据Encode写入。 这样一来就完成了通过编写.proto文件定义Message,然后生成对应的Message类和序列化类再结合Protocol-net库实现了自定义Message的Encode和Decode了,而最终数据的Encode,Decode实现就落实到Protocol-net的实现了。
// <auto-generated> // Generated by the protocol buffer compiler. DO NOT EDIT! // source: GameConfig.proto // </auto-generated> #pragmawarning disable 1591, 0612, 3021 #region Designer generated code
using pb = global::Google.Protobuf; using pbc = global::Google.Protobuf.Collections; using pbr = global::Google.Protobuf.Reflection; using scg = global::System.Collections.Generic; namespaceGameData {
///<summary>Holder for reflection information generated from GameConfig.proto</summary> publicstaticpartialclassGameConfigReflection {
#region Descriptor ///<summary>File descriptor for GameConfig.proto</summary> publicstatic pbr::FileDescriptor Descriptor { get { return descriptor; } } privatestatic pbr::FileDescriptor descriptor;
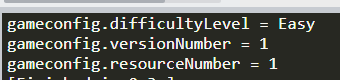
staticGameConfigReflection() { byte[] descriptorData = global::System.Convert.FromBase64String( string.Concat( "ChBHYW1lQ29uZmlnLnByb3RvEghHYW1lRGF0YSJUCgpHYW1lQ29uZmlnEhcK", "D2RpZmZpY3VsdHlMZXZlbBgBIAEoCRIVCg12ZXJzaW9uTnVtYmVyGAIgASgF", "EhYKDnJlc291cmNlTnVtYmVyGAMgASgFYgZwcm90bzM=")); descriptor = pbr::FileDescriptor.FromGeneratedCode(descriptorData, new pbr::FileDescriptor[] { }, new pbr::GeneratedClrTypeInfo(null, new pbr::GeneratedClrTypeInfo[] { new pbr::GeneratedClrTypeInfo(typeof(global::GameData.GameConfig), global::GameData.GameConfig.Parser, new[]{ "DifficultyLevel", "VersionNumber", "ResourceNumber" }, null, null, null) })); } #endregion
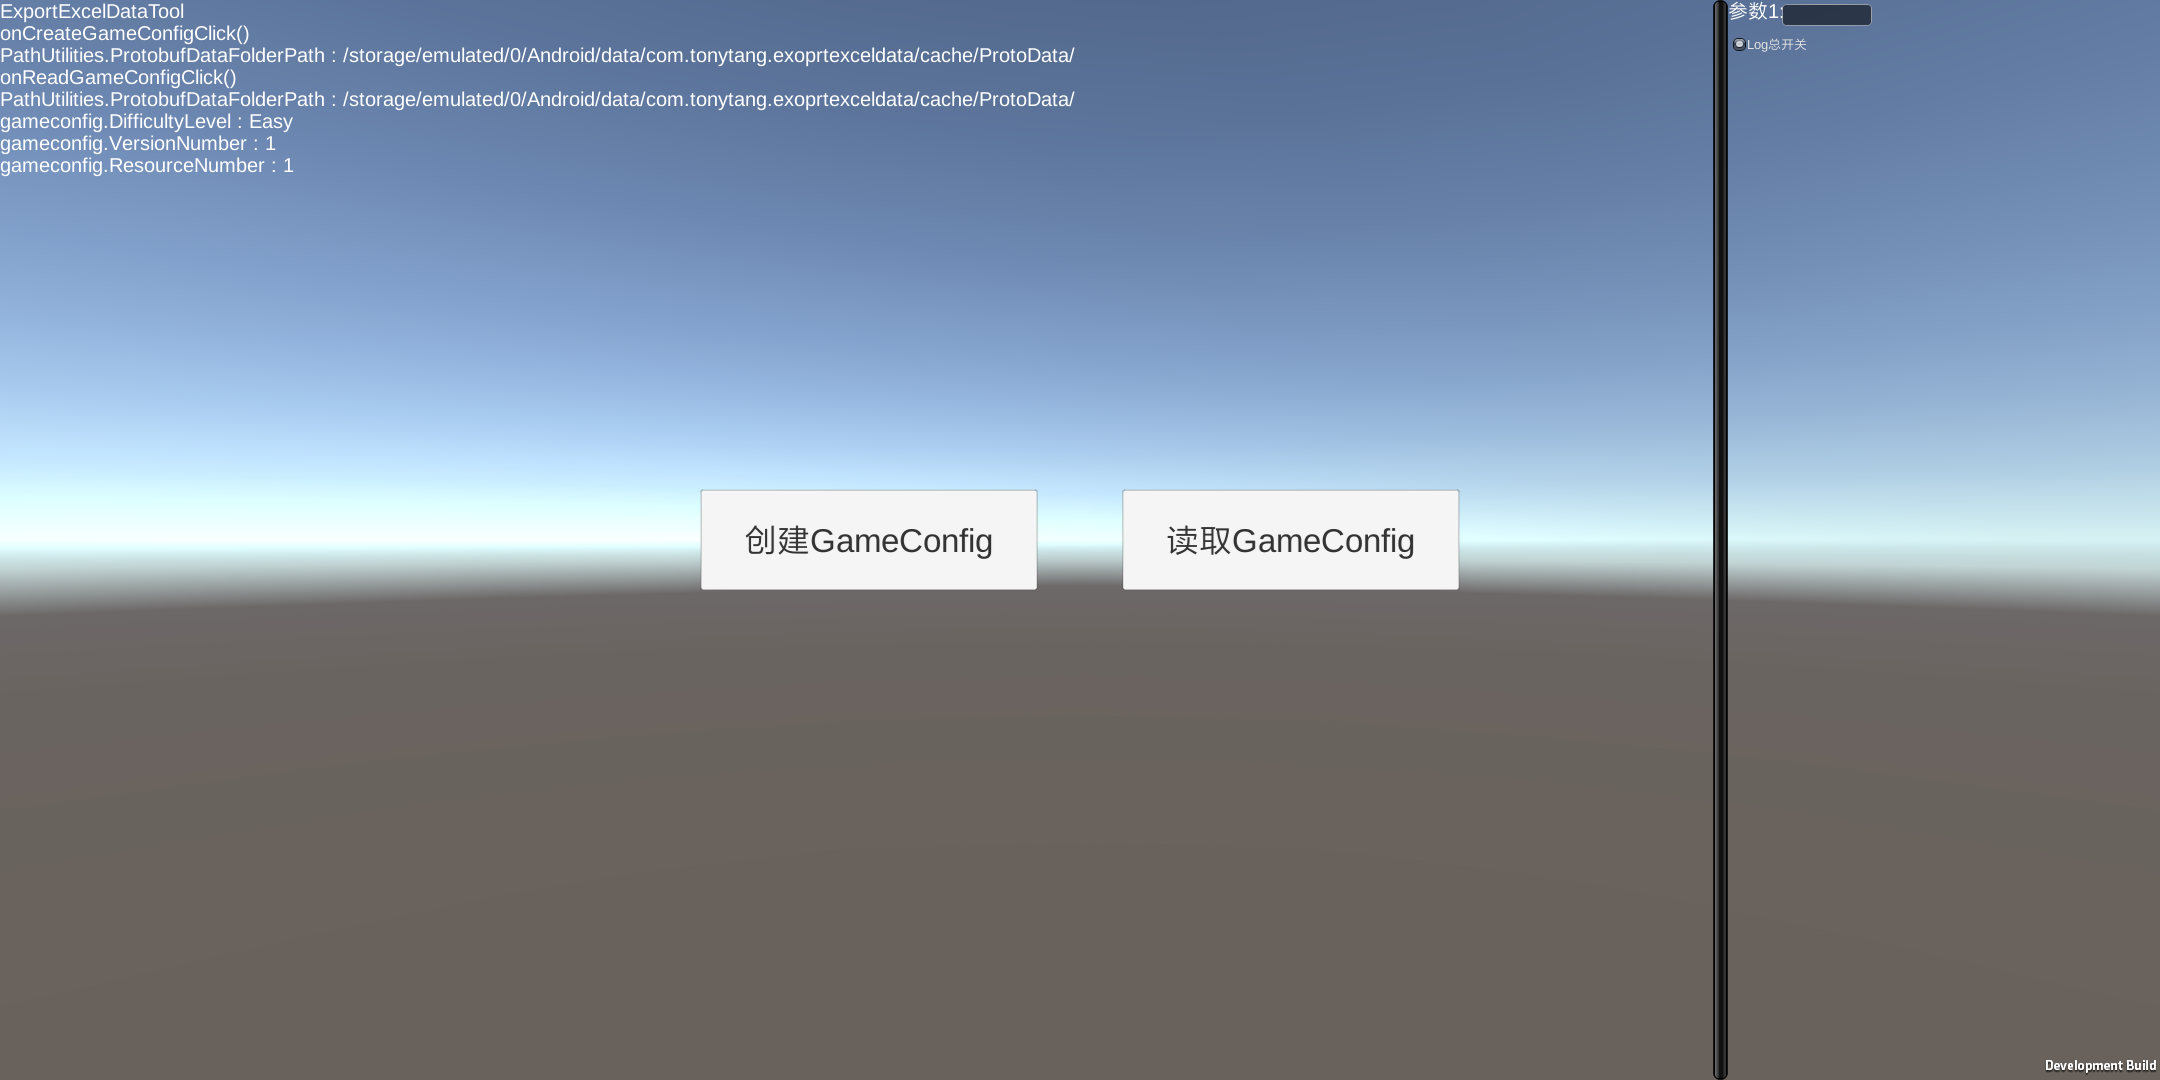
using GameData; using Google.Protobuf; using System.Collections; using System.Collections.Generic; using System.IO; using UnityEngine; using UnityEngine.UI;
# Generated by the protocol buffer compiler. DO NOT EDIT! # source: GameConfig.proto
import sys _b=sys.version_info[0]<3and (lambda x:x) or (lambda x:x.encode('latin1')) from google.protobuf import descriptor as _descriptor from google.protobuf import message as _message from google.protobuf import reflection as _reflection from google.protobuf import symbol_database as _symbol_database # @@protoc_insertion_point(imports)
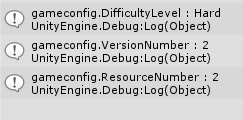
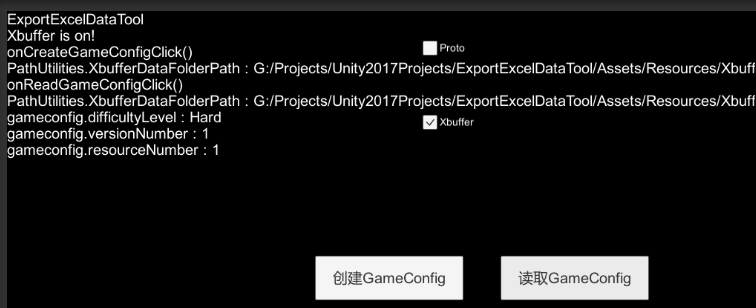
///<summary> /// 存储GameConfig数据 ///</summary> publicstaticvoidSaveGameConfigData() { // Create a `FlatBufferBuilder`, which will be used to create our // GameConfigFB' FlatBuffers. // 定义FlatBufferBulder对象用于我们构建数据对象 var builder = new FlatBufferBuilder(4); var difficultylevel = builder.CreateString("Hard-困难");
// Use the `CreateGameConfigFB()` helper function to create the GameConfigFB, since we set every field. // 往GameConfigFB里填充数据 var gameconfig = GameConfigFB.CreateGameConfigFB(builder, difficultylevel, 1, 1);
// Call `Finish()` to instruct the builder that this GameConfigFB is complete. // 指定GameConfigFB数据构建完成 builder.Finish(gameconfig.Value);
// This must be called after `Finish()`. // 包含GameConfigFB的二进制数据的数据对象 var buf = builder.DataBuffer; // GameConfigFB的二进制数据 byte[] bufbytes = builder.SizedByteArray();
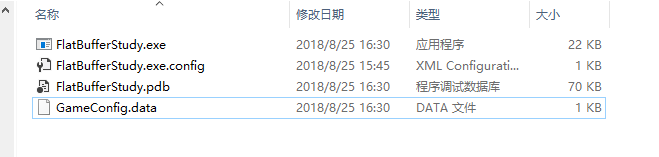
//写入GameConfig二进制数据得到本地 using (var filestream = new FileStream(GameConfigDataFullPath, FileMode.Create)) { filestream.Write(bufbytes, 0, bufbytes.Length); } }
// Get an accessor to the root object inside the buffer. // 通过字节流数据构建FlatBuff所需的Buf对象,然后使用该Buf对象通过FlatBuff构建GameConfigFB对象 var buf = new ByteBuffer(bufbytes); var gameconfig = GameConfigFB.GetRootAsGameConfigFB(buf);
///<summary> /// Responsible for building up and accessing a FlatBuffer formatted byte /// array (via ByteBuffer). ///</summary> publicclassFlatBufferBuilder { privateint _space; private ByteBuffer _bb; privateint _minAlign = 1;
// The vtable for the current table (if _vtableSize >= 0) privateint[] _vtable = newint[16]; // The size of the vtable. -1 indicates no vtable privateint _vtableSize = -1; // Starting offset of the current struct/table. privateint _objectStart; // List of offsets of all vtables. privateint[] _vtables = newint[16]; // Number of entries in `vtables` in use. privateint _numVtables = 0; // For the current vector being built. privateint _vectorNumElems = 0;
///<summary> /// Create a FlatBufferBuilder with a given initial size. ///</summary> ///<param name="initialSize"> /// The initial size to use for the internal buffer. ///</param> publicFlatBufferBuilder(int initialSize) { if (initialSize <= 0) thrownew ArgumentOutOfRangeException("initialSize", initialSize, "Must be greater than zero"); _space = initialSize; _bb = new ByteBuffer(initialSize); }
publicvoidAddInt(int o, int x, int d) { if (ForceDefaults || x != d) { AddInt(x); Slot(o); } }
publicByteBuffer(byte[] buffer, int pos) { _buffer = new ByteArrayAllocator(buffer); _pos = pos; }
publicvoidDispose() { if (_buffer != null) { _buffer.Dispose(); } }
publicint Position { get { return _pos; } set { _pos = value; } }
publicint Length { get { return _buffer.Length; } }
publicvoidReset() { _pos = 0; }
// Increases the size of the ByteBuffer, and copies the old data towards // the end of the new buffer. publicvoidGrowFront(int newSize) { _buffer.GrowFront(newSize); }
using GameData; using Google.Protobuf; using System.Collections; using System.Collections.Generic; using System.IO; using System.Text; using UnityEngine; using UnityEngine.UI; using xbuffer;
namespacexbuffer { publicclassProto { public Proto_Class[] class_protos;
publicProto(string proto) { var matchs = Regex.Matches(proto, @"//\s*(\S*)\s*((class)|(struct))\s*(\w+)\s*{\s*((\w+):([\[|\]|\w]+);\s*//\s*(\S*)\s*)*}"); class_protos = new Proto_Class[matchs.Count]; for (int i = 0; i < matchs.Count; i++) { class_protos[i] = new Proto_Class(matchs[i]); } } }
var varNames = match.Groups[7].Captures; var varTypes = match.Groups[8].Captures; var varComments = match.Groups[9].Captures; Class_Variables = new Proto_Variable[varNames.Count]; for (int i = 0; i < Class_Variables.Length; i++) { Class_Variables[i] = new Proto_Variable(varNames[i].Value, varTypes[i].Value, varComments[i].Value); } } } }
var nContents = newbyte[nCapacity_Group][]; for (uint i = 0; i < nCapacity_Group; i++) { if (i < capacity_group) nContents[i] = contents[i]; else nContents[i] = newbyte[capacity_cell]; } contents = nContents;
var nWastes = newuint[nCapacity_Group]; for (uint i = 0; i < capacity_group; i++) { nWastes[i] = wastes[i]; } wastes = nWastes;
capacity_group = nCapacity_Group; } } }
///<summary> /// 返回输出字节流 ///</summary> ///<returns></returns> publicbyte[] getBytes() { var len = index_group * capacity_cell + index_cell; for (int i = 0; i < index_group; i++) { len -= wastes[i]; }
var ret = newbyte[len]; var idx = 0; for (int i = 0; i < index_group; i++) { for (int j = 0; j < capacity_cell - wastes[i]; j++) { ret[idx++] = contents[i][j]; } } for (int i = 0; i < index_cell; i++) { ret[idx++] = contents[index_group][i]; }
/** * Auto generated by XbufferExcelToData, do not edit it * 表格名字 */ using System; using System.Collections.Generic; using System.IO; using UnityEngine; using xbuffer;
/** * Auto generated by XbufferExcelToData, do not edit it * 表格名字 */ using System; using System.Collections.Generic; using System.IO; using UnityEngine; using xbuffer;
“and Finalizers Lua does automatic memory management. Programs create objects (tables, threads, etc.), but there is no function to delete objects. Lua automatically deletes objects that become garbage, using garbage collection. “
Weak Table “Weak tables allow the collection of Lua objects that are still accessible to the program”
“A weak reference is a reference to an object hat is not considered by the garbage collector”
“In weak tables,, both keys and values can be weak”(three kinds of week table:1. weak key 2. weak value 3. weak key and value)
Object Attributes Implemetation Solution: use external table to associate objects with attributes Drawback: external table reference prevent objects from being collected Final solution: use weak keys for objects in external table
Tables with Default Values 这里有两种各有优缺点的实现方案: 方案1:
1 2 3 4 5 6 7
local defaults = {} setmetatable(defaults, {__mode = "k"}) local mt = {__index = function(t)return defaults[t] end} functionsetDefault(t, d) defaults[t] = d setmetatable(t, mt) end
方案2:
1
2
3
4
5
6
7
8
9
10
local metas = {} setmetatable(metas, {__mode = "v"}) functionsetDefault(t, d) local mt = metas[d] if mt == nilthen mt = {__index = function()return d end} metas[d] = mt -- memorize end setmetatable(t, mt) end
后者针对不同的default value分配了更多的内存(比如mt,entry on metas, closure……),但优点是同样的default value只需要分配一次即可,所以后者更适用于table数量多但default value大都相同的情况。
Ephemeron Tables(声明短暂的table Lua 5.2里提供) Ephemeron Table: “In Lua 5.2, a table with weak keys and strong values is an ephemeron table. In an ephemeron table, the accessibility of a key controls the accessibility of its corresponding value.(只当有strong reference to key时value才是strong的)” e.g. constant-function factory
Note: “Only objects can be collected from a weak table. Values, such as numbers and booleans, are not collectible”(只有Objects在weak table里能被gc回收,number和booleans这种Value类型不能在weak table里被gc回收)
“strings are collectible, but string is not removed from weak table(unless its associated value is collected)”
Finalizers “Finalizers allow the collection of externa objects that are not directly under control of the garbage collector”
“Finalizer is a function associated with an object that is called when that object is about to be collected.”(相当于C#里的Finalize,在GC object的时候会被调用。但只有一开始设置Metamethod的__gc时才能mark该object为可finalization的,否则就算后面在复制__gc也不会在调用该object的finalizer)
Lua里是通过Metamethod里的__gc实现。
1 2 3 4 5
-- 测试环境要求至少Lua 5.2 o = {x = "hi"} setmetatable(o, {__gc = function(o)print(o.x) end}) o = nil collectgarbage() --> hi
The order of finalization called: “When the collector finalizes several obejcts in the same cycle, it calls their finalizers in the reverse order that the objects were marked for finalization”(先声明__gc被mark为可finalization的object的finalizer后被调用)
1 2 3 4 5 6 7 8 9 10 11
-- 测试环境要求至少Lua 5.2 mt = {__gc = function(o)print(o[1]) end} list = nil for i = 1, 3do list = setmetatable({i, link = list}, mt) end list = nil collectgarbage() --> 1 --> 2 --> 3
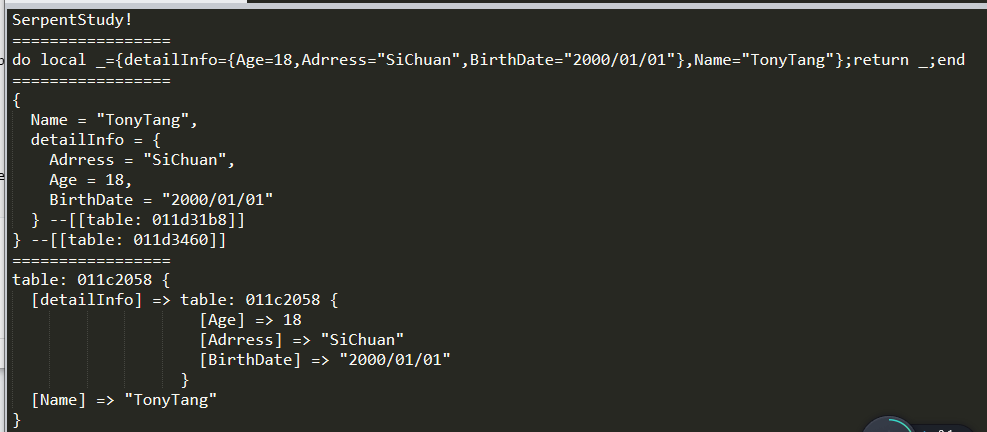
---克隆对象(建议用于克隆Class对象) ---@param any 对象 ---@return any 克隆对象 functionClone(object) local lookup_table = {} localfunction_copy(object) iftype(object) ~= "table"then return object elseif lookup_table[object] then return lookup_table[object] end local new_table = {} lookup_table[object] = new_table for key, value inpairs(object) do new_table[_copy(key)] = _copy(value) end returnsetmetatable(new_table, getmetatable(object)) end return _copy(object) end
iftype(cname) == "table"then ifself.class == cname then returntrue; elseifself.super then returnself.super.IsClass(self.super, cname); end elseiftype(cname) == "string"then ifself.class.className == cname then returntrue; elseifself.super then returnself.super.IsClass(self.super, cname); end end returnfalse; end
--- 提供Lua的OOP实现,快速定义一个Class(不支持多重继承) --- 模拟Class封装,继承,多态,类型信息,构造函数等 --- 模拟一个基础的Class需要的信息 ---@param clsname string@类名 ---@param super super@父类 ---@return Class@含Class所需基本信息的Class table functionClass(clsname, super) local classtable = {} -- ctor模拟构造函数 classtable.Ctor = false -- className模拟类型信息,负责存储类名 classtable.className = clsname -- super模拟父类 -- Note: 外部逻辑层不允许直接._super访问父类 classtable._super = super -- 自身class类table classtable.class = classtable; -- 指定索引元方法__index为自身,模拟类访问 -- 后面实例化对象时会将classtable作为元表,从而实现访问类封装的数据 classtable.__index = classtable -- 是否是指定类或者继承至某类的方法接口 classtable.IsClass = IsClass; -- 如果指定了父类,通过设置Class的元表为父类模拟继承 if super then setmetatable(classtable, super) else --print("如果定义的不是最基类,请确认是否require了父类!") end return classtable end
--- 提供实例化对象的方法接口 --- 模拟构造函数的递归调用,从最上层父类构造开始调用 ---@param cls cls@类定义 ---@param ... ...@构造函数变长参数 ---@return cls@cls类的实例对象table functionNew(cls, ...) -- 实例对象表 local instance = {} -- 设置实例对象元表为cls类模拟类的封装访问 setmetatable(instance, cls) -- create模拟面向对象里构造函数的递归调用(从父类开始构造) localcreate create = function(cls, ...) if cls._super then create(cls._super, ...) end if cls.Ctor then cls.Ctor(instance, ...) end end create(cls, ...) return instance end
functionReadOnly(t, name) local proxy = {} local mt = { -- create metatable __index = t, __newindex = function(t,k,v) error(string.format("attempt to update a read-only table:%s", name)) end, __len = function() return #t end, __pairs = function() returnnext, t, nil end } setmetatable(proxy, mt) return proxy end
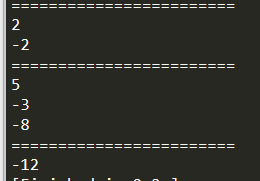
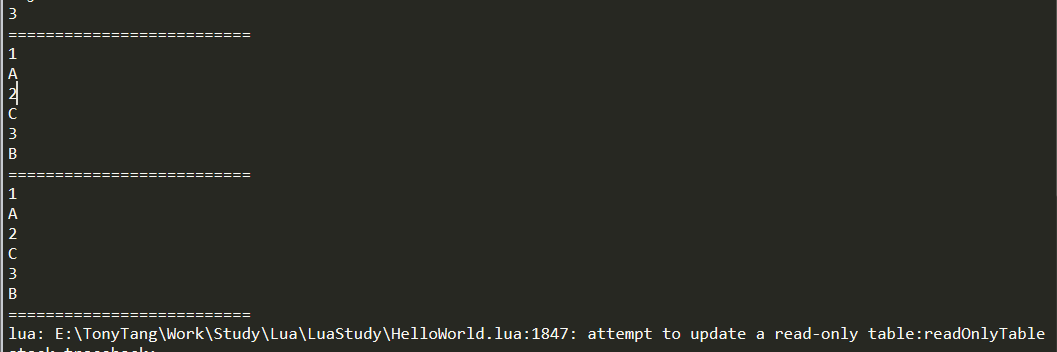
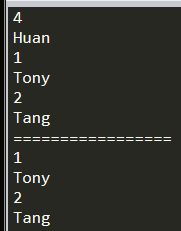
local originalTable = {} table.insert(originalTable, "A") table.insert(originalTable, "C") table.insert(originalTable, "B") local readOnlyTable = ReadOnly(originalTable, "readOnlyTable") print(#readOnlyTable) print("==========================") for key, value inpairs(readOnlyTable) do print(key) print(value) end print("==========================") for index, value inipairs(readOnlyTable) do print(index) print(value) end print("==========================") readOnlyTable[3] = "BB" --readOnlyTable[4] = "D"
--- 转换table成只读table ---@param t table @需要变成ReadOnly的table ---@param name string @ReadOnly table的名字(方便报错打印定位) ---@param depth number @只读table深度 ---@return table @转换后的只读table functionReadOnlyTable(t, name, depth) iftype(t) ~= "table"then error("not support none table to a recusive read-only table!") return t end depth = depth or1 if depth > 1then local nextDepth = depth - 1 for key, value inpairs(t) do iftype(value) == "table"then t[key] = ReadOnlyTable (t[key], name, nextDepth) end end end local proxy = {} local mt = { __index = t, __newindex = function(t,k,v) error(string.format("attempt to update a read-only table:%s", name)) end, __len = function() return #t end, __pairs = function() returnnext, t, nil end } setmetatable(proxy, mt) return proxy end
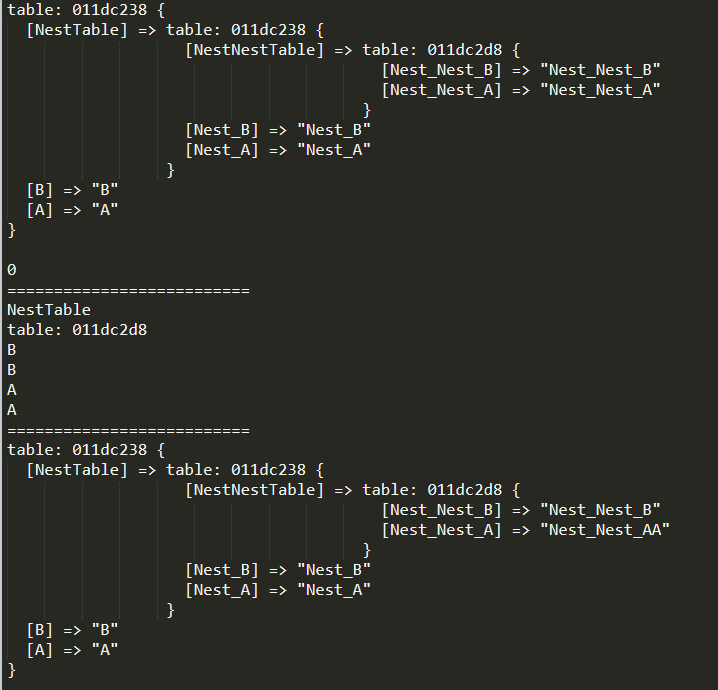
local originalTable = {} originalTable["A"] = "A" originalTable["NestTable"] = { ["Nest_A"] = "Nest_A", ["Nest_B"] = "Nest_B", ["NestNestTable"] = { ["Nest_Nest_A"] = "Nest_Nest_A", ["Nest_Nest_B"] = "Nest_Nest_B", } } originalTable["B"] = "B" local readOnlyTable = ReadOnlyTable(originalTable, "readOnlyTable", 2) print_table(readOnlyTable) print(#readOnlyTable) print("==========================") for key, value inpairs(readOnlyTable) do print(key) print(value) end print("==========================") --readOnlyTable["A"] = "AA" --> ReadOnly Error --readOnlyTable["NestTable"]["Nest_A"] = "Nest_AA" --> ReadOnly Error readOnlyTable["NestTable"]["NestNestTable"]["Nest_Nest_A"] = "Nest_Nest_AA" print_table(readOnlyTable)
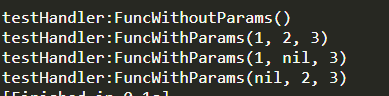
function testHandler:FuncWithParams(...) print("testHandler:FuncWithParams()") print(...) end function testHandler:TestHandlerBind(...) local handlerBind = _G.handlerBind(self, self.FuncWithParams, "param1", "param2") handlerBind(...) end
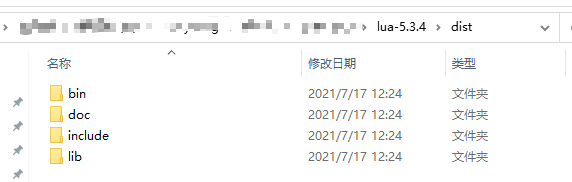
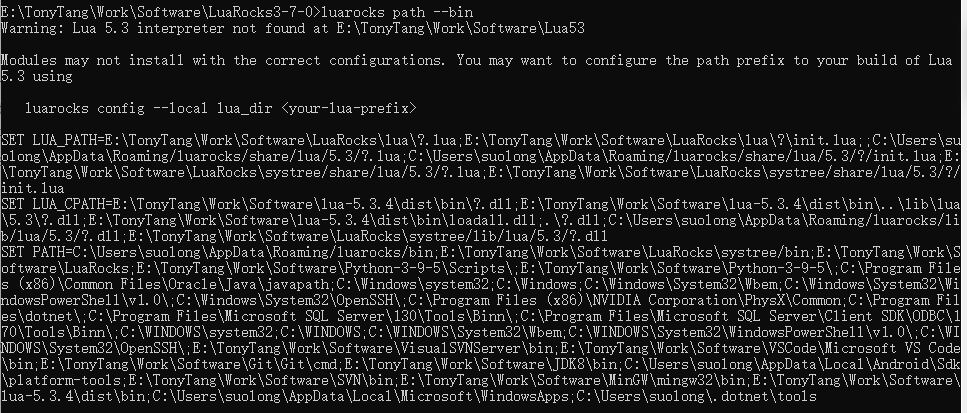
@echo off :: ======================== :: build.bat :: :: build lua to dist folder :: tested with lua-5.3.5 :: based on: :: https://medium.com/@CassiusBenard/lua-basics-windows-7-installation-and-running-lua-files-from-the-command-line-e8196e988d71 :: ======================== setlocal :: you may change the following variable’s value :: to suit the downloaded version set work_dir=%~dp0 :: Removes trailing backslash :: to enhance readability in the following steps set work_dir=%work_dir:~0,-1% set lua_install_dir=%work_dir%\dist set compiler_bin_dir=%work_dir%\tdm-gcc\bin set lua_build_dir=%work_dir% setpath=%compiler_bin_dir%;%path% cd /D %lua_build_dir% mingw32-make PLAT=mingw echo. echo **** COMPILATION TERMINATED **** echo. echo **** BUILDING BINARY DISTRIBUTION **** echo. :: create a clean “binary” installation mkdir%lua_install_dir% mkdir%lua_install_dir%\doc mkdir%lua_install_dir%\bin mkdir%lua_install_dir%\include mkdir%lua_install_dir%\lib copy%lua_build_dir%\doc\*.* %lua_install_dir%\doc\*.* copy%lua_build_dir%\src\*.exe %lua_install_dir%\bin\*.* copy%lua_build_dir%\src\*.dll %lua_install_dir%\bin\*.* copy%lua_build_dir%\src\luaconf.h %lua_install_dir%\include\*.* copy%lua_build_dir%\src\lua.h %lua_install_dir%\include\*.* copy%lua_build_dir%\src\lualib.h %lua_install_dir%\include\*.* copy%lua_build_dir%\src\lauxlib.h %lua_install_dir%\include\*.* copy%lua_build_dir%\src\lua.hpp %lua_install_dir%\include\*.* copy%lua_build_dir%\src\liblua.a %lua_install_dir%\lib\liblua.a echo. echo **** BINARY DISTRIBUTION BUILT **** echo. %lua_install_dir%\bin\lua.exe -e "print [[Hello!]];print[[Simple Lua test successful!!!]]" echo.
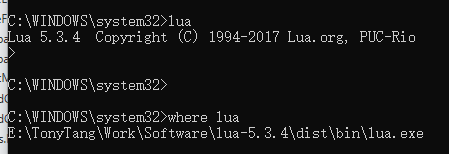
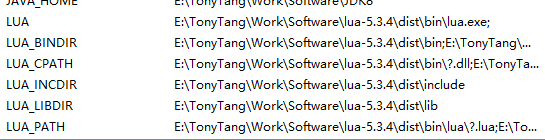
:: configure environment variable :: https://stackoverflow.com/a/21606502/4394850 :: http://lua-users.org/wiki/LuaRocksConfig :: SETX - Set an environment variable permanently. :: /m Set the variable in the system environment HKLM. setx LUA "%lua_install_dir%\bin\lua.exe" /m setx LUA_BINDIR "%lua_install_dir%\bin" /m setx LUA_INCDIR "%lua_install_dir%\include" /m setx LUA_LIBDIR "%lua_install_dir%\lib" /m
--- 最终目标1: {***}占位替换 --- 指定字符串,采用table里的key替换{key}成key对应的value functiontableGsub(s, tb) local result = s local replaceKey = nil local replaceValue = nil for key, value inpairs(tb) do replaceKey = string.format("{%s}", key) replaceValue = tostring(value) print(string.format("字符串:%s 替换:%s为%s", result, replaceKey, replaceValue)) result = gsub(result, replaceKey, replaceValue) print(string.format("替换后结果:%s", result)) end return result end
local content = "测试table替换,名字:{name} 年龄:{age} 性别:{sex} 名字2:{name} 名字3:{name}" local replaceTable = { name = "TonyTang", sex = "Man", age = 18, luckyNumber = 7, } local timeCounter = New(TimeCounter, "tableGsub") timeCounter:Start() content = tableGsub(content, replaceTable) timeCounter:Stop() print("替换后结果:replaceValue") print(content) print(string.format("替换耗时:%s", timeCounter.EllapseTime))
## Modify AndroidManifest File(修改AndroidMainifest.xml) defModifyAndroidManifest(): print("ModifyAndroidManifest()") lines = [] androidManifestFile = open(decompileAndroidManifestPath, mode='r') for line in androidManifestFile: line = ReplaceVersionCode(line, newVersionCode) lines.append(line) androidManifestFile.close()
androidManifestFile = open(decompileAndroidManifestPath, mode='w') for line in lines: androidManifestFile.write(line) androidManifestFile.close()
## Template Replace(模板替换AndroidManifest.xml里的值) defCheckTemplateReplace(line, qct, npn): # Python 2.X string.find #result = string.find(line, qct) # Python 3.X str.find result = line.find(qct) if result != -1: line = line.replace(qct, npn) return line
## Modify Version Code Value(修改AndroidManifest.xml里的version code值) ## 实际使用过程发现apktool反解APK后AndroidManifest.xmnl里没有对应versioncode值 ## 但以下代码如果存在versioncode="*"的话是能够替换成功的 defReplaceVersionCode(line, newverioncode): # Python 2.X string.find #result = string.find(line, versionCodeTemplate) # Python 3.X str.find result = line.find(versionCodeTemplate) if result != -1: line = re.sub('(versionCode="[0-9]*")', "versioncode=\"{}\"".format(newverioncode), line, 1) return line
## Copy new resource to APK(复制新资源到包内) defCopyNewResourceToAPK(): print("CopyNewResourceToAPK()") shutil.copy(newResourceName, "{}".format(replaceResourceDestinationPath))