///<summary> /// 4个点是否共面 ///</summary> ///<param name="a"></param> ///<param name="b"></param> ///<param name="c"></param> ///<param name="d"></param> ///<returns></returns> publicstaticboolIsCoplanarVector(Vector3 a, Vector3 b, Vector3 c, Vector3 d) { // 通过叉乘计算CA和CD的法线向量 var ab = b - a; var ca = a - c; var cd = d - c; var normal = Vector3.Cross(ca, cd); // 通过ab向量和CA和CD法线向量的点乘是否为0来判定是否垂直 // a,b,c,d从而判定出是否共面 if(Mathf.Approximately(Vector3.Dot(normal, ab), Mathf.Epsilon)) { returntrue; } returnfalse; }
///<summary> /// 4个点是否ab和cd线段是否相交 ///</summary> ///<param name="a"></param> ///<param name="b"></param> ///<param name="c"></param> ///<param name="d"></param> ///<returns></returns> publicstaticboolIsCross(Vector2 a, Vector2 b, Vector2 c, Vector2 d) { // 通过叉乘计算CA和CD的法线向量 var ab = b - a; var ac = c - a; var ad = d - a; // 叉乘判定两个向量的方向 // 判定ab是否在cd两侧 // 以ab为基准,如果ab叉乘ac或ad大于0表示逆时针反之顺时针,0表示两者方向相同 // 那么c和d要在ab同一侧,则ab叉乘ac的结果和ab叉乘ad的结果相乘需要>0 if (Vector2Utilities.Cross(ab, ac) * Vector2Utilities.Cross(ab, ad) >= 0) { returnfalse; } // 同理以cd为基准,如果ca和cb叉乘结果相乘>0则表示a和b在cd同一侧 var ca = a - c; var cb = b - c; var cd = d - c; if (Vector2Utilities.Cross(cd, ca) * Vector2Utilities.Cross(cd, cb) >= 0) { returnfalse; } returntrue; }
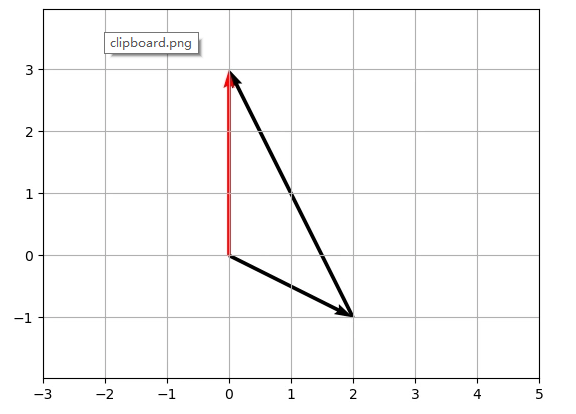
///<summary> /// 4个点是否ab和cd线段是否相交 ///</summary> ///<param name="a"></param> ///<param name="b"></param> ///<param name="c"></param> ///<param name="d"></param> ///<returns></returns> publicstaticboolIsCross(Vector3 a, Vector3 b, Vector3 c, Vector3 d) { // 通过叉乘计算CA和CD的法线向量 var ab = b - a; var ac = c - a; var ad = d - a; // 叉乘判定两个向量的方向 // 判定ab是否在cd两侧 // 以ab为基准,如果ac和ad叉乘结果再点乘>0则表示c和d在ab同一侧 // 3D向量叉乘是向量,通过计算两个叉乘向量的点乘判定是否同方向从而判定是否在一侧 if (Vector3.Dot(Vector3.Cross(ab, ac), Vector3.Cross(ab, ad)) >= 0) { returnfalse; } // 同理以cb为基准,如果ca和cb叉乘结果再点乘>0表示a和b在cd同一侧 var ca = a - c; var cb = b - c; var cd = d - c; if (Vector3.Dot(Vector3.Cross(cd, ca), Vector3.Cross(cd, cb)) >= 0) { returnfalse; } returntrue; }
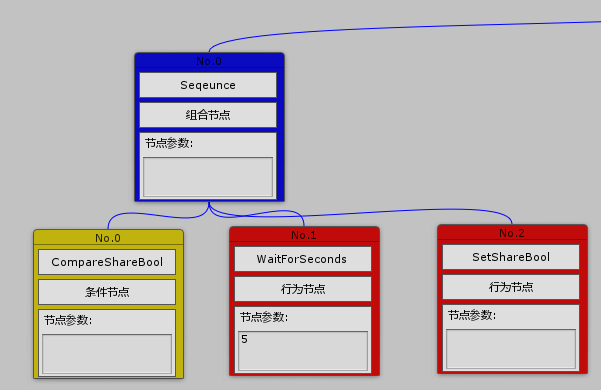
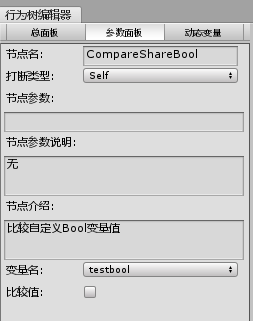
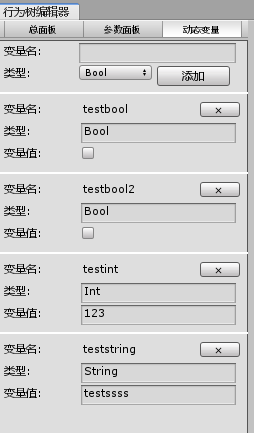
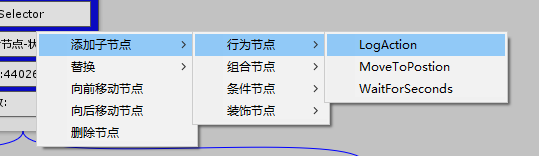
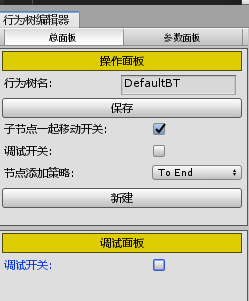
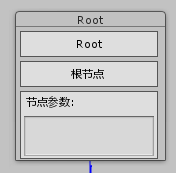
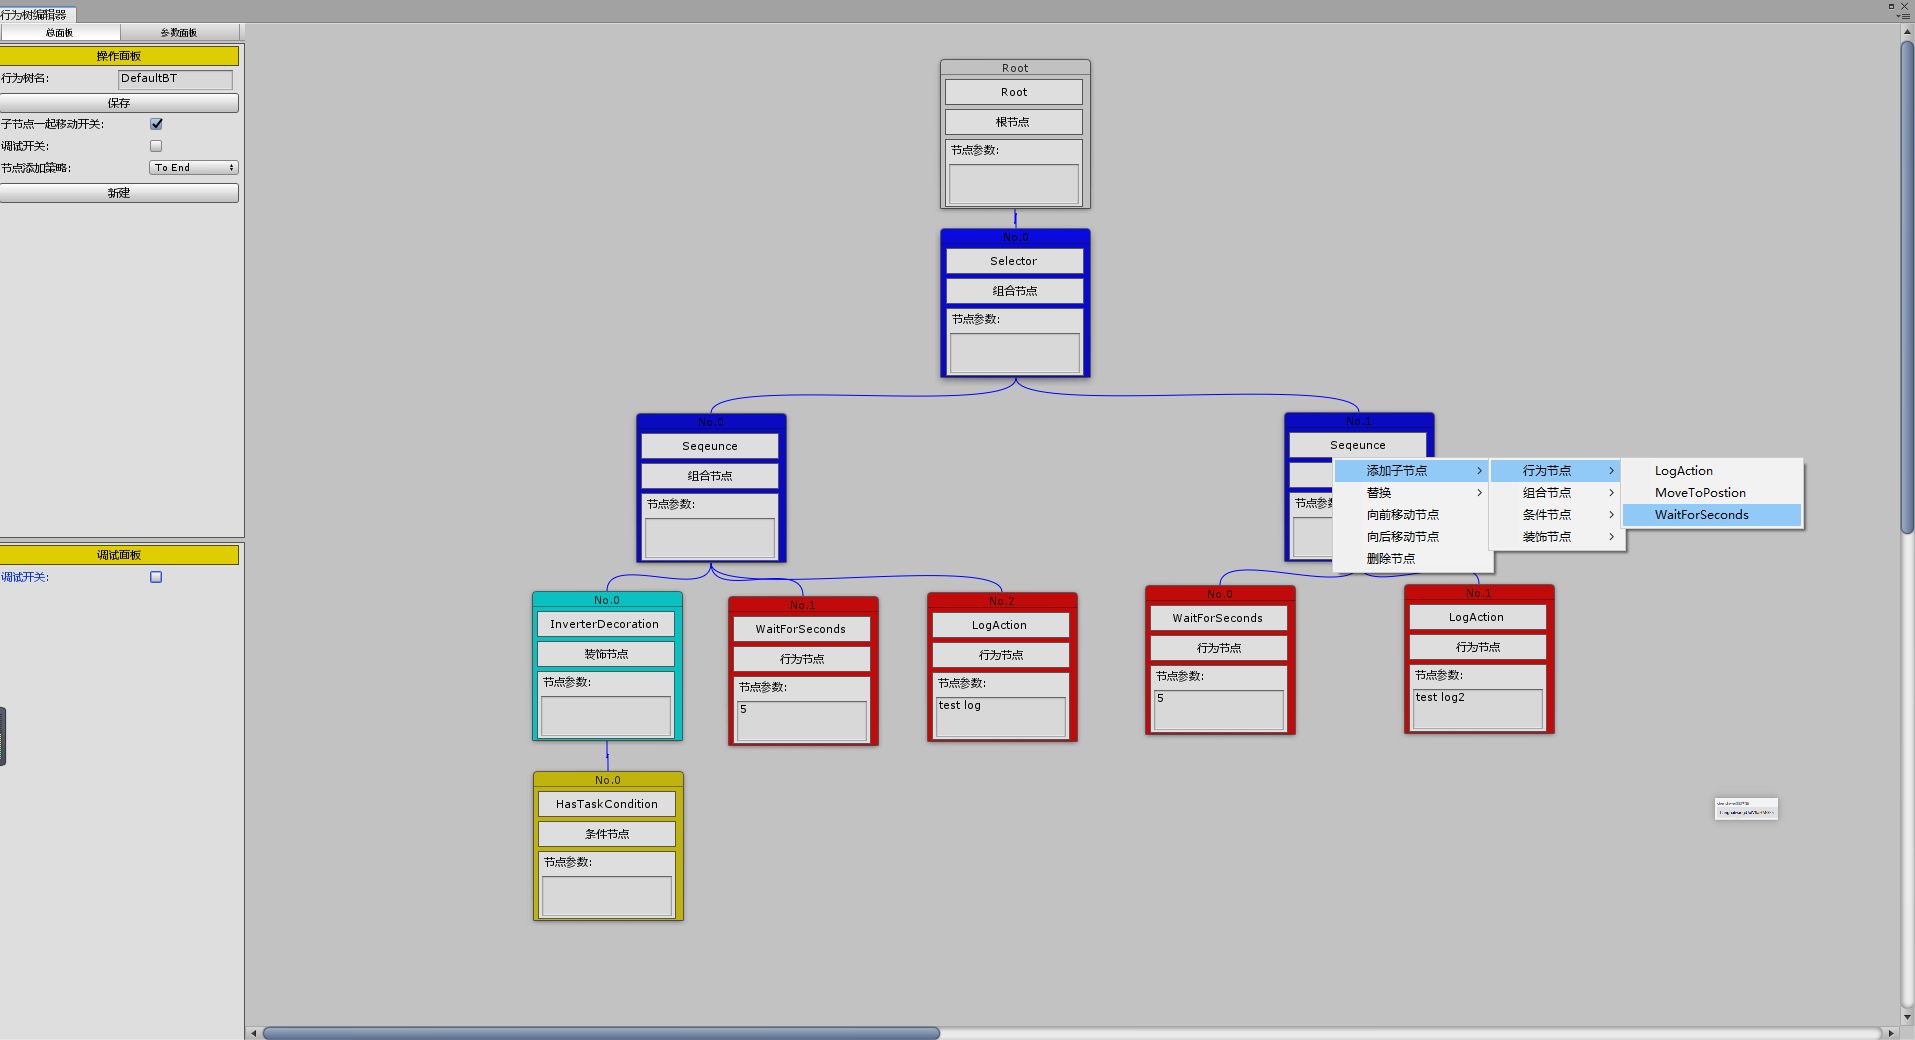
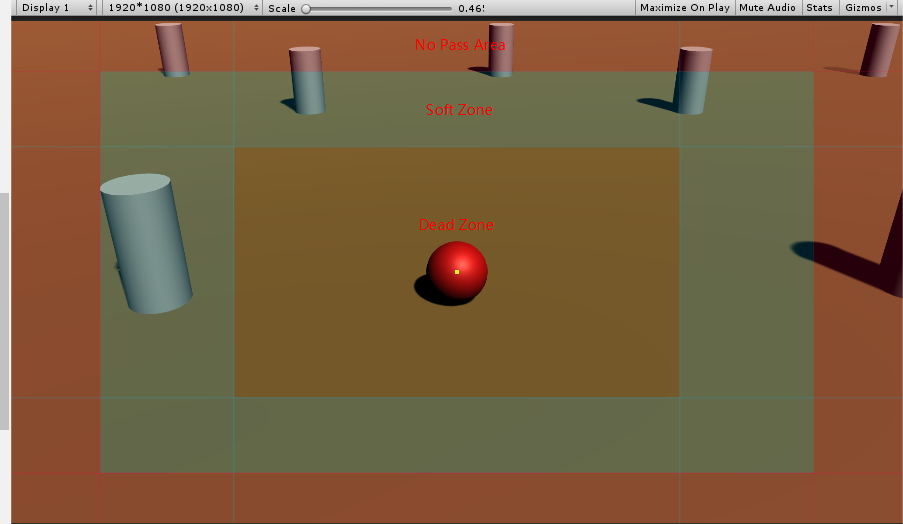
本章节博客是在项目需求设计支持Lua AI系统的前提下,驱动深入学习行为树设计实现。关于AI的相关基础概念学习可以参考:Programming Game AI by Example。而本章节的重点就是行为树,最终目的是实现一份Unity里能够支持项目级使用的支持Lua测使用AI的行为树框架设计。源代码考虑到公司正在使用所以暂时不放源码,大家可以参考设计思路自行实现。
///<summary> /// 移除无效的脚本 ///</summary> privatestaticvoidRemoveAllMissingScripts(GameObject go) { Component[] components = go.GetComponents<Component>(); var r = 0; var serializedObject = new SerializedObject(go); var prop = serializedObject.FindProperty("m_Component"); for (int i = 0; i < components.Length; i++) { if (components[i] == null) { string s = go.name; Transform t = go.transform; while (t.parent != null) { s = t.parent.name +"/"+s; t = t.parent; } Debug.Log (s + " has an empty script attached in position: " + i, go);
影响SpriteAtlas是否需要采用Later Bind(触不触发SpriteAtlasManager.atlasRequested接口,通过这个接口结合图集Variant我们可以做到例如不同平台加载不同图集的适配)。反之勾选Include in Build在依赖使用时会自动加载依赖的Sprite Atlas。 这里貌似有些Unity版本有个Bug,勾选Include in Build会导致资源打包冗余
在加载使用SpriteAtlas(仅当设置成不勾选Include in Build)的相关资源时(比如UI Prefab)上诉回调会被触发完成对SpriteAtlas的加载,确保引用的Sprite能正确显示。同时这一机制就允许我们做到不同平台的不同图集资源加载适配这样的功能。
疑问:
Later Bind只是加载SpriteAtlas提供的一个回调接口(无论是主动还是被动(依赖)加载),回调接口内只知道加载了指定的SpriteAtlas却不知道具体的详细用法,这样一来基于对象绑定和索引计数的资源管理系统就无法正确的加载管理了(因为被动(依赖)加载得不到SpriteAtlas的依赖信息)。
// Factory method that generates a playable based on this asset publicoverride Playable CreatePlayable(PlayableGraph graph, GameObject go) { var playable = ScriptPlayable<EventDispatcherPlayable>.Create(graph); playable.GetBehaviour().EventId = EventId; return playable; } }
// Called when the owning graph starts playing // Playable开始执行时 publicoverridevoidOnGraphStart(Playable playable) {
}
// Called when the owning graph stops playing // Playable停止执行时 publicoverridevoidOnGraphStop(Playable playable) {
}
// Called when the state of the playable is set to Play // 触发Playable执行时 publicoverridevoidOnBehaviourPlay(Playable playable, FrameData info) { Debug.Log(string.Format("OnBehaviourPlay() 分发事件 : {0}", EventId)); }
// Called when the state of the playable is set to Paused // Playable暂停执行时 publicoverridevoidOnBehaviourPause(Playable playable, FrameData info) {
}
// Called each frame while the state is set to Play // Playable更新执行时 publicoverridevoidPrepareFrame(Playable playable, FrameData info) {
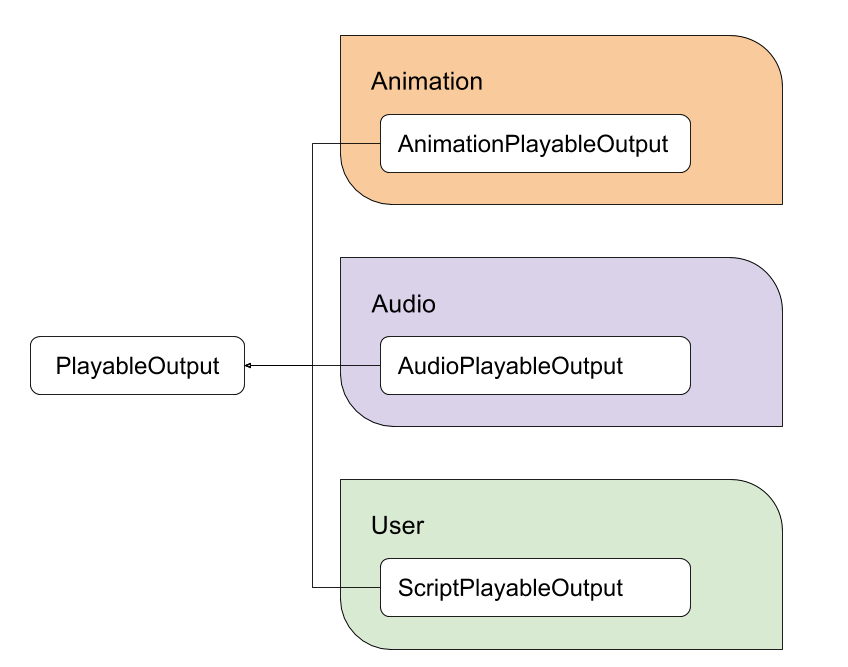
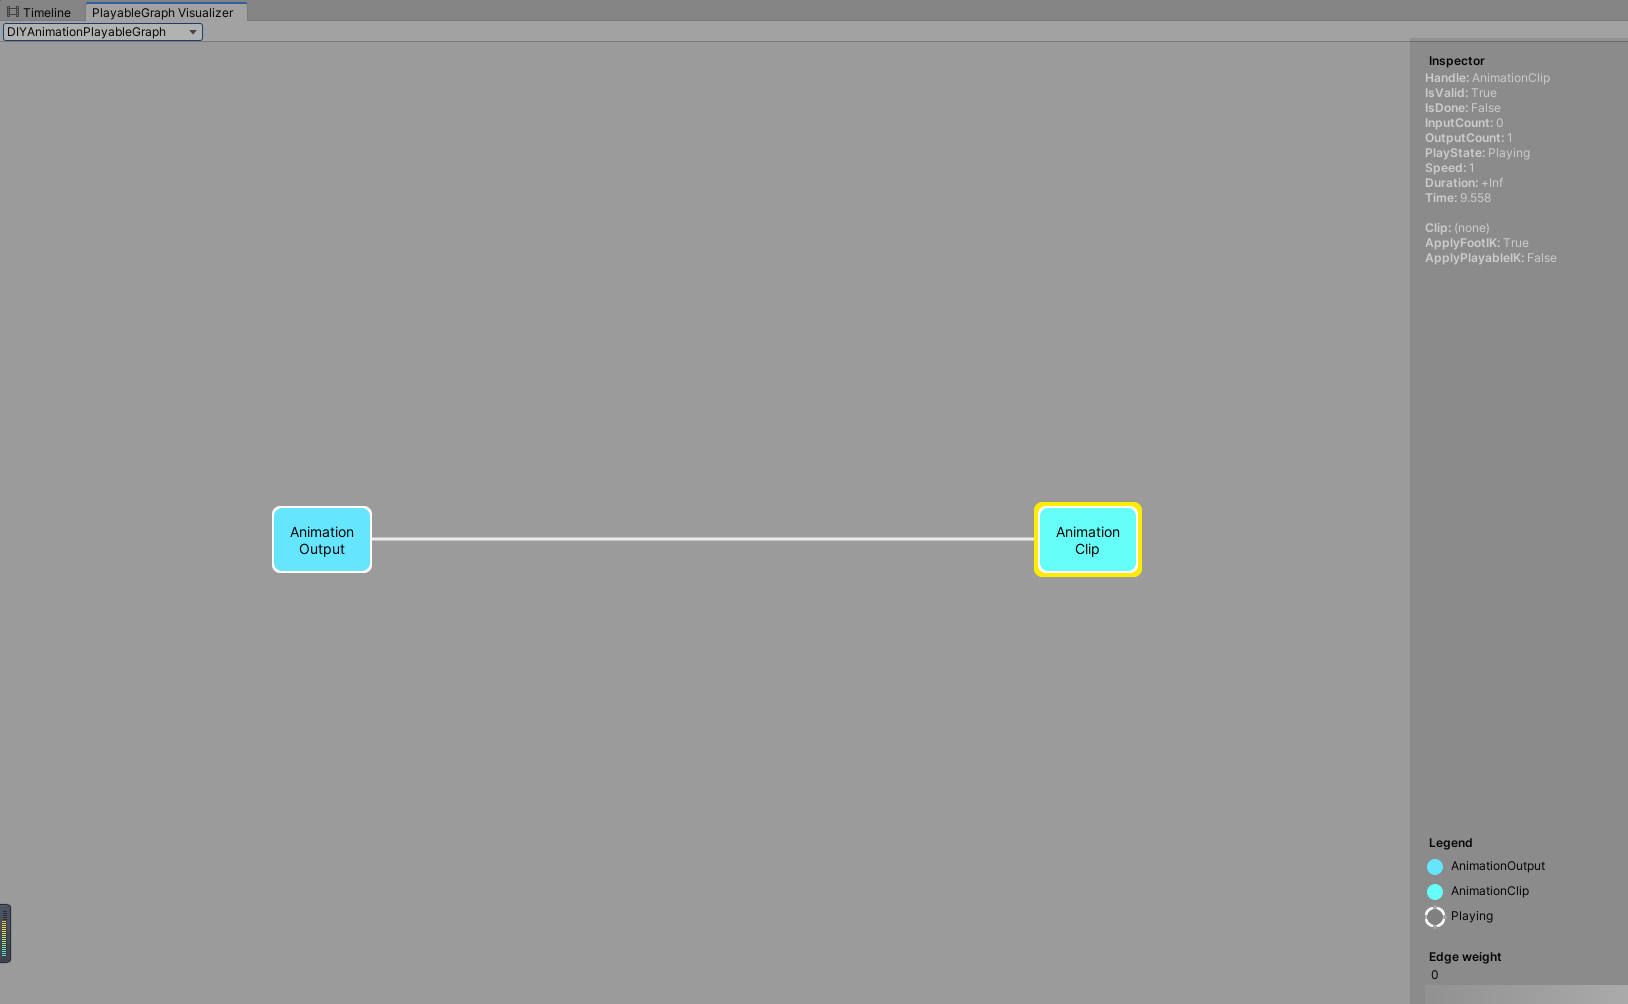
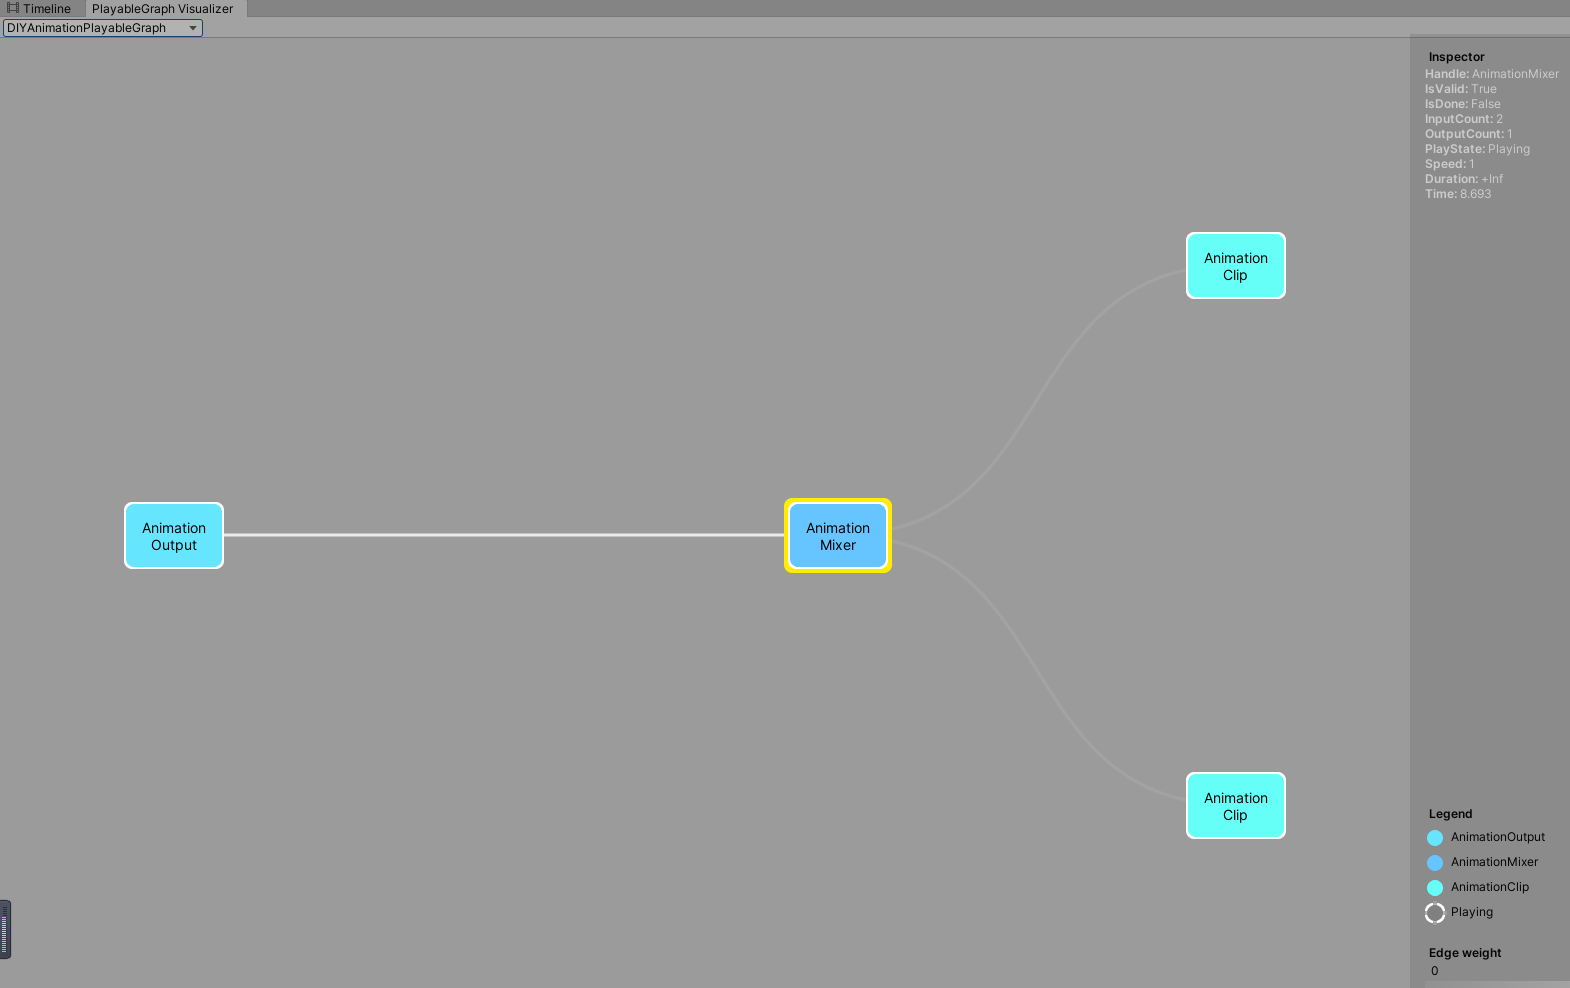
The Playables API allows for dynamic animation blending. This means that objects in the scenes could provide their own animations. For example, animations for weapons, chests, and traps could be dynamically added to the PlayableGraph and used for a certain duration.
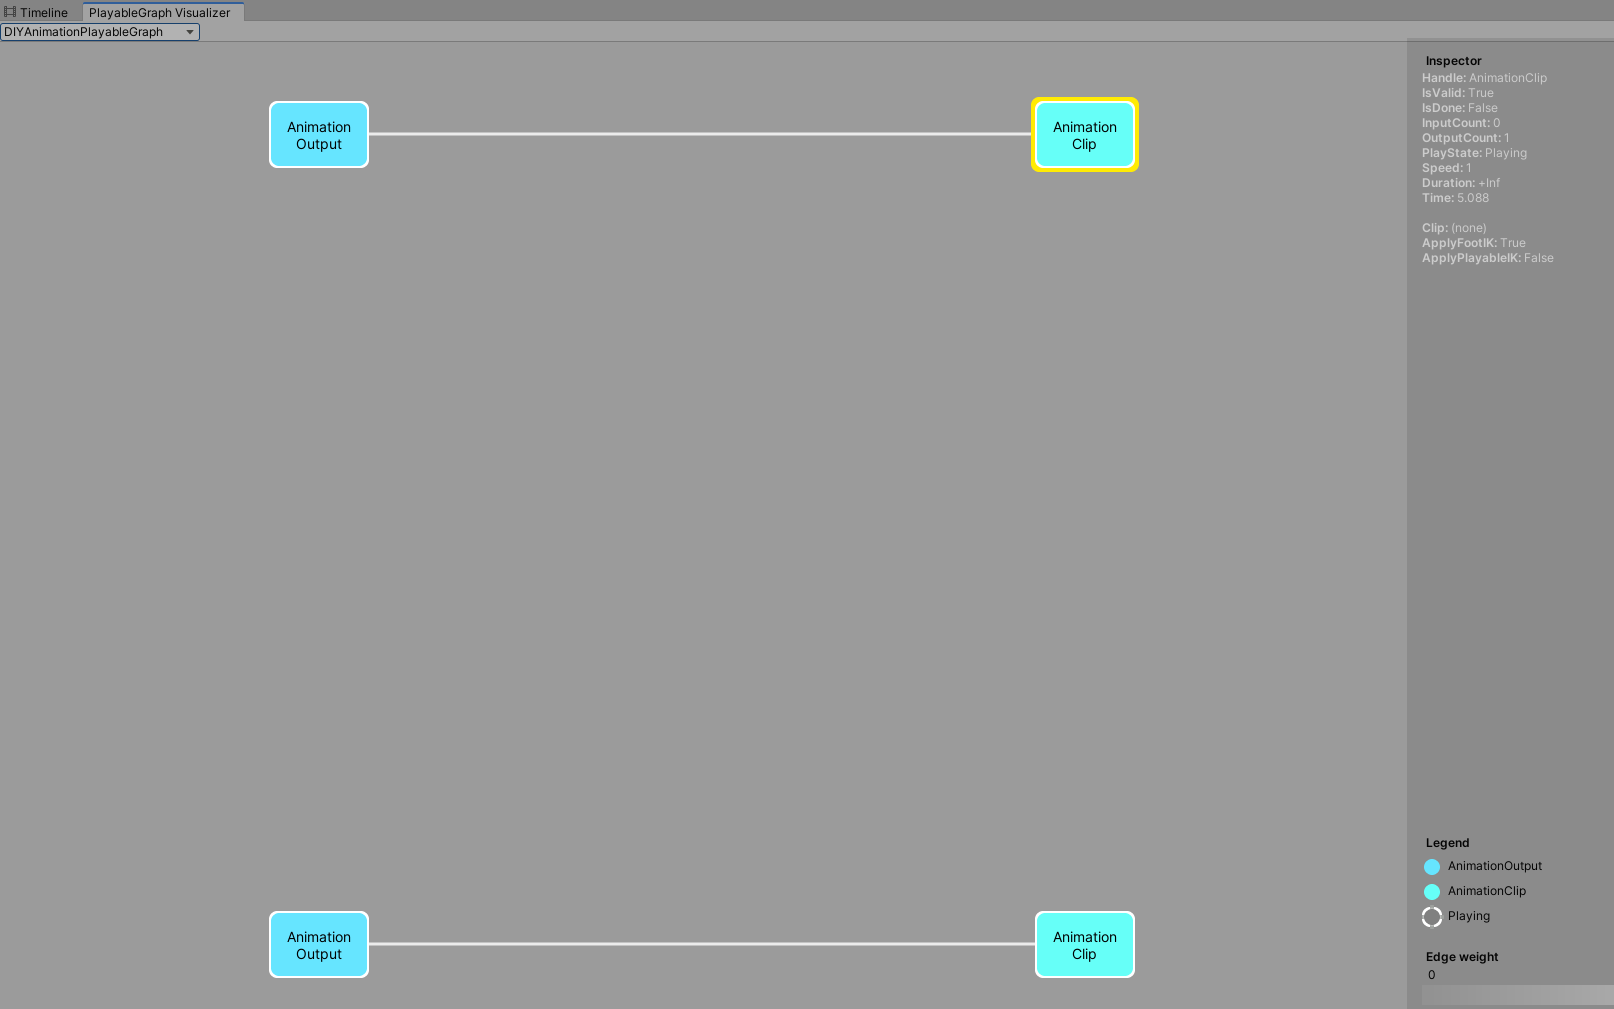
The Playables API allows you to easily play a single animation without the overhead involved in creating and managing an AnimatorController asset.
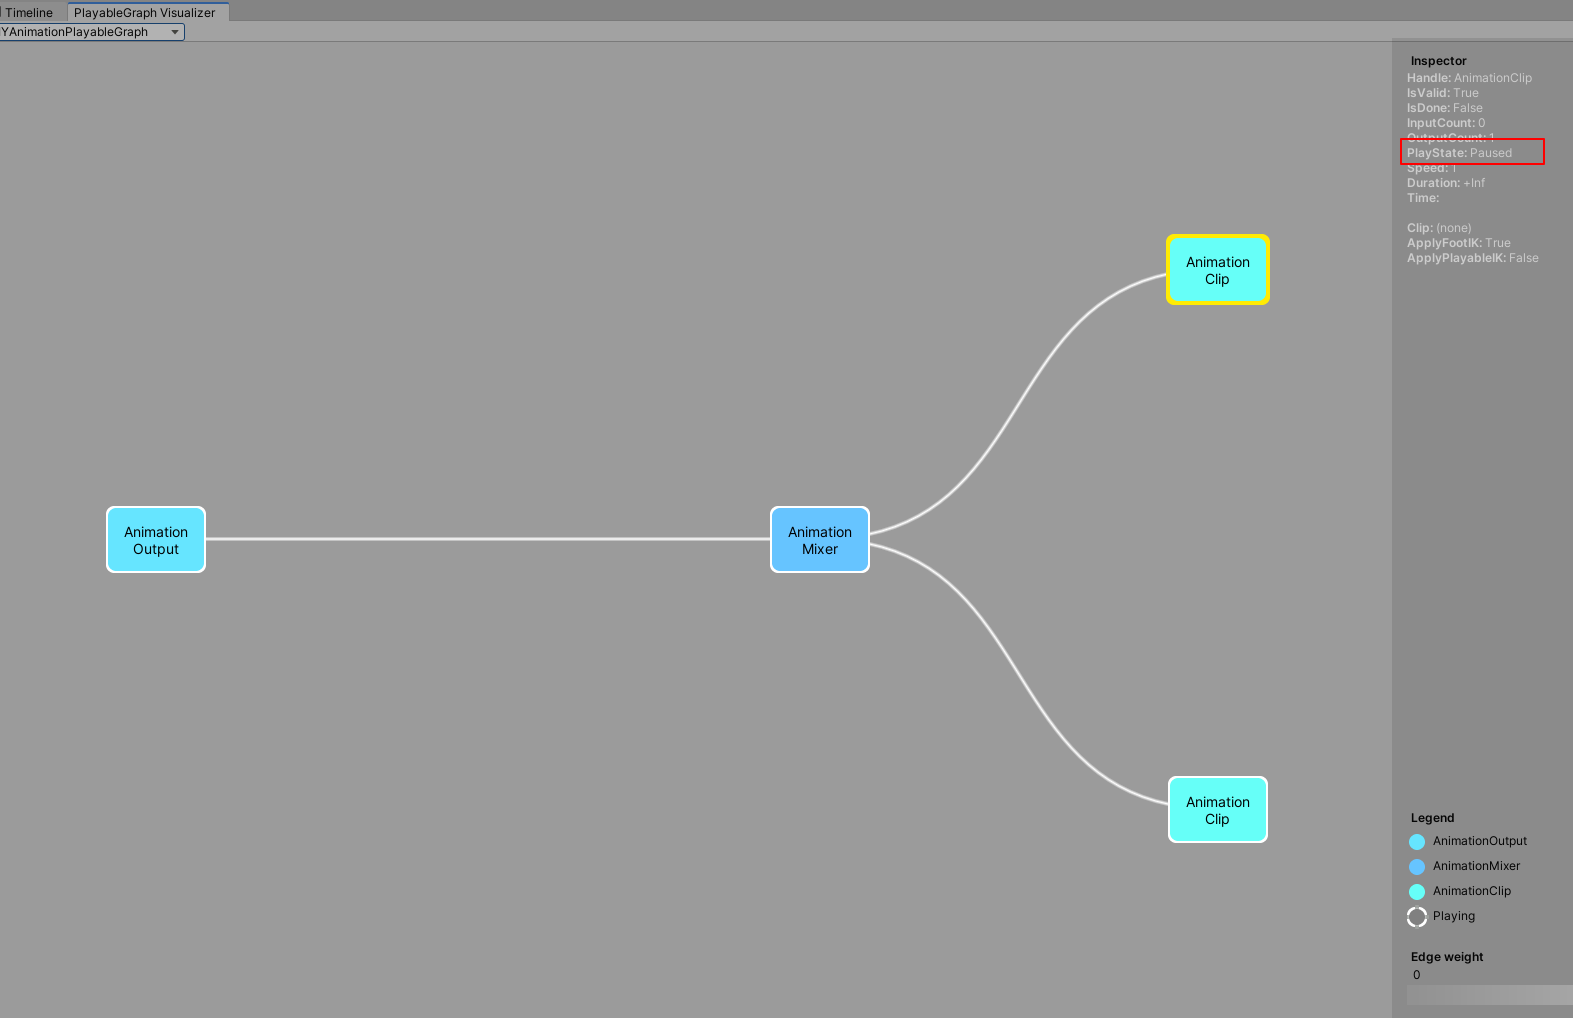
The Playables API allows users to dynamically create blending graphs and control the blending weights directly frame by frame.
A PlayableGraph can be created at runtime, adding playable node as needed, based on conditions. Instead of having a huge “one-size-fit-all” graph where nodes are enabled and disabled, the PlayableGraph can be tailored to fit the requirements of the current situation.
// Called each frame while the state is set to Play // Playable更新执行时 publicoverridevoidProcessFrame(Playable playable, FrameData info, object playerData) { TryPlayAudio(); }
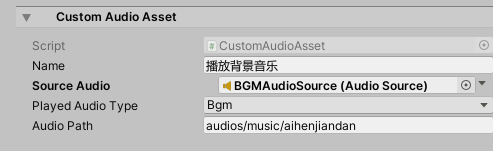
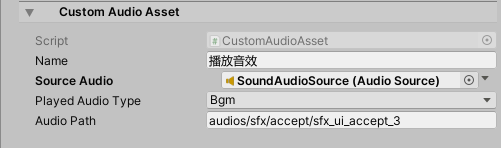
// Called when the state of the playable is set to Paused // Playable暂停执行时 publicoverridevoidOnBehaviourPause(Playable playable, FrameData info) { Debug.Log($"AudioBehaviour:OnBehaviourPause() 执行指令:{Name}"); if(SourceAudio != null && SourceAudio.clip != null) { SourceAudio.clip = null; } mIsPlayingAudio = false; } ///<summary> /// 尝试执行音乐播放 ///</summary> privatevoidTryPlayAudio() { if(mIsPlayingAudio == false && SourceAudio != null) { if (PlayedAudioType == CustomAudioAsset.AudioType.Bgm) { // TODO: 走背景音乐播放接口 SourceAudio.clip = Resources.Load<AudioClip>(AudioPath); SourceAudio.Play(); } elseif (PlayedAudioType == CustomAudioAsset.AudioType.Sound) { // TODO: 走音效播放接口 SourceAudio.clip = Resources.Load<AudioClip>(AudioPath); SourceAudio.Play(); } mIsPlayingAudio = true; } } }
// Called each frame while the state is set to Play // Playable更新执行时 publicoverridevoidProcessFrame(Playable playable, FrameData info, object playerData) { if(mSourceAudio == null) { mSourceAudio = playerData as AudioSource; } TryPlayAudio(); } ****** }
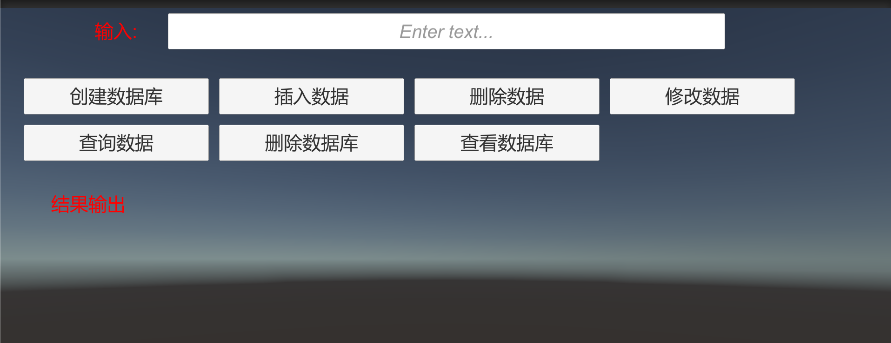
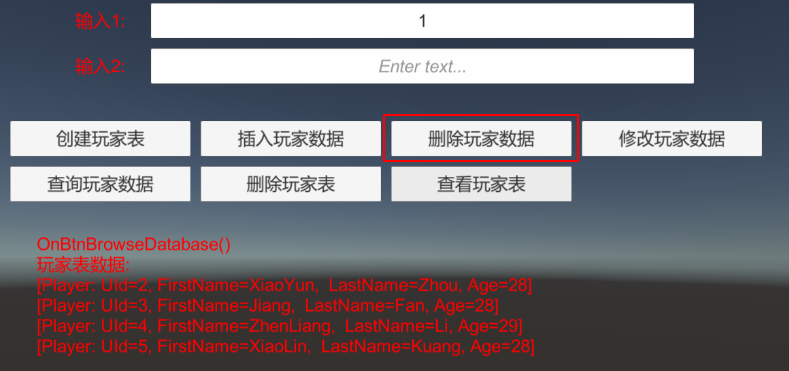
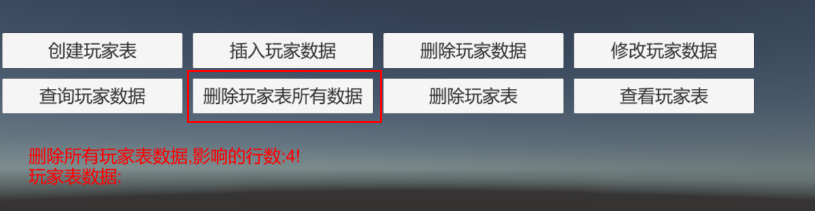
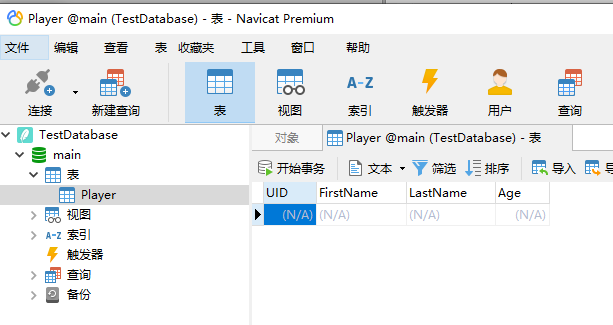
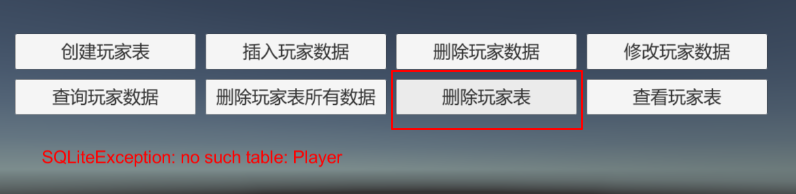
///<summary> /// Executes a "drop table" on the database. This is non-recoverable. ///</summary> publicintDropTable<T>() { var map = GetMapping (typeof (T));
var query = string.Format("drop table if exists \"{0}\"", map.TableName);
using Sirenix.OdinInspector; using Sirenix.OdinInspector.Editor; using Sirenix.Utilities; using System; using System.Collections; using UnityEditor; using UnityEngine;
//添加MenuItem节点 var custommenuitemdata = new CustomMenuItem.CustomMenuItemContentClass(1, "CustomMenuItemContentClass", null, false); var custommenuitemobj = new CustomMenuItem(menutree, "默认菜单子子节点名", custommenuitemdata); menutree.AddMenuItemAtPath("菜单子节点1", custommenuitemobj);
var customdrawmenuitemdata = new CustomDrawMenuItem.CustomDrawMenuItemContentClass(1, "CustomDrawMenuItemContentClass", null, false); var customdrawmenuitemobj = new CustomDrawMenuItem(menutree, "自定义菜单子子节点名", customdrawmenuitemdata); menutree.AddMenuItemAtPath("菜单子节点2", customdrawmenuitemobj);
using Sirenix.OdinInspector; using Sirenix.OdinInspector.Editor; using Sirenix.Utilities.Editor; using System; using System.Collections.Generic; using UnityEditor; using UnityEngine;
using Sirenix.OdinInspector; using Sirenix.OdinInspector.Editor; using System; using System.Collections; using System.Collections.Generic; using System.Reflection; using UnityEngine;