前言 本章节是深入UGUI多分辨率和异形屏的UI适配解决方案深入实战学习。
用到的东西:
Unity6000.3.19f1,CodeX,VSCode,Copilot,URP
UGUI适配 UGUI的UI适配核心目的是让我们的UI内容在不同的分辨率和特殊屏幕能在合适的位置显示给玩家,不至于出现核心内容看不到或者UI按钮被遮挡等显示问题。
适配结果有几个基础需求要满足:
UI必须充满屏幕,不能有黑边 UI必须在屏幕中,不能超出屏幕 UI在多分辨率下的位置和尺寸保持一致 UI不能变形 重要信息UI不能出现在特殊位置(比如刘海屏矩形刘海,水滴屏摄像头,挖孔屏特殊挖空等)
多分辨率适配 先不考虑特殊屏幕的前提下,来看看UGUI的多分辨率适配方案是怎样的。
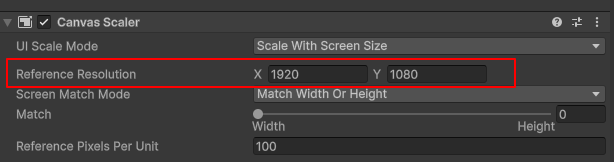
设计分辨率这里我选择1920X1080(16:9),所以我把Canvas Scaler的Reference Resolution设置成1920X1080,Canvas Scales的Screen Match Mode设置成Match Width Or Height,Match设置成0(Width适配)
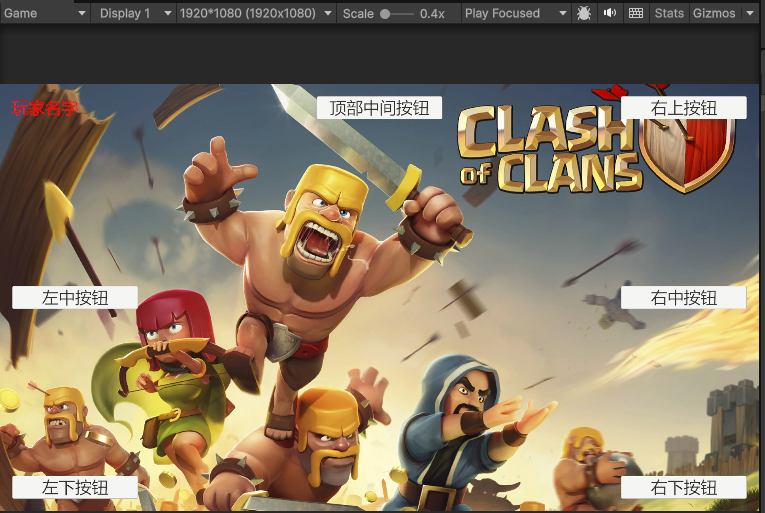
此时策划说我们要做一个窗口,包含一张全屏背景图(美术出了一张1920X1080的背景图 ),左上角显示玩家名字文本,左下,左中,右下,右中,右上和上中分别显示一个操作按钮。
所以我做了一个背景图片设置成固定宽高为1920X1080的Image和根据位置设置指定轴心(Pivot)和锚点(Anchors)去适配目标位置显示,如果设备分辨率就是1920X1080则内容完美显示:
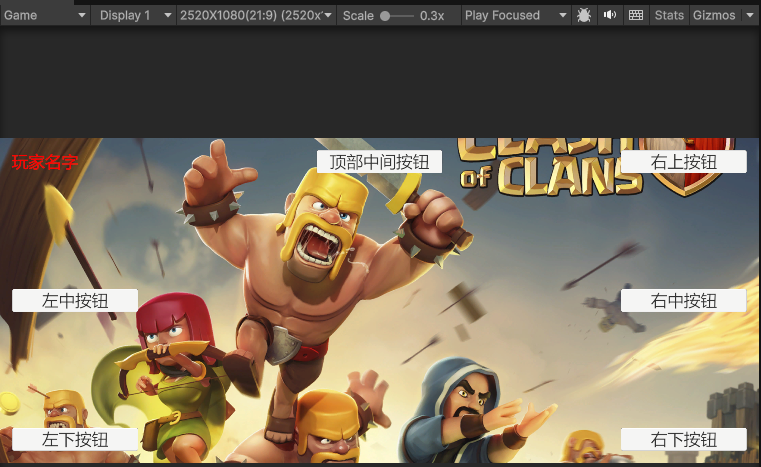
此时如果我将分辨率调整成2520X1080(21:9) :
此时设备分辨率宽高比例大于设计分辨率宽高比例 ,可以看到背景图因为前面的适配方式是**Match Width Or Height(Match值为0适配宽度)**的自适应后背景图变成宽度铺满显示但高度上下被裁剪显示,这样能符合背景图片不拉伸但铺满的需求,只是因为上下被裁剪不少所以设计全屏1920X1080背景图时要注意上下流出一部分可裁剪空间。
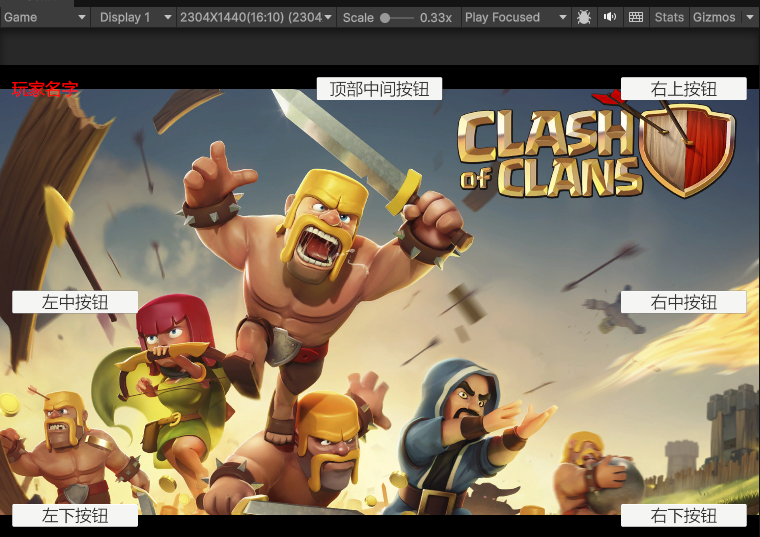
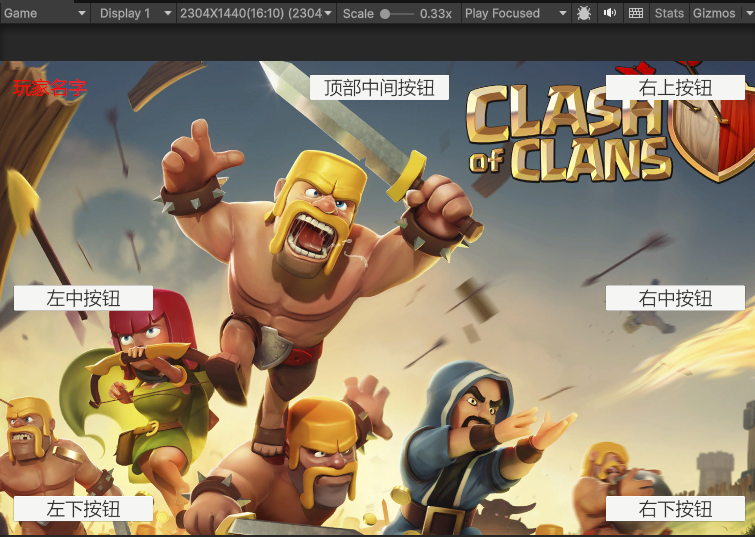
如果我将分辨率调整成2304X1440(16:10) :
此时设备分辨率宽高比例小于设计分辨率宽高比例 ,可以看到背景图因为前面的适配方式是**Match Width Or Height(Match值为0适配宽度)**的自适应后背景图编程宽度铺满但高度显示不全镂空显示,这并不符合我们不希望背景图铺满的需求。
此时为了全屏背景不拉伸能铺满,我们应该采取Match Width Or Height(Match值为1适配高度) :
可以看到修改成Match值为1适配高度后,高度铺满了符合背景铺满不拉伸的需求,只是背景图左右两边被裁剪了一部分,只是因为左右被裁剪不少所以设计全屏1920X1080背景图时要注意左右流出一部分可裁剪空间。
从上面可以看出关于屏幕适配,我们的Canvas Scaler的Match Width Or Height的Match值不是一层不变的。在屏幕宽高分辨率大于设计宽高分辨率时我们要适配宽度(Match值为0)从而实现上下裁剪全屏铺满效果。在屏幕宽高分辨率小于设计宽高分辨率时我们要适配高度(Match值为1)从而实现左右裁剪全屏铺满效果。
上述规则其实等价于将Canvas Scaler的Screen Match Mode设置成Shrink,至于为什么市面上大部分都选择代码动态计算Match Width Or Height的Match值,个人暂时还没想明白,目前我暂时直接使用Shrink的设置方式。
Note:
2026/09/20截止主流移动端设备分辨率为16:9,极端分辨率分别为21:9和16:10(含手机和平板)
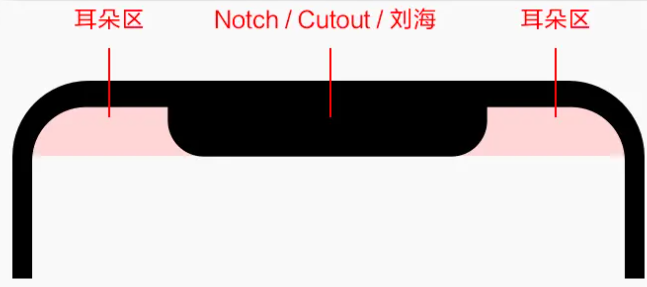
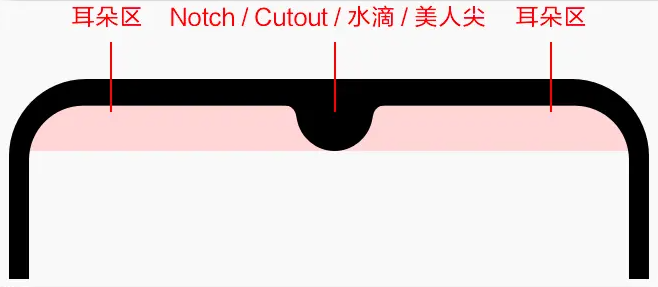
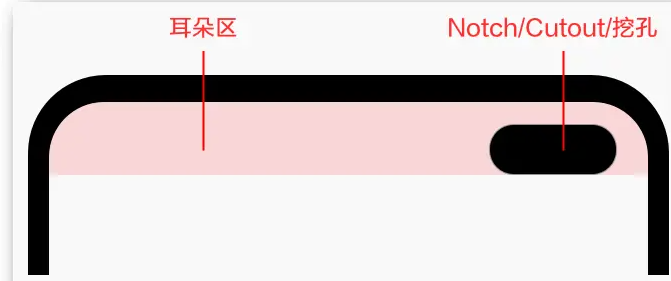
异形屏适配 前面解决的多分辨率背景适配的问题,但后来移动设备除了很多各式各样的屏幕,比如刘海屏矩形刘海,水滴屏摄像头,挖孔屏特殊挖空等。
刘海屏: 在屏幕上方中间位置,有一块矩形刘海
水滴屏:在屏幕上方中间有一个水滴状摄像头
挖孔屏:屏幕上方不规则的挖空,一般是摄像头位置
可以看出上述形状各异的屏幕,导致特殊区域如果显示UI会被遮挡看不到或无法操作。
Unity Editor提供了快速模拟移动设备显示的工具(Unity Editor->Window->General->Device Simulator) ,让我们来模拟看看效果:
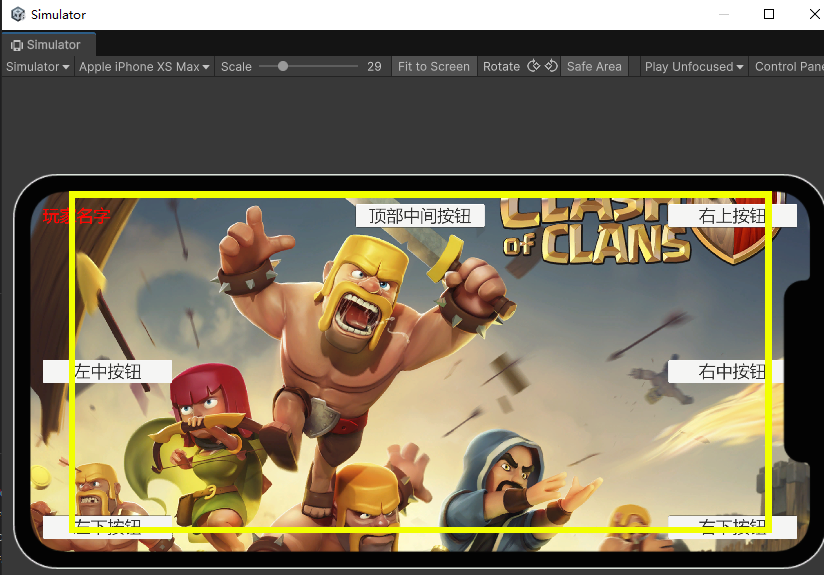
可以看到在Apple Iphone XS Max设备上模拟最右侧被所谓的刘海屏挡住了部分按钮显示,黄色的区域是我勾上Safe Area会指出来的安全区域
要解决上述问题,这里要引出一个概念安全区域 。
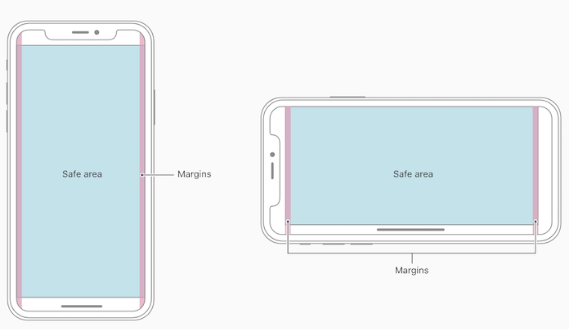
安全区域:指的是一个可视窗口范围,处于安全区域的内容不受圆角(corners)、齐刘海(sensor housing)、小黑条(Home Indicator)的影响。
下方蓝色区域即为安全区域:
安全区域已经给出了安全显示内容的范围,那么我们处理异形屏的显示方案最简单的就是将窗口内容显示都放到这个安全区域即可。
ScreenSafeAreaService.cs(负责统一处理安全区域的计算处理,挂载到游戏一开始就能启动的GameObejct身上)
1
2
3
4
5
6
7
8
9
10
11
12
13
14
15
16
17
18
19
20
21
22
23
24
25
26
27
28
29
30
31
32
33
34
35
36
37
38
39
40
41
42
43
44
45
46
47
48
49
50
51
52
53
54
55
56
57
58
59
60
61
62
63
64
65
66
67
68
69
70
71
72
73
74
75
76
77
78
79
80
81
82
83
84
85
86
87
88
89
90
91
92
93
94
95
96
97
98
99
100
101
102
103
104
105
106
107
108
109
110
111
112
113
114
115
116
117
118
119
120
121
122
123
124
125
126
127
128
129
130
131
132
133
134
135
136
137
138
139
140
141
142
143
144
145
146
147
148
149
150
151
152
153
154
155
156
157
158
159
160
161
162
163
164
165
166
167
168
169
using System;using UnityEngine;using Screen = UnityEngine.Device.Screen;[DefaultExecutionOrder(-1000) ] [DisallowMultipleComponent ] public sealed class ScreenSafeAreaService : MonoBehaviour { public readonly struct Snapshot { public readonly int ScreenWidth; public readonly int ScreenHeight; public readonly Rect SafeArea; public Vector2 AnchorMin { get { return new Vector2(SafeArea.xMin / ScreenWidth, SafeArea.yMin / ScreenHeight); } } public Vector2 AnchorMax { get { return new Vector2(SafeArea.xMax / ScreenWidth, SafeArea.yMax / ScreenHeight); } } public Snapshot (int screenWidth, int screenHeight, Rect safeArea { ScreenWidth = screenWidth; ScreenHeight = screenHeight; SafeArea = safeArea; } } public static ScreenSafeAreaService Instance { get ; private set ; } public event Action<Snapshot> Changed; public bool HasSnapshot { get ; private set ; } public Snapshot Current { get ; private set ; } private void Awake () { if (Instance != null && Instance != this ) { enabled = false ; Destroy(this ); return ; } Debug.Log($"ScreenSafeAreaService.Instance初始化完成!" ); Instance = this ; DontDestroyOnLoad(gameObject); CheckForChanges(); } private void Update () { CheckForChanges(); } private void OnDestroy () { if (Instance == this ) { Instance = null ; } Changed = null ; } private void CheckForChanges () { int width = Screen.width; int height = Screen.height; if (width <= 0 || height <= 0 ) { return ; } Rect raw = Screen.safeArea; float xMin = Mathf.Clamp(raw.xMin, 0f , width); float yMin = Mathf.Clamp(raw.yMin, 0f , height); float xMax = Mathf.Clamp(raw.xMax, xMin, width); float yMax = Mathf.Clamp(raw.yMax, yMin, height); if (!(xMax > xMin) || !(yMax > yMin)) { return ; } Rect safeArea = Rect.MinMaxRect(xMin, yMin, xMax, yMax); if (HasSnapshot && Current.ScreenWidth == width && Current.ScreenHeight == height && Current.SafeArea.Equals(safeArea)) { return ; } Current = new Snapshot(width, height, safeArea); HasSnapshot = true ; Changed?.Invoke(Current); Debug.Log($"检测到屏幕分辨率变化,最新宽度: {width} , 最新高度: {height} , 安全区: {safeArea} " ); } }
WindowSafeAreaAdapter.cs(负责单个窗口的安全区域RectTransform设置,挂载到每一个需要安全区适配的窗口根节点上)
1
2
3
4
5
6
7
8
9
10
11
12
13
14
15
16
17
18
19
20
21
22
23
24
25
26
27
28
29
30
31
32
33
34
35
36
37
38
39
40
41
42
43
44
45
46
47
48
49
50
51
52
53
54
55
56
57
58
59
60
61
62
63
64
65
66
67
68
69
70
71
72
73
74
75
76
77
78
79
80
81
82
83
84
using UnityEngine;[DisallowMultipleComponent ] [RequireComponent(typeof(Canvas)) ] public sealed class WindowSafeAreaAdapter : MonoBehaviour { private ScreenSafeAreaService service; private RectTransform mContentRoot; private void Awake () { mContentRoot = GetComponent<RectTransform>(); service = ScreenSafeAreaService.Instance; if (service == null ) { Debug.LogError($"必须先初始化并启用,再创建窗口。" , this ); service = null ; return ; } service.Changed += Apply; if (service.HasSnapshot) { Apply(service.Current); } } private void OnDestroy () { if (service != null ) { service.Changed -= Apply; } service = null ; } private void Apply (ScreenSafeAreaService.Snapshot snapshot ) { if (mContentRoot == null ) { return ; } Vector2 min = snapshot.AnchorMin; Vector2 max = snapshot.AnchorMax; if (mContentRoot.anchorMin == min && mContentRoot.anchorMax == max && mContentRoot.offsetMin == Vector2.zero && mContentRoot.offsetMax == Vector2.zero) { return ; } mContentRoot.anchorMin = min; mContentRoot.anchorMax = max; mContentRoot.offsetMin = Vector2.zero; mContentRoot.offsetMax = Vector2.zero; Debug.Log($"应用屏幕安全区快照,AnchorMin: {min} , AnchorMax: {max} ,OffsetMin: {mContentRoot.offsetMin} , OffsetMax: {mContentRoot.offsetMax} " ); } }
上面放了详细代码,就不详细介绍了,核心就是根据屏幕宽高和安全区域大小计算出窗口应该显示的位置大小从而实现将窗口只显示到安全区域内的显示。
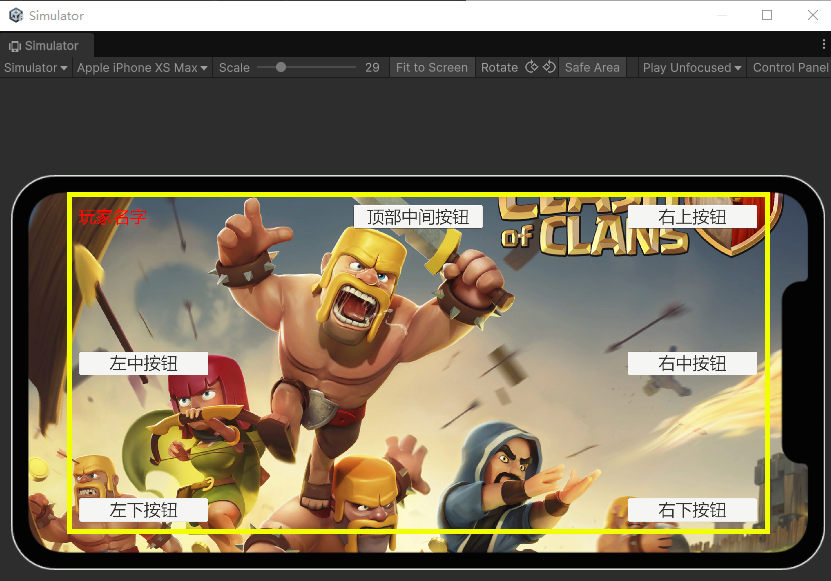
通过Unity的Device Simulator,我成功在Editor模拟了Apple Iphone XS Max的真机适配效果,可以看到因为我们通过得到的Screen.SafeArea计算出窗口的RectTransform显示范围,从而将所有有Pivot和Anchor适配的内容显示到了安全区域内,而背景图因为没设置适配所以只受Canvas Scaler的Screen Match Mode(Shrink)影响。
Note:
老版Untiy(Unity 6之前)屏幕宽高分辨率用UnityEngine.Screen.Width和UnityEngine.Screen.Height获取,新版Unity(含Unity 6和之后)屏幕宽高分辨率用UnityEngine.Device.Screen.Width和UnityEngine.Device.Screen.Height获取
UGUI适配方案 通过前面的学习我们得到UGUI适配方案如下:
将Canvas Scaler的UI Scale Mode设置成Scale With Screen Size,Screen Match Mode设置成Shrink(这个可以换成通过比较设备分辨率比例和设计分辨率比例的大小动态设置Screen Match Mode为Match Width Or Height的Match值来实现相同效果),Reference Resolution设置成参考分辨率,背景图Image不设置适配,直接设置成设计分辨率大小,从而实现背景图自动适配铺满不拉伸的显示效果。 利用Screen.SafeArea的安全区域信息,动态计算窗口应该显示的范围大小,从而避免UI内容显示到特殊区域影响操作或看不到的问题
Reference Unity UI适配方案
【游戏交互】手游适配设计