经典2D小游戏
Introduction
这一章节主要是为了实战学习Unity和NGUI的使用而写的。
Game Introduction
开发环境:
游戏引擎:Unity
UI插件:NGUI 2.7
游戏内容:
容纳多个经典2D红白机和手机游戏:
- 2D赛车躲避(原始名字想不起来了)
- 贪吃蛇
- 坦克大战
待添加
平台:
支持Android,IOS多设备。
Preparation
关于IOS打包准备工作参见:
IOS打包准备
Unity IOS build process
- XCode project is generated by Unity with all the required libraries, precompiled .NET code and serialized assets.(打包所有需要的库和资源生成XCode项目)
第一步是通过Unity的Building Settings设定IOS平台点击Build生成 - XCode project is built by XCode and deployed and run on the actual device.(编译Xcode项目安装到设备上)
第二部必须在Mac上执行(或者黑苹果),因为需要用到IOS SDK和XCode编译器
Cloud Build
关于Cloud Build让我们直接看看官网的介绍吧:
What is Unity Cloud Build?
A service that automates the build pipeline for Unity games.(自动化编译打包服务 – Build Machine)
Why Should I Use Cloud Build?
By using Cloud Build automation services, you will - Save Time. Builds are compiled and distributed automatically, minimizing manual work and intervention. Games with multiple platforms can be consolidated into a single build process.
- Improve Quality. Games are built continuously as changes are detected (“Continuous Integration”), enabling detection of issues as they are introduced to the project. - Distribute Faster. Cloud-based infrastructure compiles builds; in parallel if for multi platform projects. Completed builds are available to download by anyone on the team through Cloud Build’s website.(快捷方便,自动化检测变化进行编译打包。每个人都可以自己去下载安装对应的版本)
How does Unity Cloud Build work?
Unity Cloud Build monitors your source control repository (e.g. Git, Subversion, Mercurial, Perforce). When a change is detected, a build is automatically generated by Cloud Build. When the build is completed, you and your team are notified via email. Your build is hosted by Unity for you and your team mates. If the build is not successful, you’re also notified and provided with logs to begin troubleshooting.(通过检测Git等工具上传变化,自动触发编译打包流程,完成或出错的时候有邮件提醒和log)
What do I need to use Unity Cloud Build?
使用Unity Cloud Build我们必须先选择一个版本管理器
Git, Subversion, Mercurial, Perforce
这里我使用Git。
- github上创建Repository
- Clone到本地目录(git clone repo)
- 上传XCode项目
创建Cloud Build Project:
Unity Cloud Build - Create New Project
- 添加Git repository地址
- 选择platform(这里我选的IOS)
- 最后设置项目打包发布相关的Certificate,bundle ID, Xcode版本设置等(注意Provision Profile里的Certificate和我们导出上传的Certificate要一致),后续还有一堆关于Build的控制(比如定义宏,编译Development版本)
这样一来就可以通过访问Unity Cloud Build去查看自动化打包编译的详细情况了。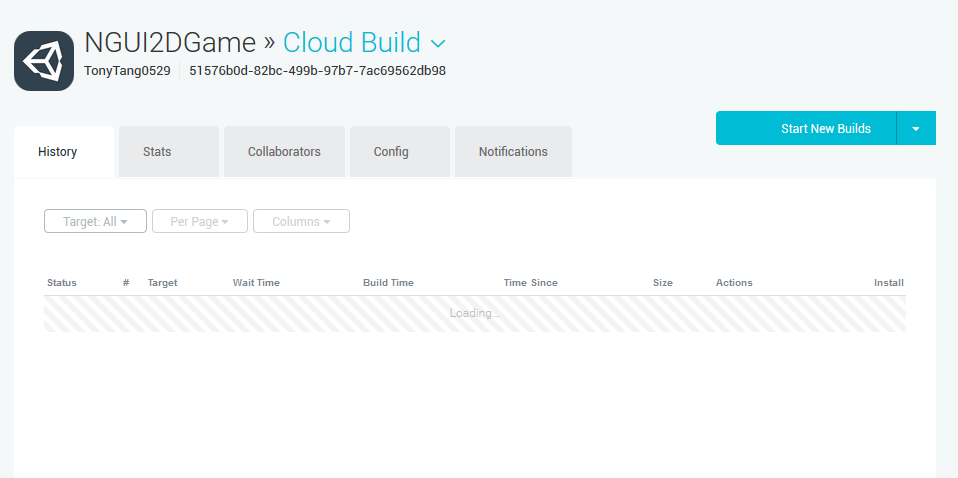
这样一来每一次提交Git后只需在Cloud Build点击build就会触发更新编译打包了。
如果打包没有错误的话,我们只需去Cloud Buid上取打包好的包安装即可。
UI库选择
在Unity 4.6以后UI主要是有两种选择:
- UGUI(Unity 自带UI)
- NGUI(成熟的第三方UI插件)
这里处于学习NGUI目的,我选择采用NGUI 2.7版本作为UI库。
游戏实战开发
赛车躲避
游戏说明
这是一款在2D竖版的赛车躲避类游戏,场景里有三条道可供行驶,玩家操控当前赛车(上下左右移动以及跳跃来躲避迎面而来的赛车)来回在三条道之间切换以躲避随机从三条道上出现的赛车,每躲过一个赛车就会增加得分,赛车移动游戏速度会随着游戏的进行越来越快已达到更快速度,最终躲避最多赛车得分最高者创造新纪录。
操控:
上下左右移动,圆形按钮跳跃(通过单独制作的控制面板,通过点击对应按钮响应)
相关概念学习
首先作为2D游戏,这里要讲一下Project 2D Mode和Editor 2D Mode这两个概念。
Project 2D Mode:
Project 2D Mode会去决定Unity Editor的一些设置。
Unity Editor Settings influence by mode settings
下列以官网将的2D Mode为例,看看分别会影响些什么?
- Any images you import are assumed to be 2D images (Sprites) and set to Sprite mode.(2D模式下默认导入的图片都是2D Sprite而不是Texture)
- The Sprite Packer is enabled.(Sprite Packer默认开启,Sprite Packager是为了高效的渲染并节约内存,用于打包图集(Atlas)的工具)
- The Scene View is set to 2D.(默认设置Scene view为2D mode,当然也可以切到Scene 3D mode)
- The default game objects do not have real time, directional light.(默认不创建方向光)
- The camera’s default position is at 0,0,–10. (It is 0,1,–10 in 3D Mode.)(Camera默认位置0,0,-10)
- The camera is set to be Orthographic. (In 3D Mode it is Perspective.)(Camera默认是Orthographic(正交)投影)
- Skybox is disabled for new scenes.(天空盒默认disable)
- Ambient Source is set to Color. (With the color set as a dark grey: RGB: 54, 58, 66.)(环境光默认设置为54,58,66)
- Precomputed Realtime GI is set to off.(预计算的全局光默认关闭)
- Baked GI is set to off.(烘焙全局观默认关闭)
- Lighting Auto-Building set to off.(光照的自动编译默认关闭)
Editor 2D Mode:
Editor 2D Mode只是决定了Scene窗口是以2D还是3D的形式显示。
从上面可以看出Project的2D Mode会帮助我们设置一些对于2D游戏不需要或重要的设定,帮助我们快速开发2D游戏。
在2D游戏里,有个很重要的概念就是Sprite:
Sprite – Sprites are 2D Graphic objects.
提到Sprite就不得不提Sprite制作,优化相关的工具和一些相关的重要概念:
- Sprite Editor
主要用于指明Sprite的一些重要属性,比如:
Texture Type – 指明纹理类型(Sprite 2D)
Sprite Mode – 指明这个Sprite是单独显示还是和其他Sprite一起显示(有利于Texture Packer去做图集的切割)
Packing Tag – 指明Sprite所在图集
……. - Sprite Creator
Unity提供的创建临时的sprite placeholder.(后期替换成我们想要的Sprite)
也可以帮助我们去切割包含多个Sprite的图片到多个单独的Sprite(前提是包含多个Sprite的图片Sprite Mode要设置成Multiple。通过设置Slice或者Grid方式,可以快速帮助我们切割包含多个图片的Sprite)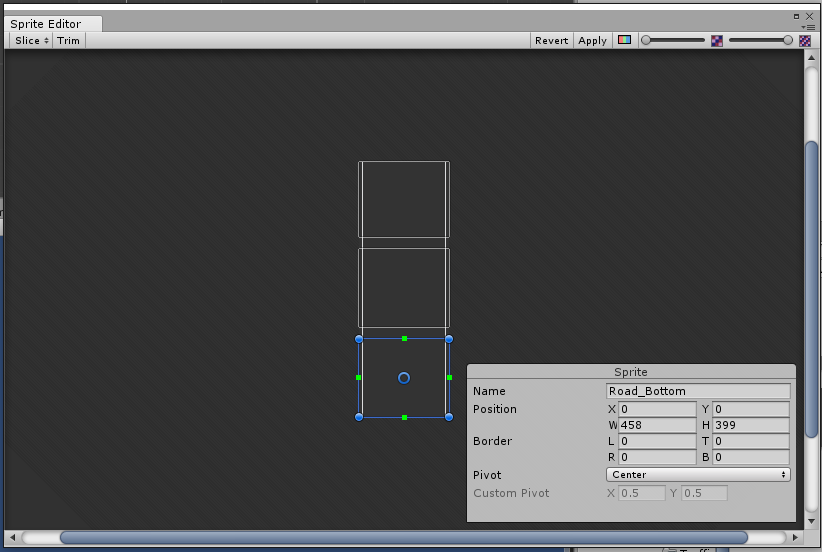
- Sprite Packer
Unity提供的自动制作图集(Atlas)的工具,为了节约内存高效渲染,把多个Sprite打包到一个大的纹理图片里,然后通过记录对应的UV信息去访问,这样只需加载一张纹理图片就能去渲染多个Sprite。
Edit -> Project Settings -> Editor -> Sprite Packer Mode - Sprite Renderer
这里需要区别一下Sprite Renderer和Mesh Renderer。
Sprite Renderer是以2D Sprite作为输入通过Color,Material等属性去渲染出最终颜色。(默认的Sprite-Default Material是不计算光照的,因为2D游戏一般不考虑光照,当然我们也可用其他的Material去计算光照的影响)
Mesh Renderer是以geometry from the Mesh Filter(模型数据)作为输入通过Material和光照方面的设置渲染出最终颜色。
Sprite Renderer里值得一提的是Layer,因为2D游戏里没有深度的概念,所以通过Layer和Layer Order去决定Sprite的渲染顺序,同时Layer属性也被Camera和Ray Cast用作过滤的条件之一。(我们可以自定义Layer且设定Layer所处顺序(Edit -> Project Setting -> Tags and Layers),然后通过设定Sprite在Layer里的Layer Order去决定在同一Layer里的顺序)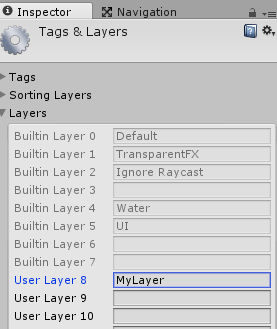
游戏制作过程
Project Mode选择
通过上面概念学习,我们知道了设置Project Mode 2D会帮助我们快速开发2D游戏,所以这里我们选择2D Mode。
Edit->Project Settings->Editor->Default Behavior Mode -> 2D
然后再创建我们的CarDodge Scene:
File -> New Scene
美术图片分辨率选择
每个游戏制作都需要指定美术图片大小标准。
考虑到不同屏幕分辨率适应的问题,结合Unity Study里NGUI 2.7屏幕自适应的学习,我选择了1024*768也就是4:3的比例作为标准,这样一来在高分辨率的机器上(大部分主流机器都高于4:3),只是两边会多显示一部分而不至于背景或游戏场景被裁减,多出来的一部分我们可以把背景放大来覆盖。(作为2D竖版游戏这样是完全可以接受的)
为了使我们的Sprite的像素完美显示在屏幕上(1个Sprite像素对应屏幕的一个pixel),要做到这一点我们只需保证Screen.height/2/Size = PPU(Pixel Per Unit)即可,所以因为我们设定Sprite的100 Pixel对应一个Unit,Size = 768/2/100 = 3.84,所以我们把Orthographic Camera的Size设置为3.84,这样一来Sprite的像素就和屏幕意义对应了。
游戏背景循环移动实现方式选择
通过官网2D Scrolling Backgrounds的学习,了解到有下列两种方式可以实现背景循环移动。
- 用一张Sprite作为背景,通过动态计算(循环)transform.position的值去实现背景移动。
这种方式的缺点是多分辨率适应问题,且当我们循环的时候,Sprite明显衔接不对,出现画面跳动。 - 设置3D Quad,添加Material去控制显示,通过动态控制(循环texture offset)Texture的显示实现背景移动。
这种方式的好处是可以通过Tile Texture和设置Offset实现不拉伸背景实现铺满屏幕的效果。
第一种方式游戏体验明显不行,所以这里我们采取第二种方式实现背景循环滚动。(这里使用的是Texture而非Sprite)
OffsetScroller.cs
1 | using UnityEngine; |
上述代码实现了通过根据时间和设定的速度来调整Background Material的Offset值实现背景循环滚动效果。
游戏控制方式选择
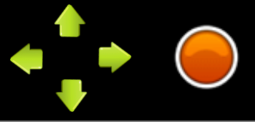
Assets Store有一些付费的成熟控制插件,但考虑到控制上没太大的需求(上下左右和个别按钮即可),这里选择自己制作。(提供上下左右和一个单独的按钮交互界面)
我在Panel上挂载了UIAnchor和InputControlerManager脚本,前者用于在场景里设置位置,后者是我自己写来用于通过单一接口去传递相应回调。
InputControllerManager.cs
1 | using UnityEngine; |
然后把做好的InputPanel作为Prefab存起来。上述代码只提供了按钮的OnClick和OnPress回调设置。
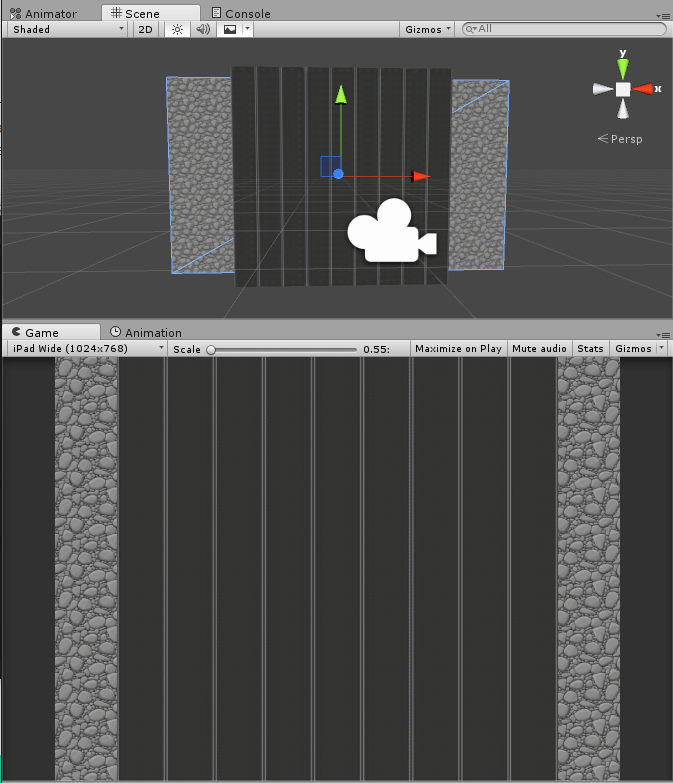
当前游戏界面如下: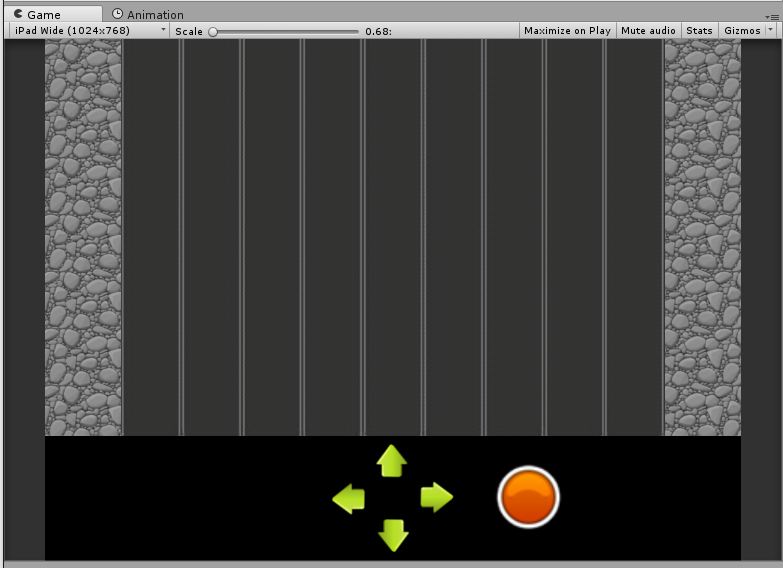
游戏完成时只会有三条道会显示,但玩家需要移动8次来实现从最左边移动到最右边,这里显示九条是为了方便确认位置。
可视化重要信息
这里主要是为了可视化的看出我们在制作游戏的过程中是否用了一些导致性能或内存消耗很高的方法。
关于性能消耗:
我们采用在Unity_COC_Study里打印FPS的方式来可视化。
关于内存消耗:
之前使用过Memroy Profiler,很直观的显示了各方面的内存消耗和运行时间,性能消耗也能在这里看的一清二楚。
这里为了不每次都链接电脑开Memory Profiler,我采用打印FPS的方式查看性能上的消耗。
FPSDisplay.cs
1 | using UnityEngine; |
2D动画抉择
一个游戏如果都是静态的图片移动,那么看起来肯定很无聊。
所以这里我们必须知道如何去制作动画。
首先我们确定的是我们使用的是2D Sprite,那么这里就确定了我们需要制作Sprite Animation。
在执着2D Sprite Animation之前,我们需要了解一些重要的概念:
- Animation – 基于关键帧的动画
- Animation Controller — 动画管理,通过给物体添加Animator并设定动画状态机之间的切换规则来实现动画状态切换管理(通过给UI添加Animator我们也可以在Anmation面板设置简单动画)
接下来看看制作2D Animation步骤:
这里由于我下载的资源都只有一整张赛车的Sprite,见下图: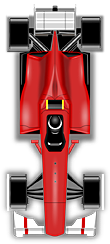
因为原始图片是463*1010的,对于我们来说像素太大了,需要缩小,所以我首先通过PS把图片缩小。
如果要想做更细致的动画,比如控车里的人做动画,轮子转弯的时候做动画,那么我就需要制作多张关键帧的Sprite。
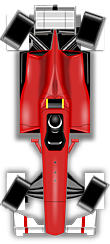
关键帧图片制作(下面只列举最后一帧,就不多放图片了这里):
接下来我们把制作好的关键帧图片导入Unity作为2D Sprite。
然后在Animation面板创建并制作Turn Right,Turn Left,Normal和Crash四种动画。


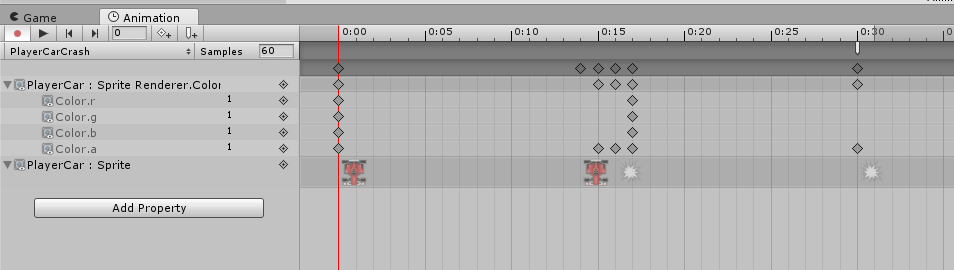
动画制作完成后,我们需要通过Animation Controller去控制四个动画之间的状态转换规则(Unity里可视化的状态机)。(除了默认的Sprite创建的动画,我们还可以在Aniamtor里通过修改scale,position等属性制作帧动画)
首先在Animation Controller里我的赛车有四中状态,Normal,TurnRight,TurnLeft,Crash: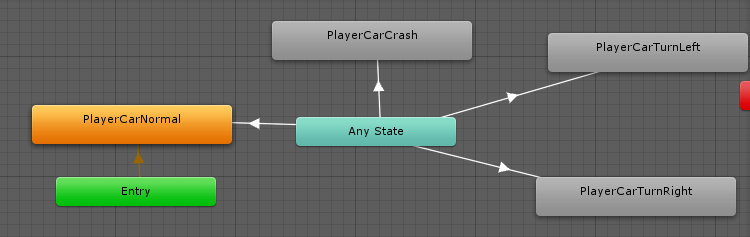
设置了四种状态之间的转换后,我们需要添加转换条件,添加转换条件,需要通过Animator->Parameters面板添加,这里我添加了四个trigger类型的条件变量(Trigger的设置只会触发一次状态):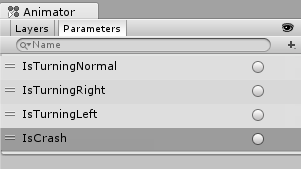
创建了状态切换条件后我们需要在状态切换的条件那里设置触发条件:
首先选中特定状态切换的带三尖角的线,然后在Inspector设置触发条件和一些状态转换之间的设置,见下图: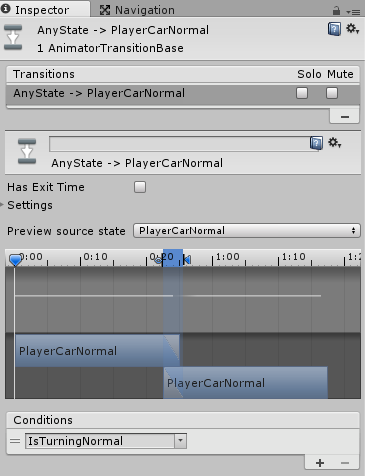
这样一来我们在代码里只需获取特定对象身上的Animator,然后调用Animator.SetTrigger(“IsTurningNormal”)就能触发到Normal的状态切换了,同时触发动画效果。
除了Unity自带的帧动画,我们还可以通过Animation插件去实现一些动画效果。
让我们来看看下面DOTween官网对于各个Tween插件的比较Comparison with other engines。
因为我一个都没有用过,就直接按上面的理论使用方便快速的DOTween作为这一次学习使用的对象。
具体的DOTween学习参见Unity_Study_Plugins_DOTween
这样一来车子的左右平滑移动和Jump动画效果就通过DOTween实现了。
而车子的上下移动结合Coroutine来实现(使用Coroutine的好处是可以实现避免每帧都判断是否需要向上或向下移动)。
具体代码如下:
PlayerCarController.cs
1 | using UnityEngine; |
通过调节给出的public变量,可控制movetween的duration时间和coroutine的执行时间间隔,还有垂直和水平方向的移动位移等。
游戏内GameObject数量的思考
因为2D赛车躲避小游戏同一时间不会有太多的GameObject处于场景里,通过Unity_COC_Study的学习,我知道了我们可以通过Object Pool的方式来预创建一定数量的GameObject,然后在适当的时机active or deactive他们来减少Instantiate的调用,即节约内存又性能损耗低。
ObjectPoolManager .cs
1 | using UnityEngine; |
上述代码写的比较死,是针对CarDodge这个游戏而言,因为有多种车子,所以用到了List<List
最终游戏截图(大部分游戏UI素材选至COC):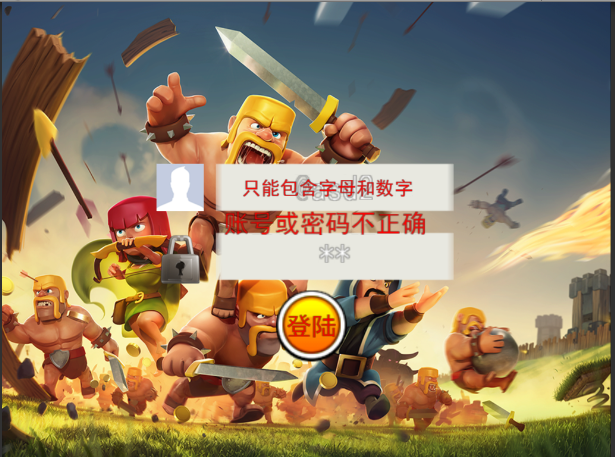
出于是学习使用旧版的NGUI,所以上述UI并没有实际的账号注册检查,只实现了简单的输入文字要求和账号对错(账号暂时是硬代码写的,PC上是通过读取Excel(使用的是ExcelReader,参考ExcelRead website),真机对应功能还没做)检查。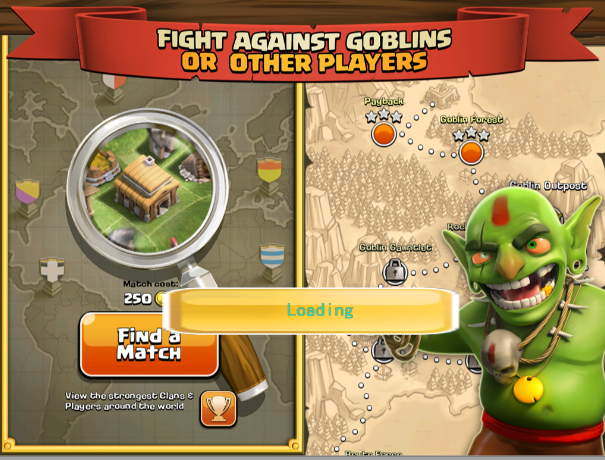
这一个主要是尝试Scroll Bar
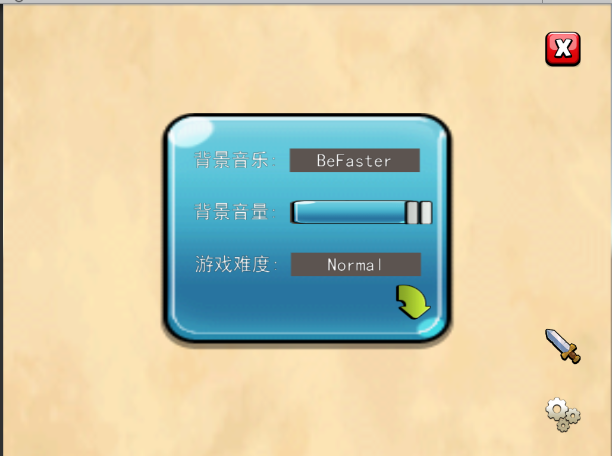

这三个主要是尝试UIBUtton,UIPopupList,UIISlider,UIDraggable Panel的使用和TweenPosition制作简单UI动画(包含了对背景音乐和音量的设置功能,存储采取PlayerPrefs写入程序文件)。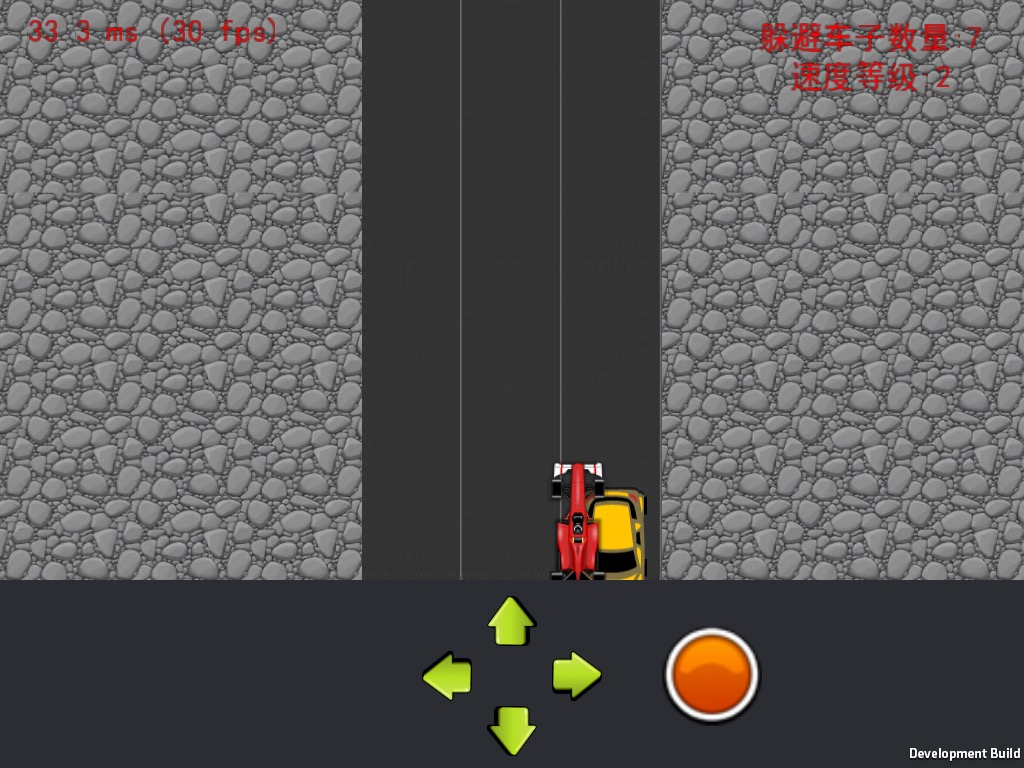
最后这一个是本章2D赛车躲避的最终真机(Ipad mini 1)游戏截图,主要实现了赛车跳跃,前后左右移动,随着赛车数量躲避增加游戏速度增加,限制了移动范围。
贪吃蛇
游戏说明
这个游戏我想没什么好说的了,直接移步贪吃蛇维基百科
游戏要点思考
- 2D or 3D?
标准的传统2D游戏,所以这里可以用纯2D来做(这里采用纯NGUI来做,看看NGUI的自适应效果)。 - 游戏素材大小
依然以1024768(4:3)为标准,因为之前在NGUI 2.7屏幕自适应已经提到了,把UIRoot的Scaling Style设置为Fixed Size,然后通过动态修改ManuaHeight已经实现了基于高度的自适应,所以我们在创建地图的时候只需考虑把Grid创建在基于1024768的分辨率对应位置即可(当然这样会出现在不同分辨率机器上自适应后铺不满屏幕,但这样做我们可以无需考虑机器分辨率)。准备设计宽4030(4:3)个单元格,单元格以20乘以20像素为基准,这样一来游戏地图占据800600像素,高度腾出来的像素768-600=168用于控制UI面板显示。
这个游戏实现没什么特别的,这里主要看看不同分辨率的显示情况。
1024-768: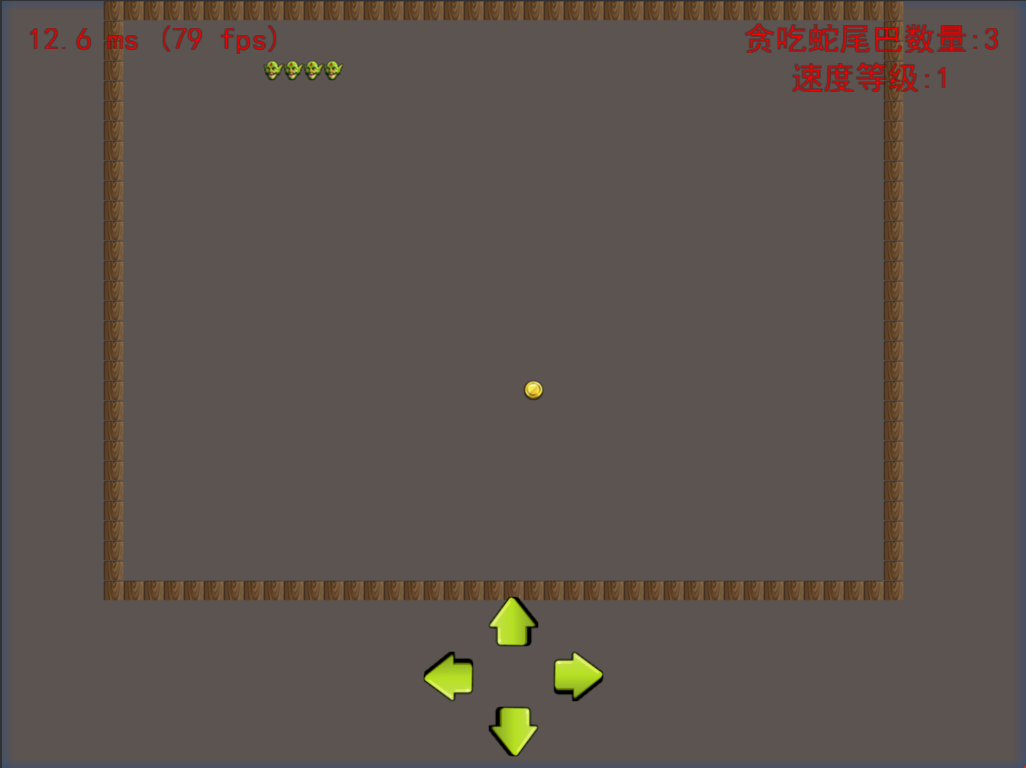
960-640: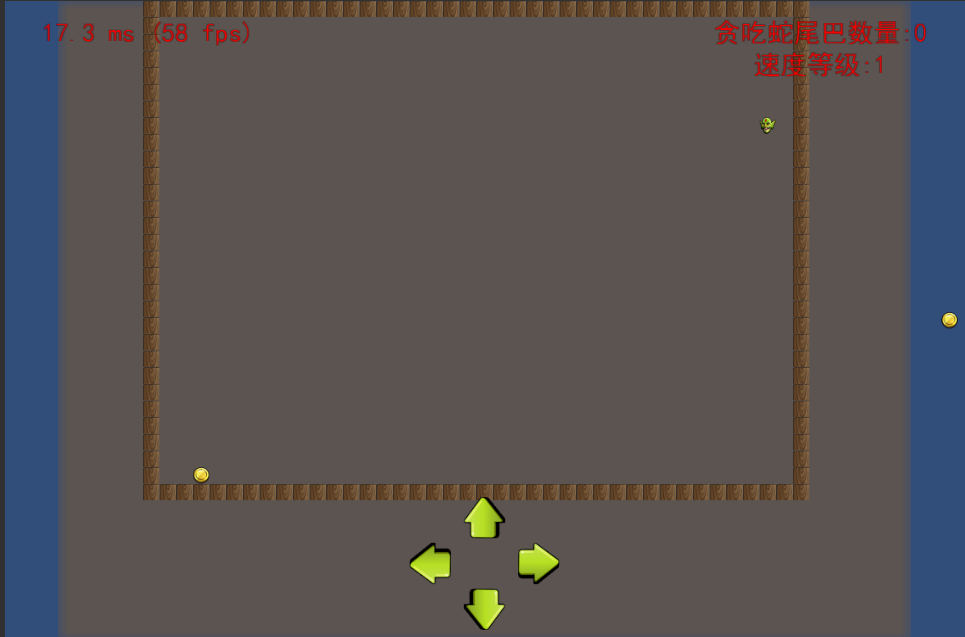
800-800: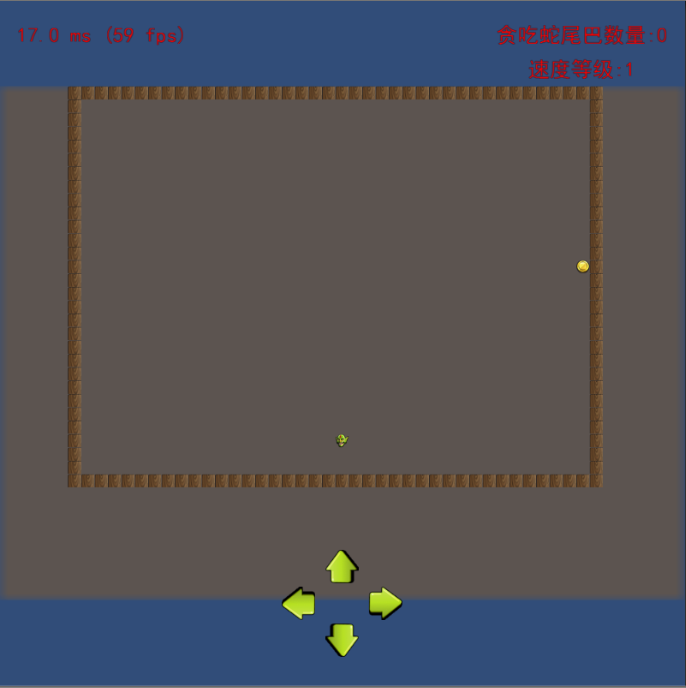
坦克大战
游戏说明
游戏要点思考
2D or 3D?
以纯2D的形式来制作坦克大战游戏。UI选择
这里为了熟悉UGUI,进而和NGUI相比较,这里采用UGUI来学习。
UGUI相关知识学习UI自适应
UI Render Space – Screen Space(Camera)(设置Main Camera作为渲染Camera)
UI Scale Mode – Scale With Screen Size(设置MatchWidthOrHeight = 0.5确保按宽度和高度变化同时变化去适应)
Background UI Scale Mode – Scale with Screen Size(设置MatchWidthOrHeight = 1确保游戏背景是高度铺满,Anchor设置在中心保持1:1比例)Pixel Perfect 2D?素材选择?地图大小?地图在不同分辨率上的显示?
为了实现Pixel Perfect 2D,我们需要确保1 Unit所代表的像素 = PPU。
我以1024 X 768为基准,Orthographic Size设置为6,PPU为64。(这样一来屏幕高度被分为12 Unit,每个Unit代表768 / 2 / 6 = 64 pixel)
2D素材采用64 X 64的Tile(每一个Tile占一个Unit)
游戏区域为704 X 704大小(占11 X 11个Unit,四周多出来的用于UI显示)
UI Sprite采用64 X 64。
因为地图是基于Tile的,所以在不同分辨率上,地图的大小(Tile数量)应该是一致的,这里地图大小默认设定为11 X 11个Tile(704 X 704)(基于1024 X 768,高度顶部留1个Unit)。
要想Tile在不同分辨率机器上都Pixel Perfect显示,动态修改Orthographic Size会导致Size Change(屏幕高度的Unit数量也会改变),以PPU = 64且Tile像素为64 * 64去显示12个Tile是没法恰好铺满屏幕高度的。所以这里采用保持Orthographic Size不变保持6,制作多套PPU去适应屏幕分辨率的方案(通过Assetbundle动态替换)。(出于学习目的这里只针对1024 X 768(PPU = 64)和1920 X 1080(PPU = 1080 / 2 / 6 = 90)来做两套PPU实验)
Note:
这方案会导致做很多套不同PPU的资源去适应不同屏幕分辨率。Sprite Setting?
Sprite Type – Sprite(2D and UI) 因为用于纯2D游戏
Sprite Mode – Single or Multiple 根据我们的图片是否需要切割成单独的Sprite而定
Packing Tag – 用于Unity Sprite Packer打包Spite图集
Pixels Per Unit – 64(Pixel Perfect显示,PPU = Screen.height / Orthographic Size(6) / 2)。
Generate Mip Maps – No(因为是纯2D游戏,摄像机与Sprite距离保持不变(当然其实Camera设置成Screen Space(Camera)而言是可以变的,但这里我们设置Orthographic投影,所以距离对于显示大小没有意义,并且我们还保证了Pixel Perfet显示,所以就游戏里的Sprite而言Mipmap是没有必要的。(前面的前提是使用多套Asset资源并保证Pixel Perfect显示))
后面三个参数学习参考调整画质(贴图)质量
Filter Mode – Bilinear(Filter Mode用于纹理图片这里的Sprite拉伸后如何插值计算(抗锯齿计算),Bilinear会进行双线性插值,效果和运算开销在Point,Biinear,Trilinear里最能够接受。)
Max Size – 2048(导入纹理的最大尺寸,默认2048,设置过小会导致大图片被压缩,质量变得很差(当然也要考虑内存的使用降低了))
Format – Compressed(纹理压缩格式,大小和质量的权衡。采用默认的Compressed即可。)物理?
不使用物理控制(Transform移动),使用Trigger做触发,纯2D游戏,使用Physical2D和Rigibody2D。
平滑移动思考:
需求:
保持匀速移动,固定时间内完成
方案一:
DoTwen
使用DoTween会导致需要初始化大量的Tween(假设地图是11 X 11,每次移动的offset是0.5,那么我们会需要创建(11 / 0.5 ) X (11 / 0.5) = 484个Tween)
方案二:
Vector3.Lerp(Vector3 a, Vector3 b, float t);
Interpolates between the vectors a and b by the interpolant t. The parameter t is clamped to the range [0, 1].
Using Vector3.Lerp() correctly in Unity
参考上述博文,我们会发现,平时大部分的用法是如下:
1 | transform.position = Vector3.Lerp(transform.position, _endPosition, speed*Time.deltaTime); |
这样的用法其实会导致非线性的移动速度,因为每一次transform.position的位置在变(离终点越来越近),假设Time.deltaTime是固定时间间隔,那么就会出现前半段移动的快,后半段移动的慢的效果。
为了保证正真的平滑移动(匀速移动),我们需要保证初始位置和结束位置不变,然后调整t参数,所以这里把t参数设定为timepassed(从开始Lerp计时) / timetocomplete(总共完成Lerp的用时。通过在Update或FixedUpdate里每隔一段时间更新Lerp的t参数,我们可以实现跟帧率挂钩的匀速移动效果(帧率高,移动的平滑。帧率低,移动的跳跃。但都能在固定时间内达到终点)。
1 | IEnumerator MovingCoroutine() |
控制方式
因为之前的控制面板是基于NGUI制作的,所以这里就混合UGUI和NGUI来作为控制面板。游戏特性
坦克特性:
1. 占据一个Tile,1 Unit(1 Tile被细分成16 * 16的网格)
2. Tank以0.5个Unit的单位的移动,只要前方0.5 Unit单位内有不可通行物,就不能前进
3. 多个Tank不能占据同一位置
4. Tank只能上下左右移动
5. 坦克只能发射出有限数量的子弹,在子弹数量达到上限时需要等待子弹消失。
6. 不同的坦克的移动速度和子弹数量上限和子弹速度不一样
子弹特性:
1. 子弹拥有不同等级的威力,根据威力不同可消灭的小块数量和小块类型不同
2. 子弹不能击中友方队员(友方队员子弹也不行)
3. 子弹只有上下左右四个固定的方向,一旦射出子弹,方向不会改变
Tile特性:
1. Tile可以被攻击切割成多个小块(Normal Tile这里假设可切割成16),
每个小块具备完整的特性(占据单元格阻碍前进,能被攻击)。
2. 小块Tile被子弹击中会根据子弹伤害和周围Tile小块情况来决定是消灭单独一个小块还是2个或多个。
3. 不同类型的Tile有不同的特性(能否通过,能否破坏等)敌人AI
敌军坦克特性:
1. 移动方向只有上下左右
2. 单次移动单位0.5 Unit
3. 撞到障碍物(不可通行的地方(不包括友军坦克))后重新选择方向
4. 方向选择(避开之前行进方向随机选取一个方向,为了保证坦克不至于一直一左一右,这里需要采用[Shuffle Bag]而非完全随机的方式选取新移动方向,Shuffle Bag可以保证特定事件发生的概率从而保证各个方向的选择都能平摊,比如4次里面肯定会有上下左右而非左右左右)
5. 多个坦克相遇的时候不立刻重新选择方向而是开始累计坦克无法移动的时间
(直到坦克达到坦克停止时间限制时重新选择,这里不同速度的坦克所忍耐的停止时间不一样,这样一来就可以实现,速度快的追着速度慢的跑)
6. 子弹随机隔一段时间发射,但不会发射超过子弹数量上限。
Shuffle Bag
Shuffle Bag代码:
1 | using UnityEngine; |
地图编辑器制作
做一个地图编辑模式,提供多种Tile模型选择,通过序列化存储起来。(可用于制作关卡)多人网络游戏(学习多人网络游戏开发)
暂不支持多人联网进行(通过Unity High Level API去开发 – 待深入学习)地图存储方式
地图信息很简单,主要存储地图里每一个Tile的类型信息(同时存储地图名称,坦克出生地点信息),这里采用序列化的方式。(因为我们保持了Orthographic Size为6,通过动态切换不同PPU的Assets去保证Pixel Perfect显示,所以Screen高度一直都是12个Unit,同时设置了PPU = Screen.height / 2 / 6,Tile素材PPU * PPU,所以1个Tile对应1个Unit。地图存储的信息是11 * 11(704 * 704)个Tile相关的信息(高度顶部留3个Unit用作UI显示)。地图数据加密
待思考游戏地图数据结构?如何实现Tile可以被多个方向打击切割成小块效果?
地图存储数据信息(MapInfo):
1. 地图被细分成多个Tile(MapSize.Row * MapSize.Column大小),存储所有Tile相关信息(用于构建地图)
2. 记录玩家Tank出生点和敌军坦克出生点信息。(用于获取Spawn玩家坦克和敌军坦克的位置信息)
3. 记录是否包含基地和基地位置信息。(用于确保只有一个基地)
4. 存储地图名字(用于地图存储)
游戏地图数据(TankMap):
1. 记录所有细分后是否被占用信息(用于Tank移动判断)
同时记录是否被Tank占用(用于Tank移动的时候判断前方是Tank还是Tile)
同时记录细分后占用的类型信息(Tile Type,用于子弹撞击后检测周边Tile类型信息)
地图应该被细分成所有 Tile数量 * Tile最小切割数的网格
(这里假设Tile最多被切割成16,那么地图应该被细分到MapSize.Row * MapSize.Column * 16的BitArray)
2. 每个细分的Tile记录自身包含细分后的索引信息
(e.g. 最大细分16,Iron Tile细分为2 * 2 = 4,那么每个细分的Iro Tile所记录的细分后的索引信息数量为16 / 4 = 4个)
这样一来每个小的Tile被破坏后支持快速改写该小块占有地图网格的占用信息)。
3. 坦克存储自身所占用的所有indexs作为移动索引信息
3. 包含前面地图存储的信息(用于构建游戏地图数据)
Note:
不同类型的Tile的细分程度不同(16 * 16 or 4 * 4 or 2 * 2 or 1 * 1),但游戏地图数据细分以细分程度最大的为准。(细分程度不同会影响Tile在子弹撞击时的效果判定)
实现功能:
- 地图编辑存储和读取(支持原始的那些Tile选择)
- 敌军坦克简单AI(基本无AI,主要是随机的方向选择,但通过Shuffle Bag来避免了过于随机的选择方式)
- 我方坦克控制和子弹射击
- 子弹打击效果
暂时效果: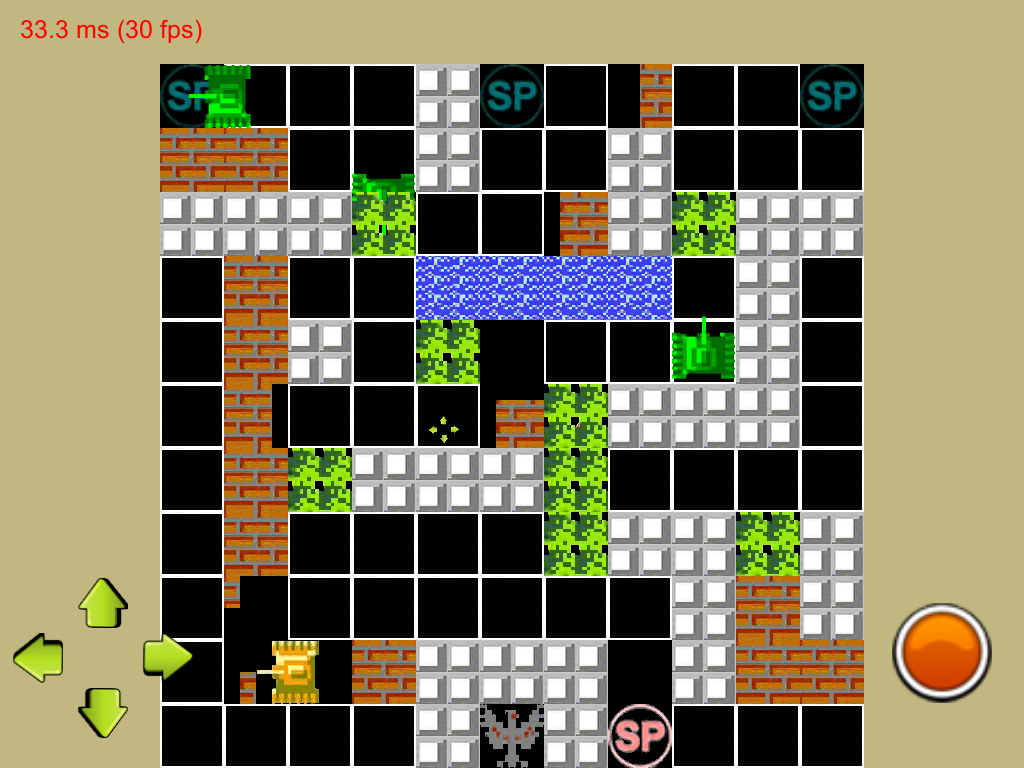
具体视频效果参见
因为只上传了IOS打包后的XCode项目等文件作为Unity Icloud Build的地址,所以这里没有源代码地址。
待续……
问题记录
- 编译打包XCode项目出问题
Failed to Copy File / Directory from ‘**\Unity\Editor\Data\Tools/MapFileParser/MapFileParser’ to ‘Temp/StagingArea\Trampoline\MapFileParser’.
这是Unity 5.1版本的一个bug。
解决方案
修改.\Unity\Editor\Data\Tools\MapFileParser\MapFileParser.exe到MapFileParser然后打包XCode项目,然后在XCode项目里把MapFileParser改回MapFileParser.exe
或者使用新版本Unity - 编译打包XCode项目时库找不到的问题
ArgumentException: The Assembly System.Configuration is referenced by System.Data. But the dll is not allowed to be included or could not be found.
解决方案
Change it from .NET sub 2.0 to .NET - Git不支持超过100M文件上传
解决方案Git Large File Storage (LFS) - Cloud Build显示Bitcode错误
又是Unity5.1.1的一个bug
解决方案:
可以打开XCode项目,项目属性设置bitcode enale
由于遇到太多Unity bug,个人建议采用新版本Unity为佳。我个人最后去下载了最新版本的Unity5.4.0版本。 - MapParser.sh acess Permission denied
貌似又是Unity bug,Unity 5.4.0
解决方案:
需要在Mac电脑上修改MapParser.sh的执行权限(chmod +x MapParser.sh),然后提交到Git后再触发编译。然后用修改后的MapParser.sh覆盖引擎目录下的Editor\Data\PlaybackEngines\iOSSupport\Trampoline\MapParser.sh以确保每次生成的XCode Project里的MapParser.sh有可执行权限。 - 指定Android NDK的时候报错”Unable to detect NDK version, please pick a different folder”
解决方案:
需要下载特定版本的NDK 10r
Edit -> Preference -> External Tool -> NDK download
或者
自己去下载后指定目录 - XCode编译项目报错:MapParser.sh: bin/sh^M: bad interpreter: no such file or directory
解决方案
这是不同系统编码格式引起的:在windows系统中编辑的.sh文件可能有不可见字符,所以在Linux系统下执行会报以上异常信息。
使用dos2unix工具转换字符编码后放到Xcode项目里。(为了避免XCode生成每次都出这个问题,我们替换字符编码为Unix位于Unity引擎里的Editor->Data->PlaybackEngines->iOSSupport->Trampoline->MapFileParser.sh) - Unity Cloud Build error:”2015-12-10 17:21:27.407 xcodebuild[7363:75765] Failed to locate a valid instance of CoreSimulatorService in the bootstrap. Adding it now.
Could not find service “com.apple.CoreSimulator.CoreSimulatorService” in domain for uid: 502
2015-12-10 17:21:27.431 xcodebuild[7363:75765] launchctl print returned an error code: 28928”
解决方案
从上面链接发现这是Xcode 7.2的一个bug,我们需要用Xcode 7.3,所以我们只需要把Unity Cloud Build设置到Xcode 7.3即可。 - Unity Icloud Build打包出来的.ipa文件很大
一. 关闭Bitcode
关闭Bitcode
Bitcode好像是Apple提交App后用于帮助优化的数据,IOS上是optional的,但watchOS and tvOS apps是必须的。
1 | using UnityEngine; |
二. 不使用的资源不要放在Resources目录下,避免被打包到resources.assets里
三. 打包编译Release版本而非Debug版
