前言
伴随着聊天模型ChatGPT的兴起,人工智能潮流爆发。无论是照片生成工具,视频生成工具,写作生成工具,甚至编程AI工具等都热火朝天。此博客主要用于学习了解相关AI工具使用,重点侧重于编程AI工具的深入学习和使用。
聊天AI
首当其冲的肯定是ChatGPT,全称聊天生成预训练转换器(英语:Chat Generative Pre-trained Transformer),是OpenAI开发的人工智能聊天机器人程序,于2022年12月推出。该程序使用基于GPT-3.5、GPT-4、GPT-4o架构的大型语言模型并以强化学习训练。)
ChatGPT的诞生,让Her这部电影仿佛照进了现实。
目前ChatGPT Plus收费,普通版免费。
当我们有问题无法解决时,通常我们除了baidu和google查阅答案,也可以尝试询问周边的人,有了ChatGPT我们每个人都相当于拥有了一个全能的助手,可以通过ChatGPT去尝试获取答案。
比如我们询问:
ChatGPT的人工智能原理是什么?
我们会得到如下回答:

Note:
- ChatGPT上限很高的同时,下限也很低,在自主学习回答的过程中有时会给出很多明显错误的答案,可以说在使用ChatGPT时,用户即使学生也是老师,通过边教边问的方式,让ChatGPT给出靠近正确的答案。
图片生成AI
Midjourney
Midjourney是一个由位于美国加州旧金山的同名研究实验室开发之人工智能程序,可根据文本生成图像,于2022年7月12日进入公开测试阶段
Midjourney既可以通过Discord也可以通过Web在线进行使用。
这里以Web在线使用来尝试文本生成图像的AI工具。参考文档流程:Midjourney Create-Page
用户通过在Midjourney网站上给出prompts(提示词类似关键词),让AI理解需要生成的图片长什么样,然后点击生成即可,考虑到Midjourney需要付费,这里就不测试使用效果了,感兴趣的可以自行购买使用。这里只截张官方网站的创作展示效果界面:

SeaArt
SeaArt一款AI艺术生成器
创作文生图或者图生视频等功能需要消耗的一些币(付费),但因为是博主个人所在公司,所以可以免费使用部分功能。
文生图:
给DeepSeek描述文生图相关问题生成文生图的提示词
比如:
“帮忙生成文生图,描述一只蓝猫和皮卡丘在森林里对战的图片提示词,要求动漫风格,画面颜色鲜艳。”
“上述提示词翻译成英文版”
最终得到文生图的提示词:
“In a sunlit forest, a blue cat and Pikachu are engaged in an intense battle. The blue cat’s fur glistens in the sunlight, its eyes sharp as it swipes with its claws. Pikachu stands on a rock, its cheeks sparkling with electricity, ready to unleash a powerful thunderbolt. The background features tall trees with sunlight filtering through the leaves, creating a dappled effect. The entire scene is dynamic and full of energy, with vibrant colors and intricate details.”
将生成的提示词放入SeaArt的文生图提示词里,点击生成

视频生成AI
Runway
Runway是一个基于人工智能的,强大的影视创作平台,它为用户提供多样化的视频生成、编辑服务,支持多种风格的视频创作,功能包括文本生成视频、视频转换风格、自动绿幕去除背景等,以及图片生成及编辑、音频编辑、3D 物体编辑等。
因为Runway只免费了100多积分,这里只测试了根据图片+prompts的方式生成视频。
输入数据如下:

效果如下:

可以看到根据输入照片和Prompts确实生成了相关的动态视频效果(不得不感叹AI工具的强大)
SeaArt
SeaArt一款AI艺术生成器
图生视频可以用类似上面文生图的SeaArt流程,这里就不一一展示了。
视频字幕AI
VEED.io
支持对视频处理的相关AI功能(比如只能加字幕,智能配音,文字转视频等)
这里本人只测试了智能给带音频的视频加字幕功能,目前来看免费功能优先,长期或深度使用需要付费。
编程AI
接下来来到本文的重点,作为程序员,我们完全是AI编程工具的目标客户,利用AI来提升开发效率是很有必要的(使用ChatGPT后对AI提升的效率深有感触)。
接下来主要以Copilot和Cursor两个工具进行学习和比较。
Copilot
GitHub Copilot是GitHub和OpenAI合作开发的一个人工智能工具,用户在使用Visual Studio Code、Microsoft Visual Studio、Vim、Cursor或JetBrains集成开发环境时可以通过GitHub Copilot自动补全代码。Copilot的OpenAI Codex接受了一系列英语语言、公共 GitHub 存储库和其他公开可用源代码的训练。这包括来自 5400 万个公共 GitHub 存储库的 159 GB Python 代码的过滤数据集。
从介绍可以看出Copilot主打的是基于代码的学习,提供代码AI自动补全的功能。
Copilot是微软旗下的,所以对Visual Studio,VS Code等微软IDE支持比较完善,下载VS时就自带集成Copilot。
支持基于Github大量代码学习的代码智能推断补全,支持Agent聊天问答,支持多个模型选择,支持代码Review等功能。
优势:
- 不用切换IDE,直接嵌入各大主流IDE
- 微软官方支持且基于Github的大量代码知识
Note:
- Copilot基础版免费,Pro版需要付费购买(10美元每月-个人推荐这个),Pro+(39美元每月)[https://visualstudio.microsoft.com/zh-hans/vs/pricing/?tab=paid-subscriptions])。
Copilot安装
官方下载带Copilot的Visual Studio 2022[https://visualstudio.microsoft.com/github-copilot/]
新建工程
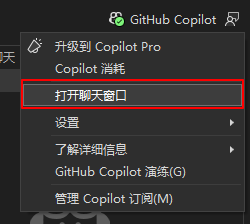
右上角点击Github Copilot->打开聊天框
Completions
敲击代码,Copilot会根据代码智能推断即将编写的代码,敲击tab应用智能推断的代码

敲击注释,Copilot也会根据注释去推断即将编写的代码,敲击tab应用智能推断的代码

只接受一部分Copilot智能推断的代码,Windows上Ctrl+→按键

决定不启用智能推断的代码,点击Esc按键
Prompt
**Prompt(提示词)**可以帮助AI更加准确的理解我们的需求,给出更更准确的代码推断和需求编写。
前面的Completions提到注释描述给AI提示,以及Chat中提到针对代码片段的提问(Alt+I),在提问时我们通过自然语言准确描述需求比泛化的描述可以更加准确的让AI理解我们给出的指令,得到更准确的目标结果。
泛化的Prompt,比如注释描述”// Some Code”
此时无论是AI还是人其实都无法理解我们具体想做什么,所以AI并没与给出任何有效的代码推断

好的Prompt,比如注释描述”// define a function that is used to compare to int value”

可以看到好的提示词成功让AI理解了需求并给出了准确的推断编写代码。
Chat
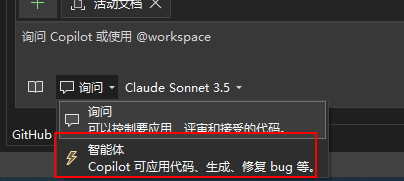
聊天模式氛围Ask Mode和Agent Mode
聊天模式切换:
Ask Mode
AI提问模式交互,打开Copilot后,右下方有聊天窗口
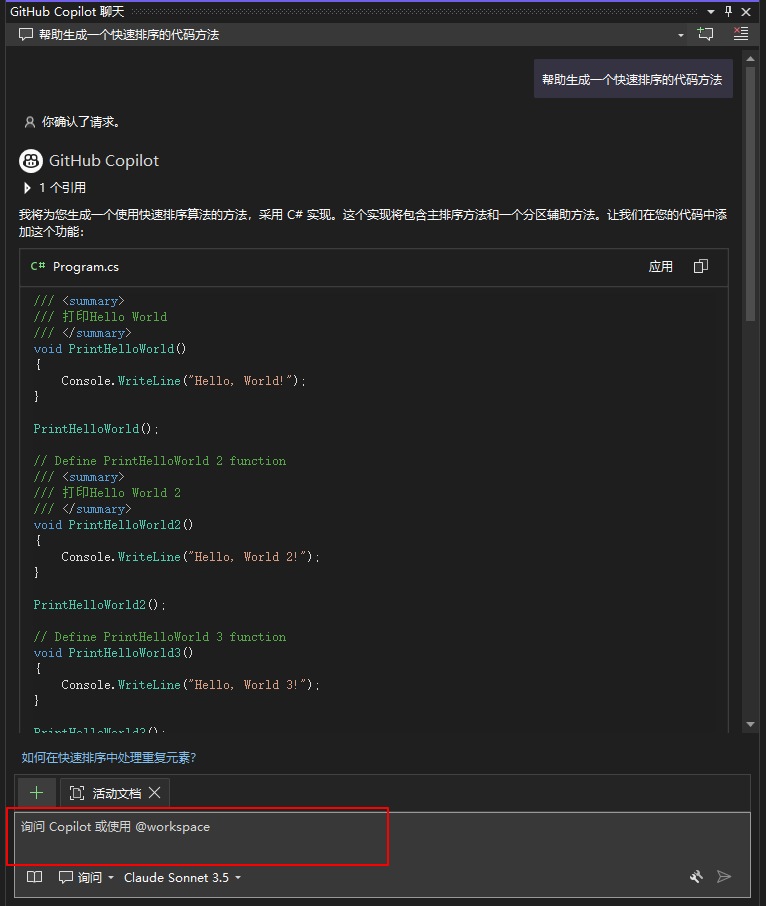
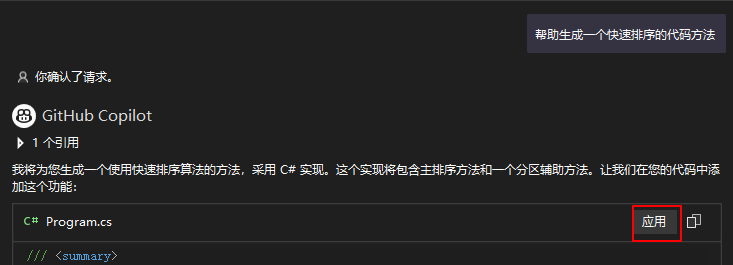
点击代码块右上方的应用则可以将Copilot生成的代码生成到我们的代码里
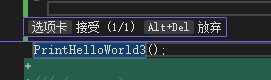
在代码区点击**放弃(Alt+Del)**则可以放弃方才应用的代码
代码块交互聊天,选中需要询问的代码,按Alt+/

交互聊天有一系列的快捷操作指令
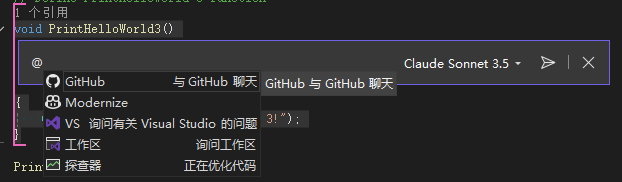
输入@会看到几个大方向或内容给AI作为参考
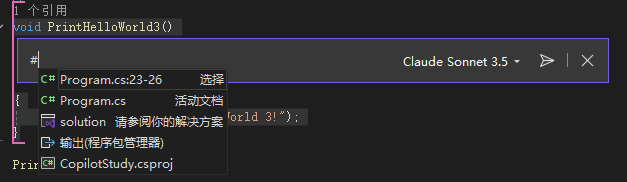
输入#会看到可以在询问前添加相关文件作为给AI的参考文件
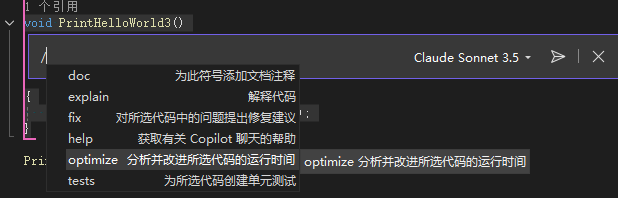
输入/会看到有内置支持的快捷代码操作指令(比如fix,optimization……)
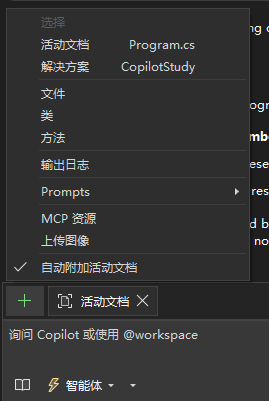
想引入更多复杂类型的资源作为AI参考文件,可以通过+添加:
自动以快捷交互指令详情参考:
Customize chat responses and set context
Agent Mode
With the GitHub Copilot agent mode in Visual Studio, you can use natural language to specify a high-level task. AI creates a plan, makes code edits, runs terminal commands, invokes tools, and applies changes across your codebase. It monitors outcomes, such as build results, unit-test failures, or tool outputs, and iterates as needed.
Unlike ask mode, agent mode doesn’t stop after a single response. It continues running and refining steps until you reach the goal in your prompt or more input is required.
从介绍可以看出Copilot Agent Mode可以让我们通过自然语言区描述高阶任务需求,让AI使用特定工具自动化完成高阶任务需求。
Agent Mode工具选择:
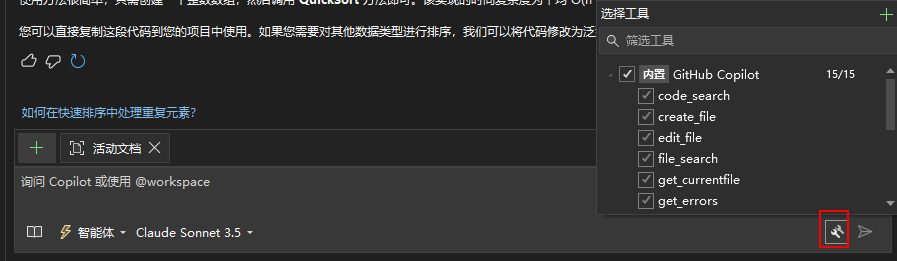
比如指挥Copilot调用指定方法并应用代码。
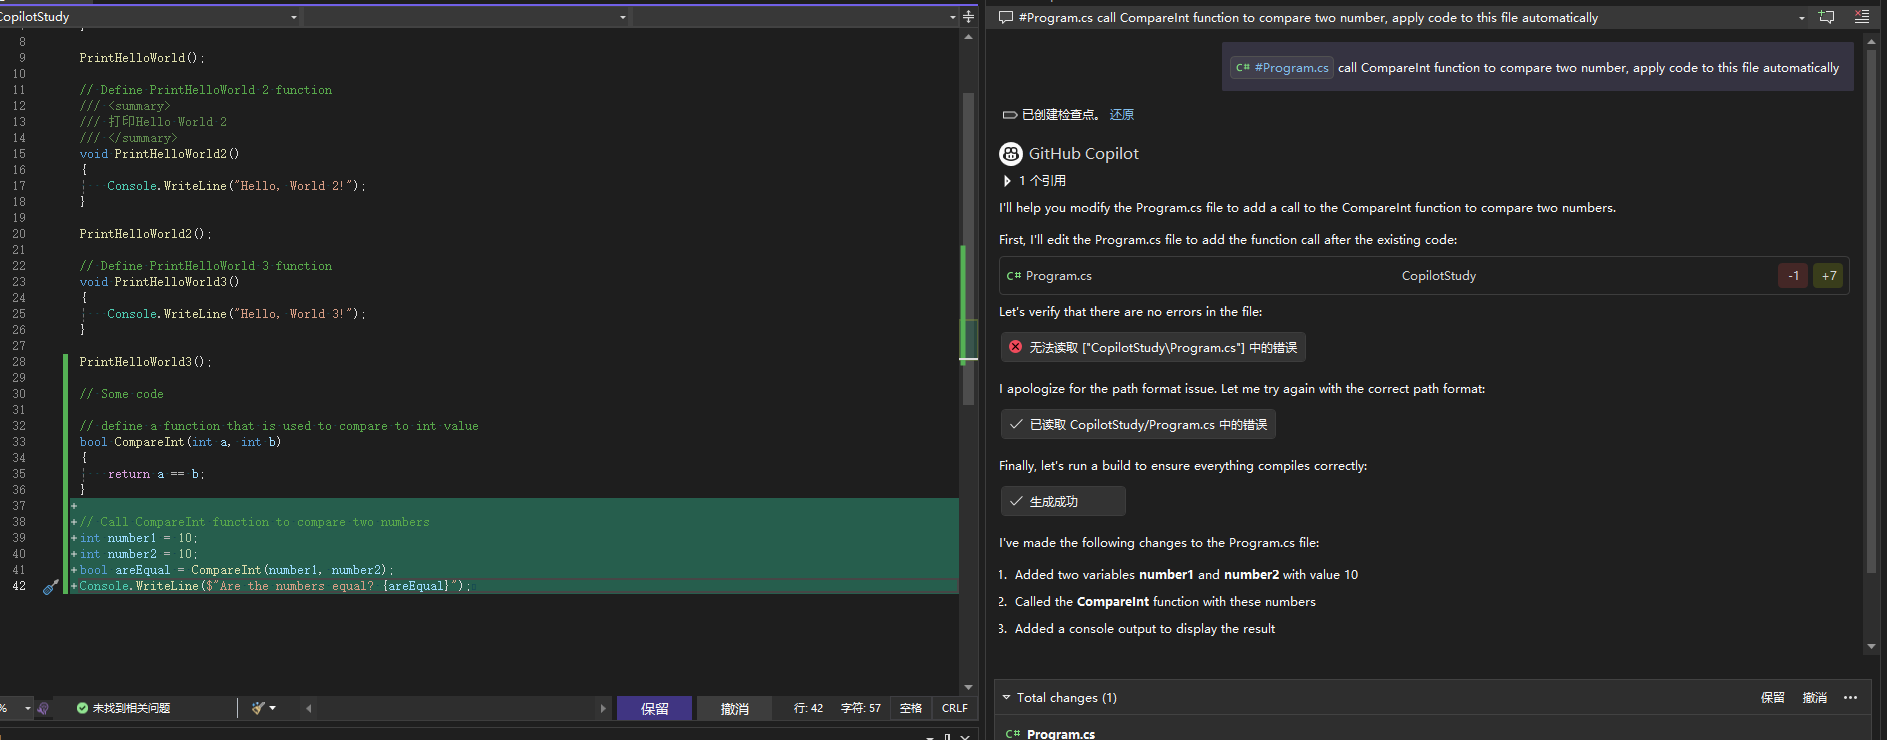
相比Ask Mode生成的代码我们要选择应用,Agent Mode已经通过我的指令自动应用到了Program.cs文件里,同时Agent Mode还通过调用编译进行了生成代码的对错验证(工具自动化的使用是和Ask Mode的最大区别)。
Agent Mode可以通过选择保留和放弃去确认生成代码的去留。
当成功应用后,Copilot通过创建还原点,可以实现快速的放弃之前的操作

Note:
- 需要使用一些列工具进行自动化的操作推荐用Agent Mode
- 需要使用MCP Servers功能,必须使用Agent Mode而非Ask Mode
MCP
Model Context Protocol (MCP) is an open standard that enables AI models to interact with external tools and services through a unified interface.
从介绍可以看出MCP是AI模型和外部工具交互的标准。
如果想通过外部工具扩展Agent Mode工作流,可以通过MCP引入外部工具。
详情参考:
Use MCP servers
Coding Agent
With Copilot coding agent, GitHub Copilot can work independently in the background to complete tasks, just like a human developer.
从介绍可以看出Coding Agent可以用于像人工一样自动化完成任务。
Copilot coding agent is distinct from the “agent mode” feature available in your IDE. Copilot coding agent works autonomously in a GitHub Actions-powered environment to complete development tasks assigned through GitHub issues or GitHub Copilot Chat prompts, and creates pull requests with the results. In contrast, agent mode in your IDE makes autonomous edits directly in your local development environment.
相比Agent Mode,Coding Agent能独立于IDE在Github环境下运行完成任务。
Note:
- Coding Agent是付费功能(Pro或Pro+等)
多模型选择
打开Copilot聊天框正下方有底层AI模型选择

Code Review
通常合作开发时,提交代码时代码review以往都是人工查看的,有了AI工具,Code Review也能实现AI自动化分析。
Visual Studio Code Review步骤:
Github创建不同分支并推上去
在对应分支进行修改并提交
在Github上或者Git发出Pull Request请求
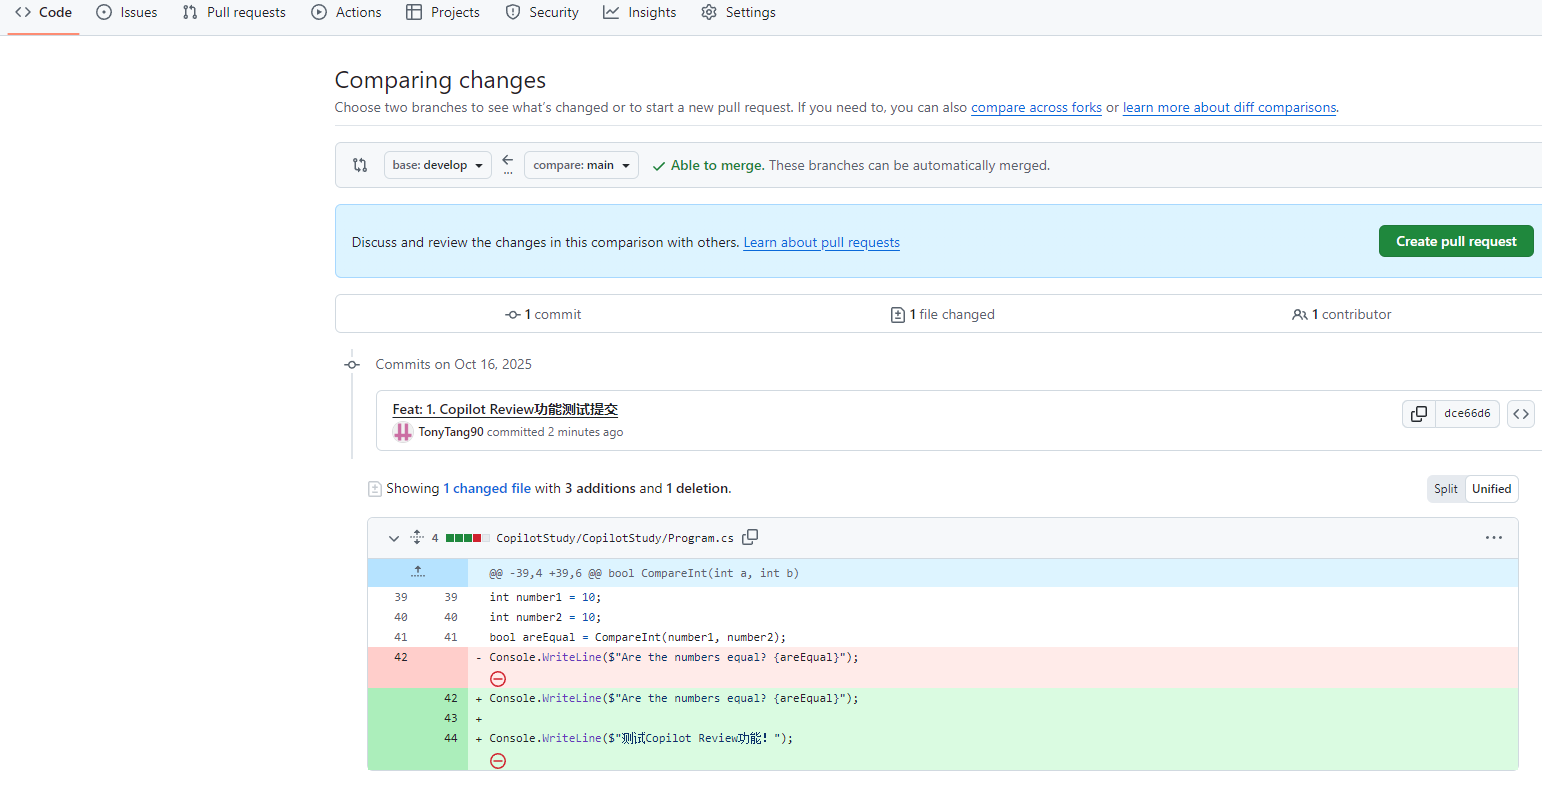
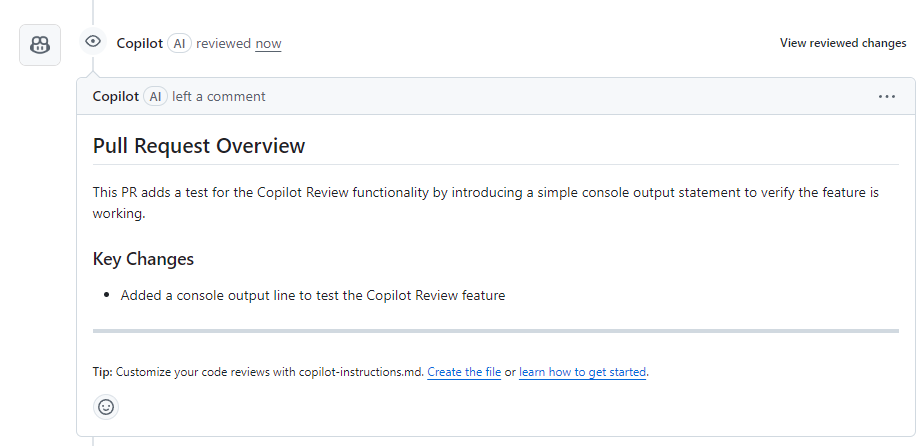
在Github上Pull Request操作发起Copilot Review请求
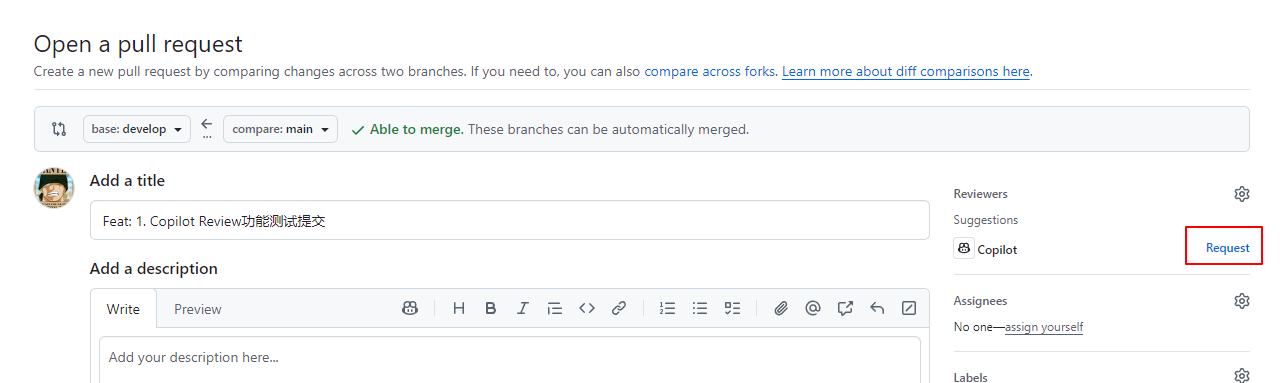
等待AI Copilot Review完成则可看到AI Review结论
Note:
- Code Review是付费功能(Pro或Pro+等)
Copilot CLI
The command-line interface (CLI) for GitHub Copilot allows you to use Copilot directly from your terminal.
Copilot CLI允许通过命令行界面使用Copilot,这一点很想Claude Code。
Copilot CLI使用详情参考:
Using GitHub Copilot CLI
Note:
- Copilot CLI是付费功能(Pro或Pro+等)
Copilot付费
Copilot有多个付费模式:
Free – **只允许使用优先功能(50次Agent Mode或Chat每月,2000次智能代码提示补全每月等)
Pro – 无限次Agent Mode或Chat每月,无限次智能代码补全提示,更多AI模型选择,Code Review,Coding Agent等功能
Pro+ – 相比Pro更多的AI模型选择等
Copilot付费支持的Visa卡好像要要求支持跨境汇款,PayPal这个我个人没有。
不同付费模式功能详情参考:
Github-copilot
Cursor
让我们看下官网的介绍:
The AI Code Editor. Built to make you extraordinarily productive, Cursor is the best way to code with AI.
从介绍可以看出与Copilot主打编程辅助不同,Cursor设计之初是作为一款人工智能代码编辑器,是一款为提供更好编程AI体验的IDE工具。
Cursor安装
接下来我们基于Cursor官方文档,把Cursor的类VS Code使用搭建起来:
首先下载安装Cursor
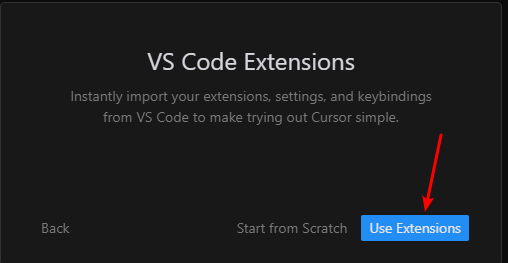
最快兼容老IDE的使用方式是直接导入VSCode的设置,安装时选择导入VS Code Extension:
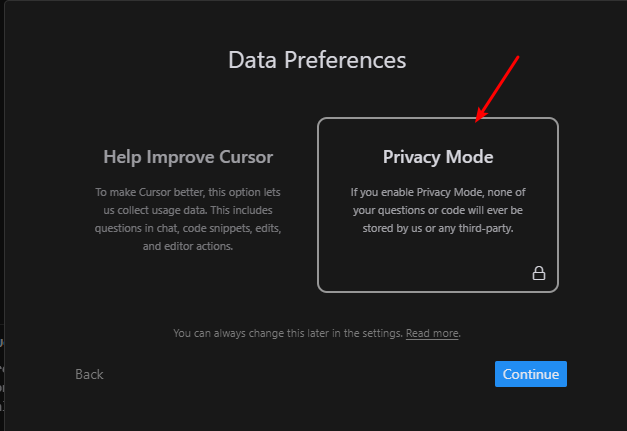
Cursor为了更好的共享分析代码,会把代码上传到云端,但对于开发项目来说,项目代码肯定是不允许上传云端的,所以在安装Cursor时,我们一定要选择Privacy Mode:
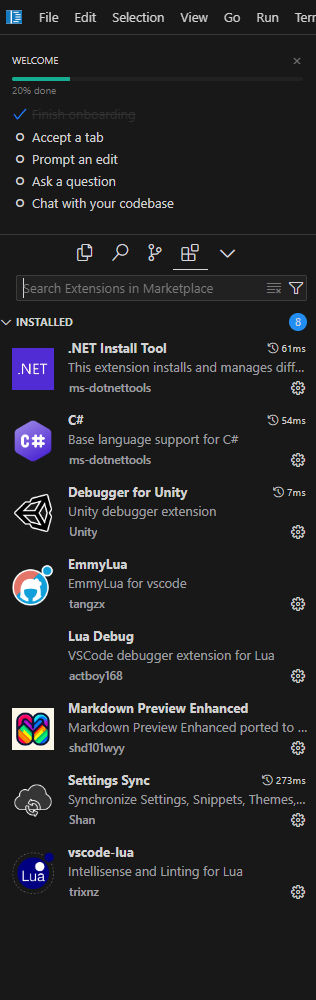
最后点击登录Cursor,完成登录,基本的Cursor安装和VS Code扩展同步就完成了。
Cursor安装完成后可以看到,Cursor自动下载了.Net Runtime,这是为了准备好.Net开发需要依赖.Net相关的做准备。

Cursor是付费的,价格参考如下:

虽然价格不便宜,但使用效果真心大大提升开发效率,有条件还是建议人手必备。
Note:
- Cursor的核心是基于VS Code的,所以对于从VS Code的用户使用比较友好。
- 免费版功能很有限,付费版Pro+(60美元每月[https://cursor.com/pricing])
- Cursor被微软限制使用原生市场插件
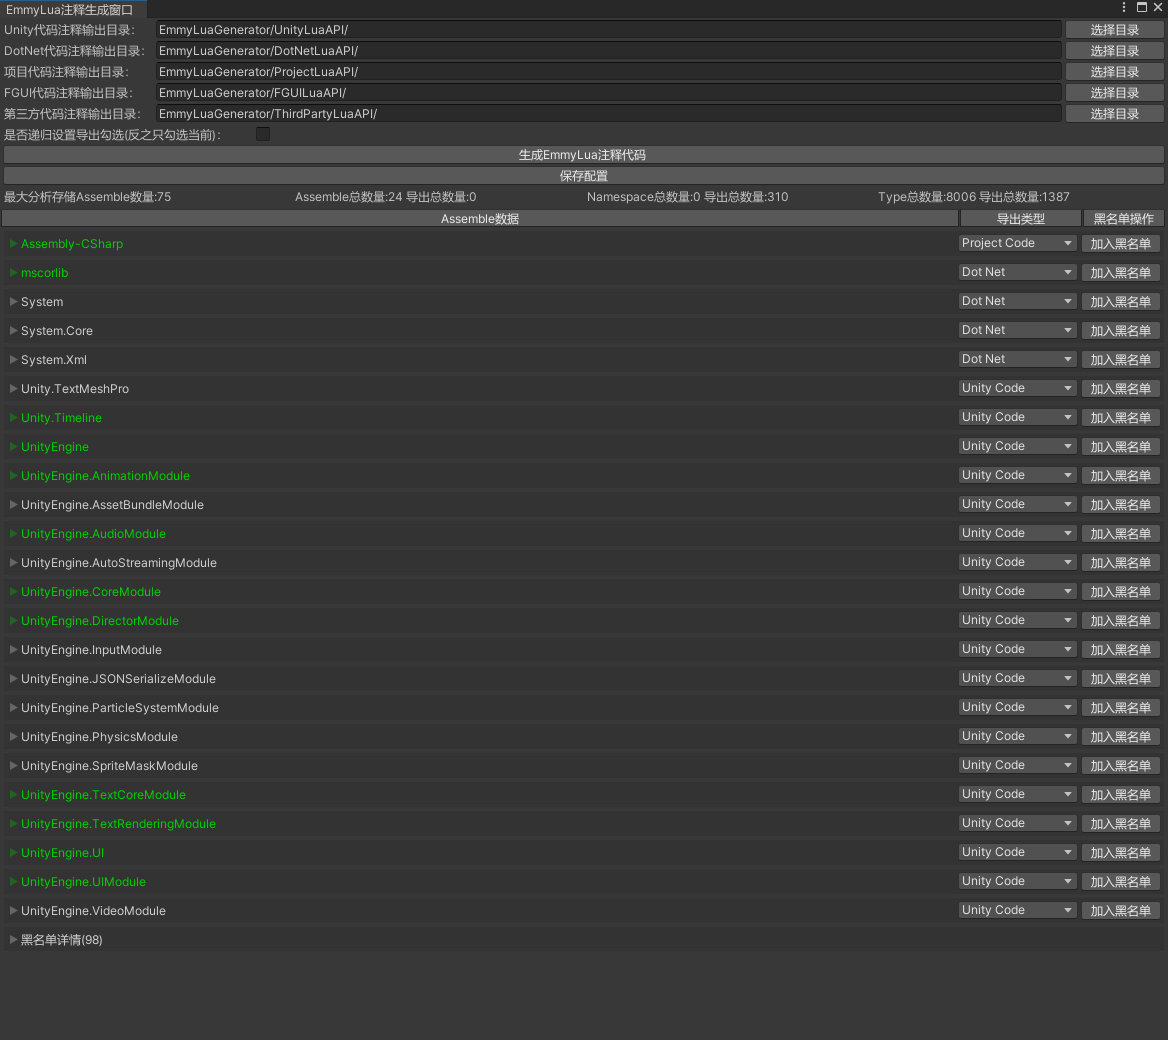
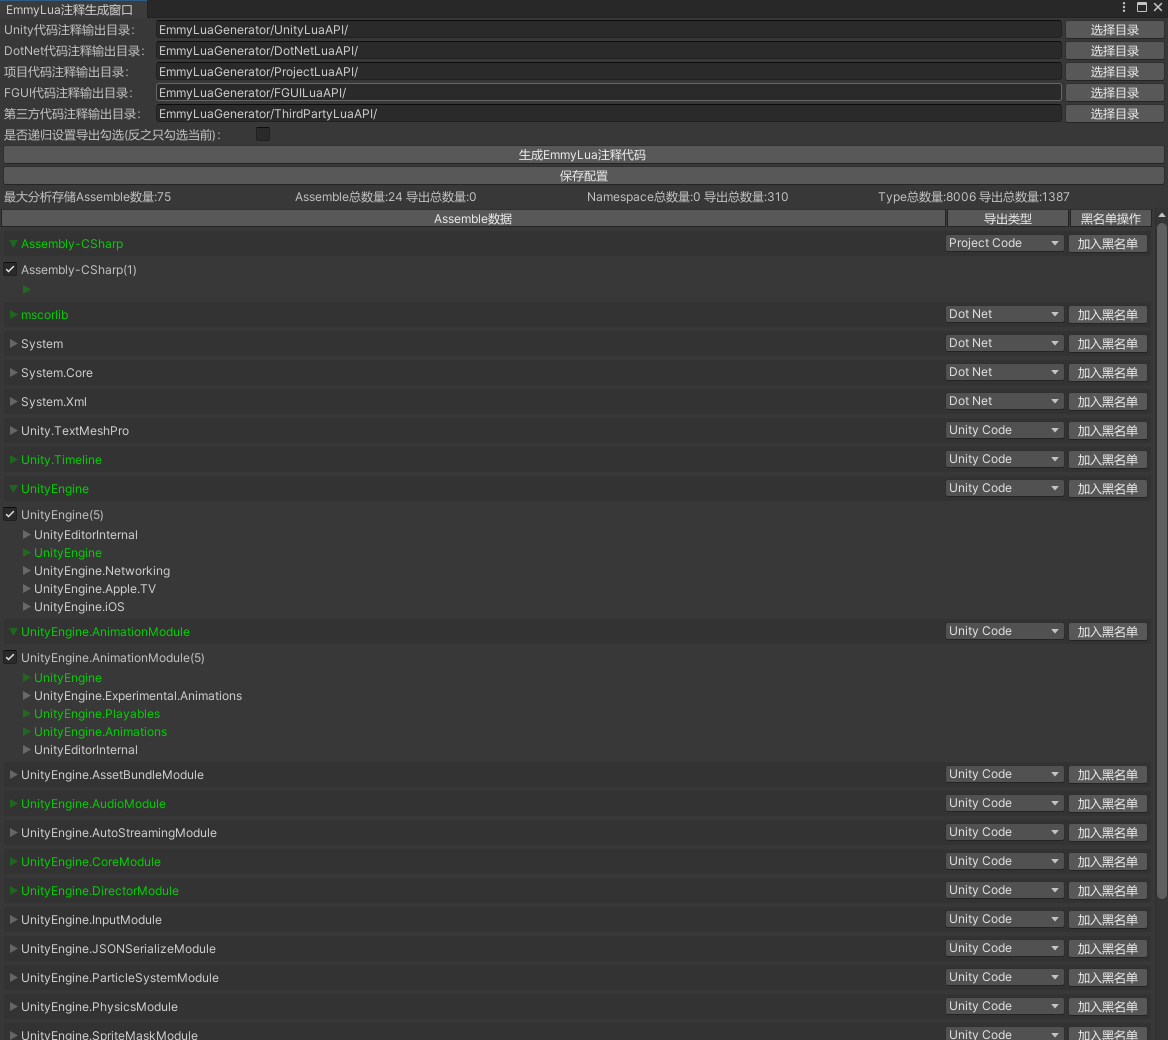
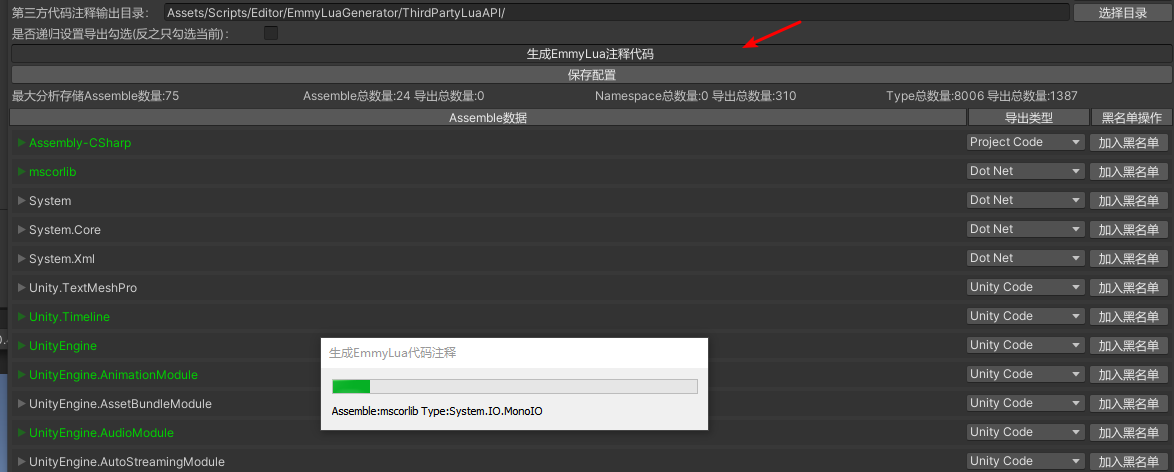
Unity
Unity客户端开发者熟悉的IDE莫过于Visual Studio和VS Code,而Cursor就对于VS Code使用者相当友好,在前面安装的流程里我们已经快速同步了VS Code的扩展设置。
Cursor Editor+Unity
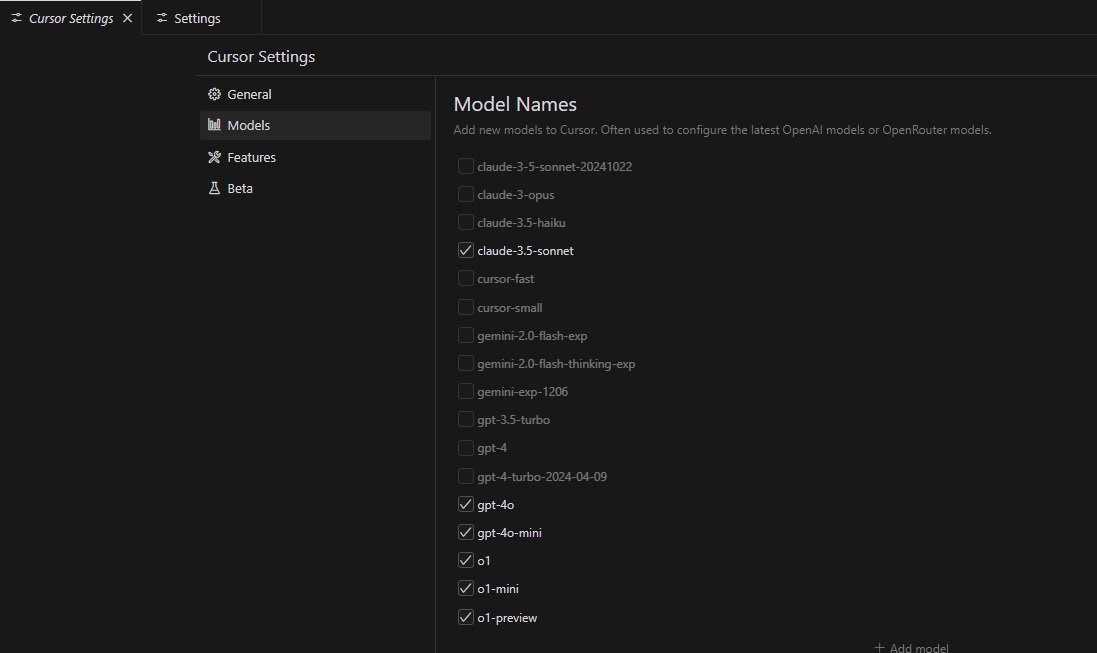
Cursor IDE打开后,我们会看到有一个和VS Code不一样的地方就是多了一个Cursor Setting:
从这里我们不仅能看到Cursor账号相关设置信息,也能看到Cursor目前设置使用功能的AI模型配置:
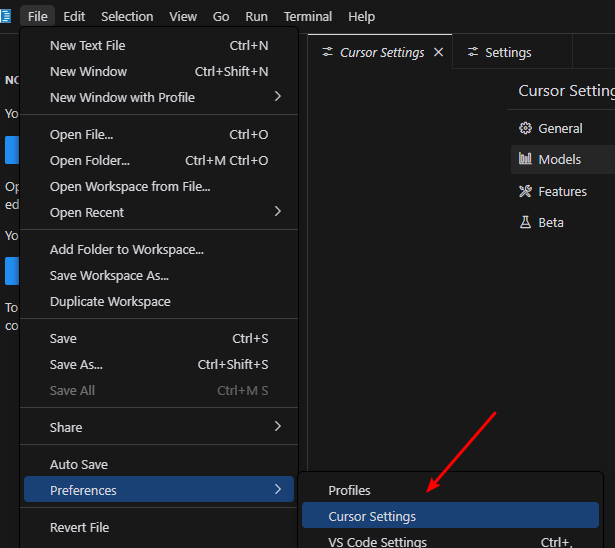
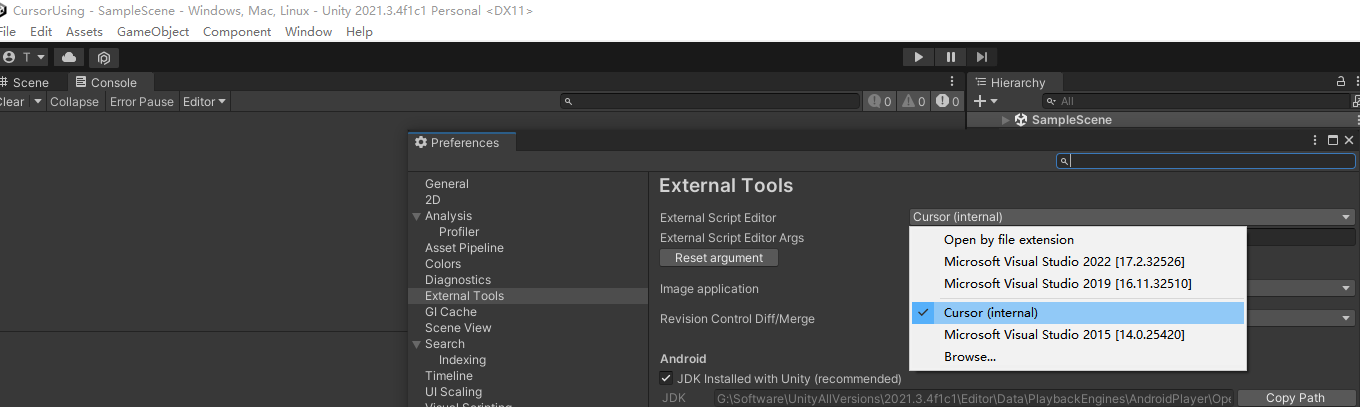
那么如何将Cursor设置成我们Cursor的默认IDE了?
Edit->Preference->External Tools->External Script Editor->Cursor
新建一个项目双击CS文件后我们会发现,Cursor仅仅是把当前选中文件当做单文件的方式打开:
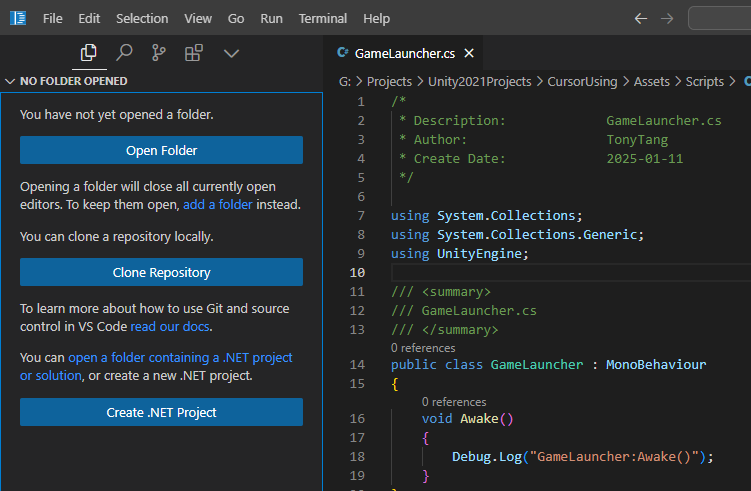
在我们Cursor工程目录下会看到压根没生成CS项目相关文件:
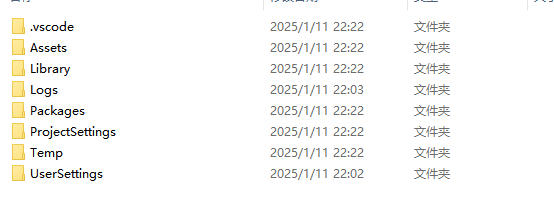
在这种状态下F5理所当然是无法调试Unity的,所以我们需要安装一个第三方包Cursor Editor帮助我们生成CS相关项目文件:
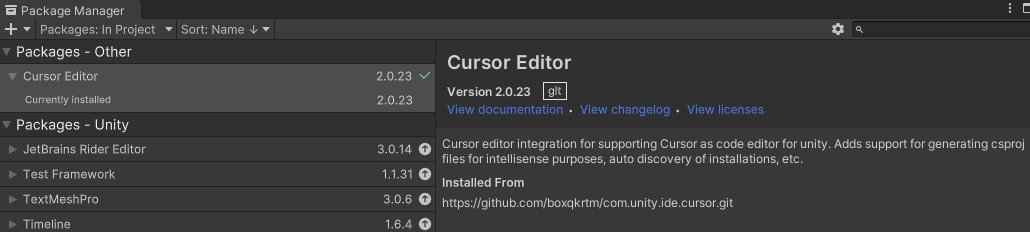
Window->Package Manager->+->Add Package from Git URL
然后输入地址:https://github.com/boxqkrtm/com.unity.ide.cursor.git
Cursor Editor Github
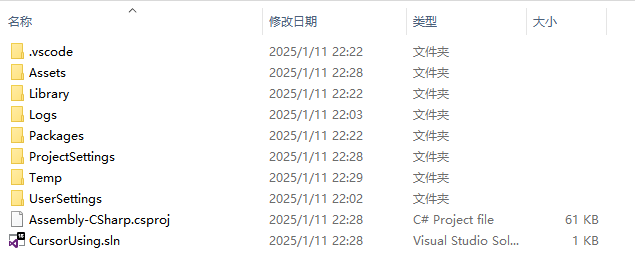
安装完成Cursor Editor后我们再次双击CS文件就会发现不仅项目工程生成了CS相关项目文件,Cursor也成功以CS工程打开了该文件:
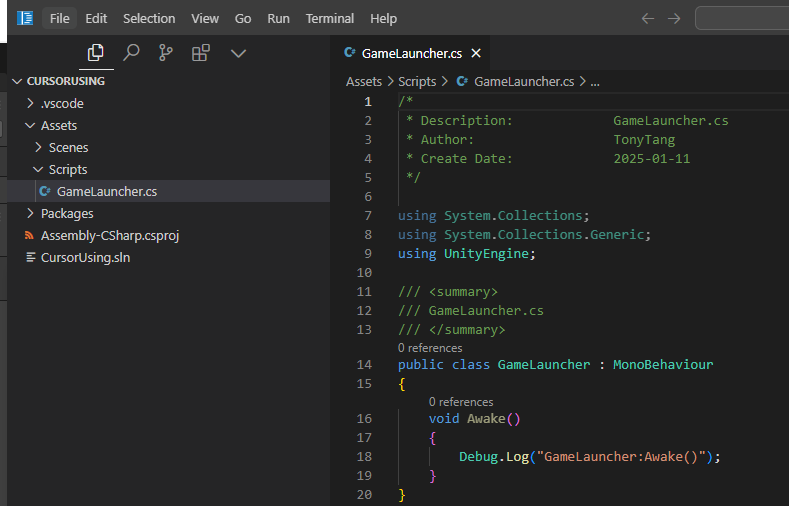
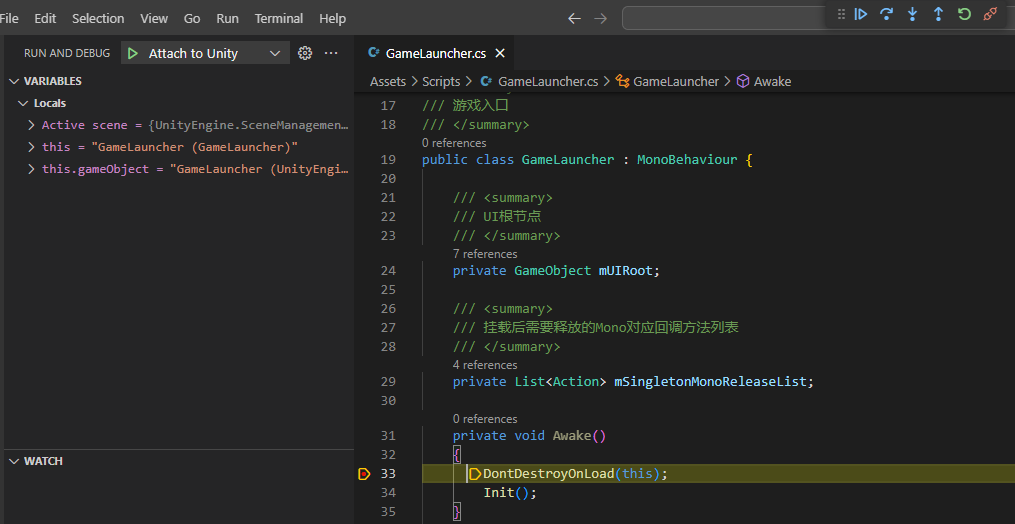
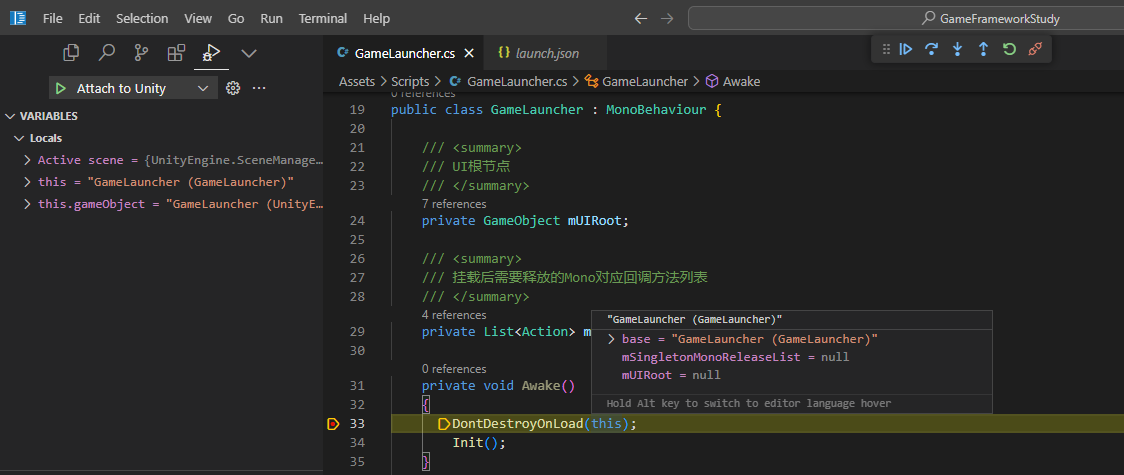
这时我们再按F5就会发现已经成功Attach到Unity并断点到了:
Note:
- 如果调试不成功请参考博主安装的扩展插件,可能是跟C#相关的扩展需要安装
VS Code+Unity
但如果必须安装Cursor Editor Package才能顺利生成C#工程和调试的话,对现有已经通过Visual Studio生成的C#工程就很不友好,所以接下来的目标是搭建Cursor直接打开原始C#工程并调试。
根据Cursor最初的介绍,Cursor的核心是基于VS Code的,所以个人认为Cursor要想调试Unity现有的C#工程,操作流程应该是和VS Code一样的。
Unity Development with VS Code
从上面的介绍可以看到条件有如下几个:
- 安装Unity 2021或者更高版本
- 安装VS Code
- VS Code安装Unity for Visual Studio Code插件(这一步会包含C#相关需要的一些东西,比如C# Dev Kit)
- Unity安装Visual Studio Editor包(这一步如果无法升级到最新,提示说需要重新登录Unity账号则登出再登录统一相关政策即可)
- 设置VS Code作为Unity的External Script Editor
所有设置完成后,我们双击C#代码文件即可打开VS Code,可以看到项目工程目录下生成了.vscode目录,里面存放了相关VS Code调试C#需要的文件:
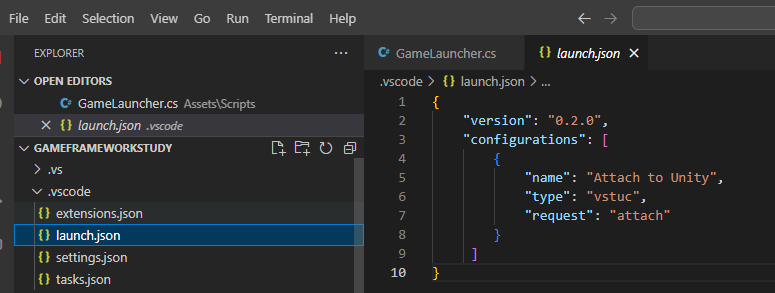
然后直接按F5即可Attach到Unity上:
Note:
- VS Code导出插件到本地需要通过vsce,详情参考:Publishing Extensions(如果vsce安装不成功的话,升级Node和Npm版本再次尝试),本人导出插件遇到一系列问题,真正导出需要符合插件开发的一系列流程,下载到本地的Extension没法直接通过vsce直接导出vsix包,vsix包可以在官方插件网站直接下载Extensions for Visual Studio Code
- 如果遇到打开的工程目录不是被Unity相关类无法自动Quick Fix添加引用等问题,记着通过设置Edit->Preference->External Script Editor(VSCode),然后点击Regenerate project files重新生成工程文件
Cursor+Unity
既然VS Code都调试Unity C#工程成功了,那么接下来让我们看下Cursor参考VSCode是如何成功打开原始C#工程并调试成功的。
参考VSCode的安装流程:
- 安装Unity 2021或者更高版本
- 安装Cursor
- Cursor安装Unity for Visual Studio Code插件(这一步会包含C#相关需要的一些东西,比如C# Dev Kit)
- Unity安装Visual Studio Editor包(这一步如果无法升级到最新,提示说需要重新登录Unity账号则登出再登录统一相关政策即可)
- 设置Cursor作为Unity的External Script Editor
按照上述流程弄完后,双击C#文件会发现Cursor IDE只打开了一个文件,而没有把整个项目的工程文件打开,这时我们只能通过Cursor把项目通过文件夹的方式打开。

通过上述方式打开我们会看到项目里所有的资源文件包含Library目录的文件都显示在了Cursor里,为了避免笔不要的文件显示在Cursor工程里,我们需要再.vscode/settings.json里配置排除的文件列表,这个列表我参考复制了Cursor Editor生成的settings.json(这一步通过VSCode流程打开项目也会自动生成):
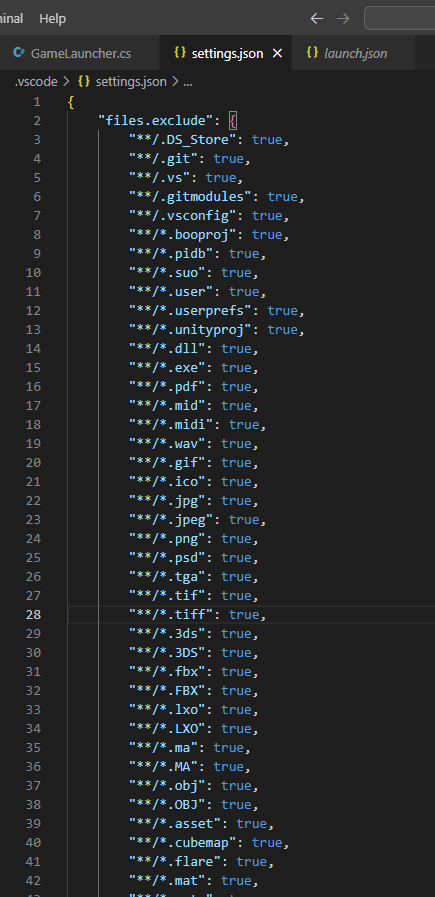
直接使用Cursor打开目录是不会生成.vscode目录的相关配置文件的,这里我们可以自行复制相关文件,也可以在Cursor打开工程目录之前,设置VS Code作为Extebnal IDE然后打开项目代码自动生成.vscode目录。
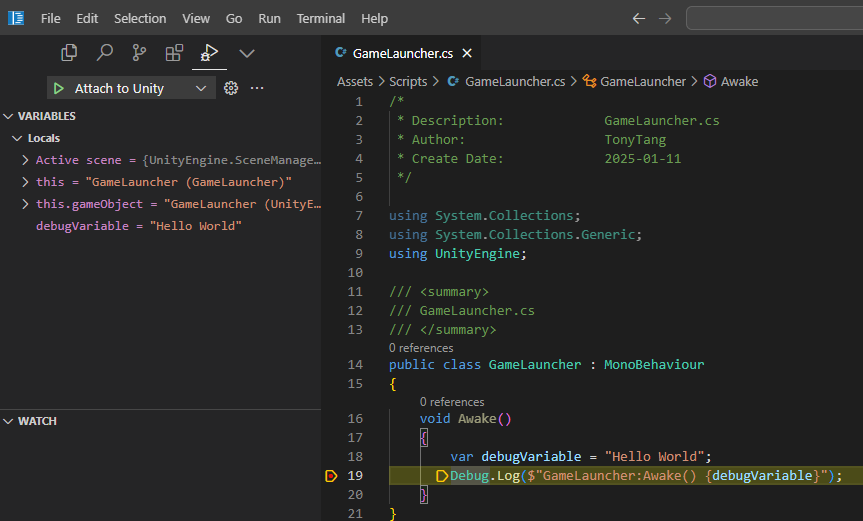
有了.vscode这个目录的相关配置,我们使用Cursor打开目录后直接F5即可看到调试效果:
Note:
- Cursor底层核心跟VSCode是一样,所以Cursor调试Unity的流程跟VSCode也几乎是一样的,但设置Cursor作为External IDE并不会帮我们自动生成.vscode这个相关配置目录,所以需要我们通过VSCode流程或者Cursor Editor包辅助生成
- Unity里的Visual Studio Editor包一定要更新到最新
- Cursor不使用Cursor Editor包的前提下只能通过打开项目目录的方式打开工程
- 目前个人认为最好的IDE设置方式应该是利用设置VS Code作为External IDE双击打开生成.vscode相关配置文件,然后修改External IDE为Cursor,然后使用Cursor直接打开项目工程目录作为编写代码的IDE,这样通过Console双击报错时也能快速打开Cursor对应文件,也能快速适配C#工程代码调试
Cursor进阶使用
项目文件生成+调试C#成功,接下来就让我们看看Cursor是如何帮助我们提升开发效率的。
Cursor主要有三大功能:
- 人工智能代码补全(理解代码库智能分析即将编写的代码进行智能不全)
- 自然语言聊天交互(通过打字交流的方式,交互理解代码分析问题)
- 智能代理(处理复杂开发任务)
人工智能代码补全
Cursor最强大也是最基础就是根据程序员代码编写进行智能代码分析,对接下来的代码编写进行预测,在编写的时候会生成灰色的预测代码,如果程序员选择接受预测的代码只需按tab键即可。
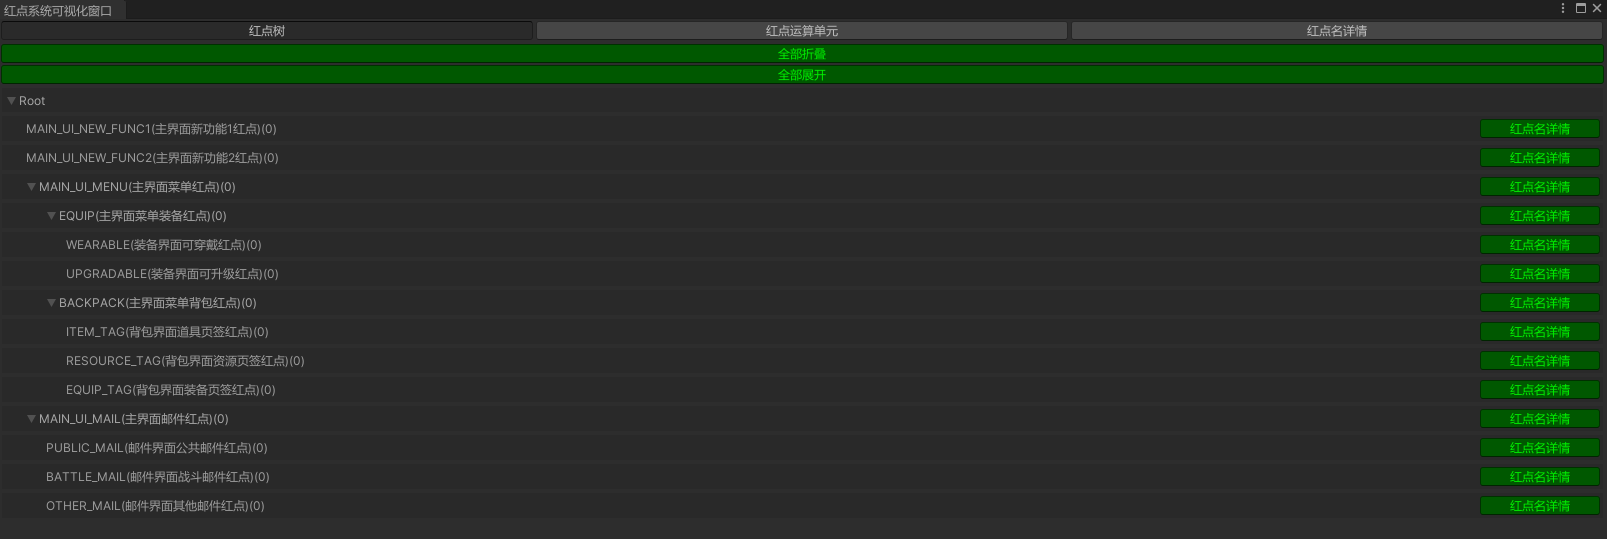
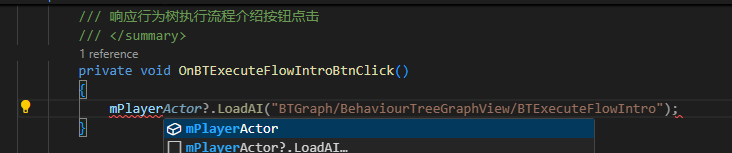
比如我们编写一个主界面打印日志按钮的声明和点击监听代码:
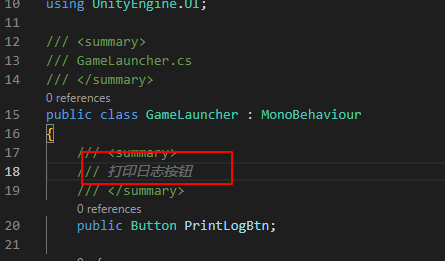
可以看到我们还没有编写注释,Cursor就根据之前编写的声明代码猜测出我们即将写的注释,此时我们只需按tab键即可接受Cursor的代码推断,自动完成注释编写。
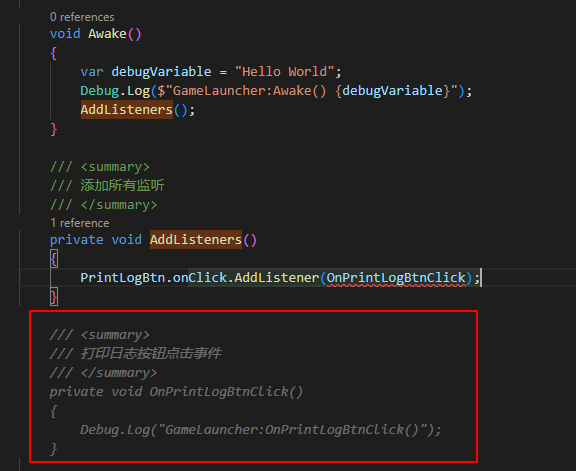
从上面可以看到博主刚编写完PrintLogBtn的onClick的监听,Cursor就在下面智能分析提示出了多段即将编写的代码,从预测代码来看,几乎就是博主即将编写的代码,此时只需按tab键接受Cursor的的预测代码,即快速完成了日志打印按钮的响应代码编写。

相比Compilot,Cursor的智能提示有如下优势:
GitHub Copilot can insert text at your cursor position. It cannot edit the code around your cursor or remove text.(Copilot智能在光标处插入文本,无法在光标附近插入文本或者删除文本)
可以实现自动文件导入补全功能(好比C#里用到某个命名空间下的类,Tab可以实现智能补全using)
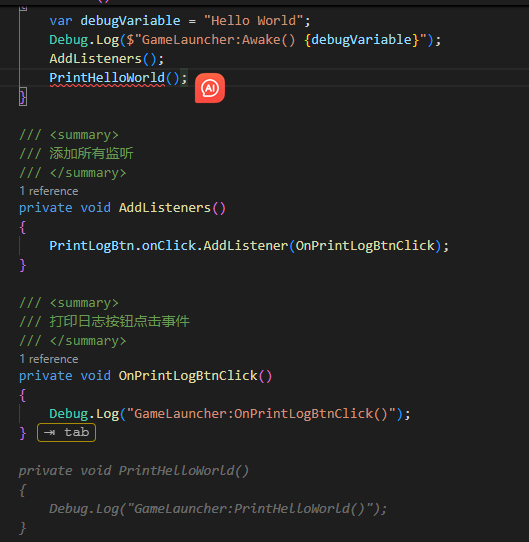
Cursor在用户tab接受智能分析代码后预测即将编写的代码地方(方便用户一直通过tab补全相关代码)
Cursor可以实现智能分析的代码部分接受(此功能貌似默认关闭的,需要在Cursor Settings->Features->Cursor Tab里勾选打开)
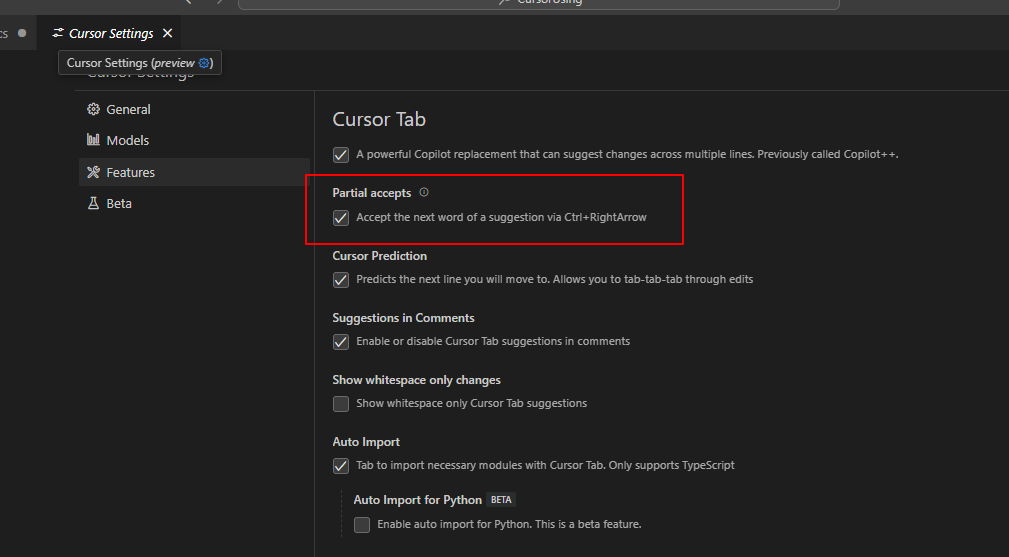
部分接受补全的快捷键是:Ctrl+→

自然语言聊天交互
Chat feature that uses AI to answer code questions with smart context and file references in your editor(Chat功能就好比我们常规用的ChatGpt,能够通过聊天交互的方式一步一步向AI提出需求让AI帮我们提出解决方案甚至编写完整代码)
个人理解ChatGpt更加面向通用模型,而Cursor的Chat更面向程序层面,可以结合强大的代码库知识库给我们提出代码层面更加合理的解决方案
打开Chat的快捷键:Ctrl+L
Chat功能类似Composer,也可以通过@的方式提供上下文文件或目录。
可以看到根据我们提出的需求,AI已经成功编写了相关代码,如果选择接受点击右下角apply all即可,如果在此基础上还需要改进,可以继续在Chat聊天框里基于前面生成的代码进行对AI的细节调教来完善代码。
Note:
- Cusor的代码接受和拒绝有点像Git合并操作,这一点还是比较容易理解的
智能代理
Agent is your AI-powered coding partner that helps you tackle larger tasks(智能代理是一个强大的代码编程助手,辅助我们解决复杂的任务)
Composer:AI coding assistant that helps write and edit code directly in your editor with chat and agent modes(Composer是Cursor提供的通过聊天交互方式的代码助手,快捷键打开是:Ctrl+I,打开新Composer快捷键是:Ctrl+N)
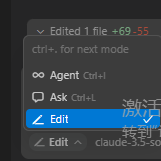
Composer有三种工作模式:
- Ask:Ask question about your code, get explanations, and discover your codebase.(询问关于代码的问题,得到解释的模式)
- Edit:Make single-turn edits to your code with precision and clarity.(单词精准编辑代码的模式)
- Agent:uses tools and reasoning to perform coding tasks with minimal supervision(利用工具在最小的监督下完成编码任务)
目前个人理解Ask模式适合针对指定代码上下文询问问题得到解释。
Edit模式适合指定上下文代码问题给出代码修改方案。
Agent模式适合需要完成复杂的代码任务(利用了更多的工具(比如Model Context Protocol (MCP)实现更加DIY和智能的代码理解和生成)
模式的指定在Composer的左下角:
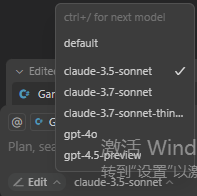
同时关于Composer使用的底层模型(目前代码理解比较火的是claude-3.7-sonnet-thinking(2025/3/11))指定也在左下角:
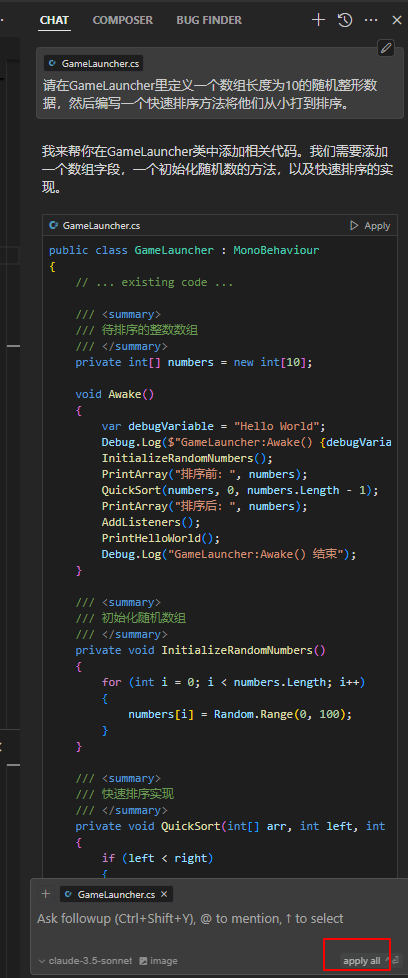
Composer里我们可以通过@的方式指定要添加的相关上下文代码,然后通过自然语言交互的方式给人工智能提需求编写相关代码。
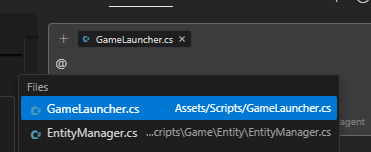
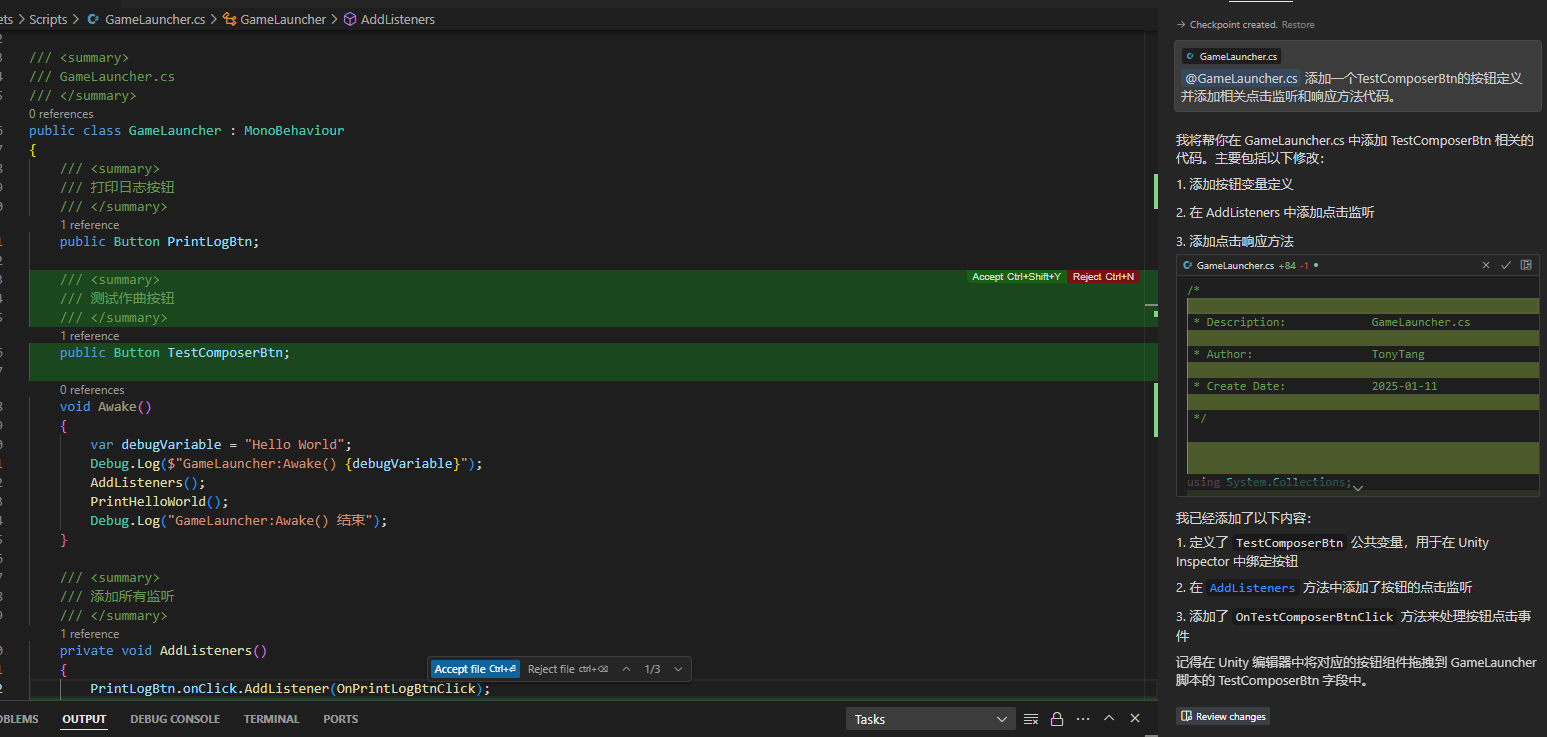
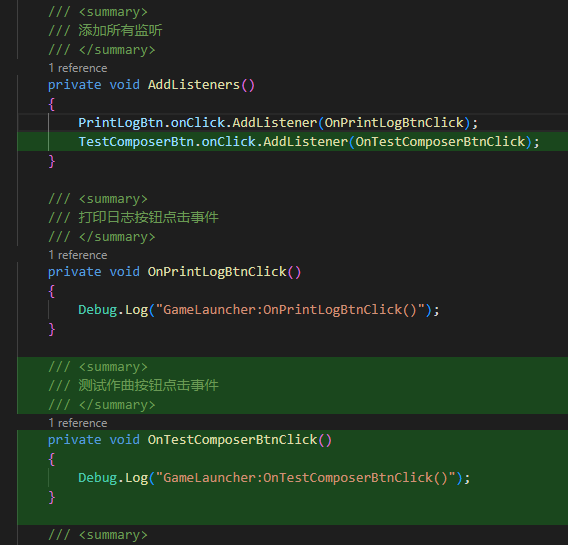
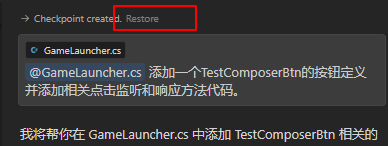
可以看到通过添加GameLauncher.cs脚本作为上下文,然后直接描述需求的方式,Cursor帮我们生成了相关代码,就这个简单需求而言,生成的代码几乎完美,代码符合心理预期后,接下来我们只需要点击接受单个或者接受所有即可:
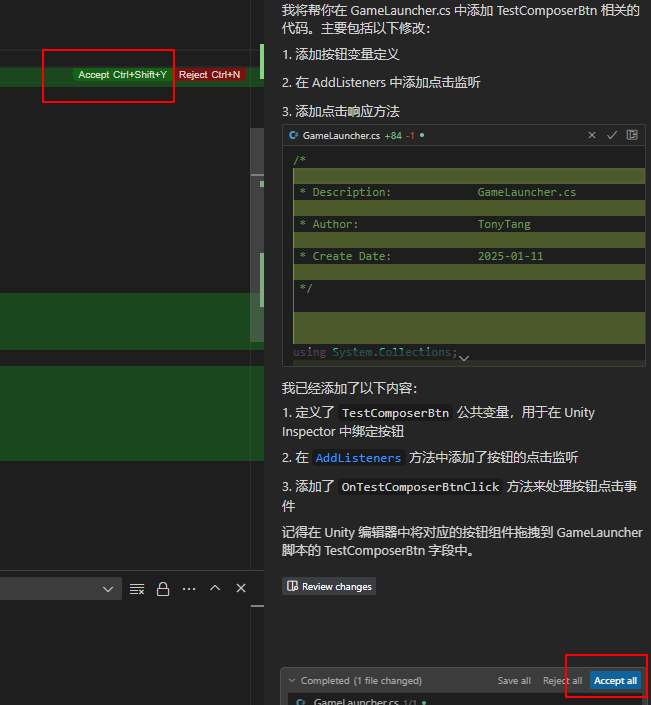
如果接受的这一次Composer代码不想要了,Cursor还记录的类似进度点(CheckPoint)的东西,帮助我们快速还原某次Composer记录:
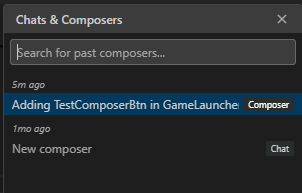
Cursor Composer还提供了历史面板的东西,快捷键:Ctrl+Alt+L,可以帮助我们快速查看过去的所有Composer提问以及再次操作过去Composer提问的入口:
关于Agent,这里暂不深入学习,未来有需求再深入了解。
Note:
- Cursor受到微软制裁,导致无法正常使用VSCode的插件,导致相关使用受限(2025/07/08)
Augment Code
借助VSCode插件市场Augment的介绍来了解一下Augment的功能:
“Augment Code is the AI-powered coding platform built for professional software engineers and large codebases. Powered by a cutting-edge context engine that understands your entire codebase, use Agent, Completions, Chat, and Next Edit to accelerate the way you code.”
Augment Code定位是AI辅助编程工具,和Cursor一样拥有强大的整体代码分析能力以及强大的代码预测快速填充和AI问答辅助编程等功能,但和Cursor最核心不一样的地方是,Augment Code是以插件的形式注入的原始的IDE中,而Cursor是独立的IDE结合AI编程体验。据说Augment Code有更大容量的上下文token,对于大项目团队合作和代码分析更加强大。
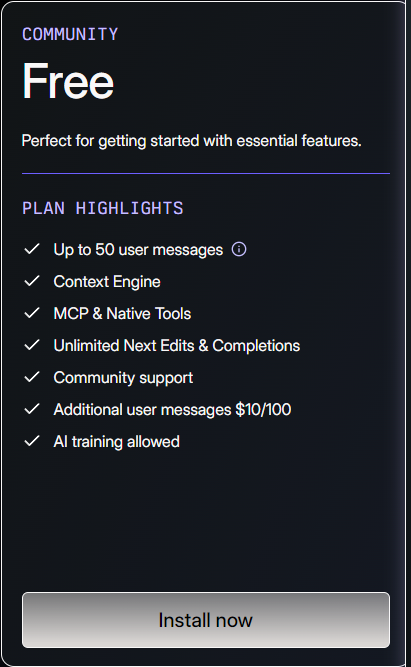
Augment Code的开发版价格目前是50美元/月,本人采用的是社区免费版本(50次对话提问,MCP,无限代码预测提示等):
相比Cursor改变IDE,本人更倾向于原始的熟悉的IDE开发(借助原生态的插件等,会有更好的开发体验),特别是Cursor在受到微软VSCode插件使用限制的情况下,个人更看好插件形式的AI辅助编程环境(e.g. compilot和Augment Code)
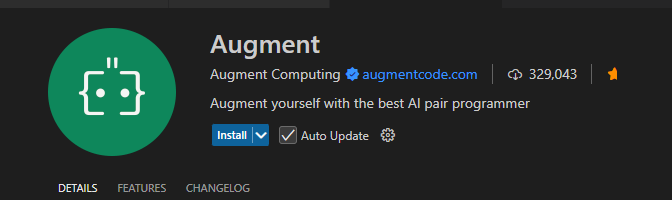
安装Augment Code很简单,直接在VSCode插件市场搜索Augment然后点击安装即可:
安装完成后我们通过登录Augment账号即可开发体验Augment插件功能:
允许Agment所以我们指定的代码库进行代码解释和分析:

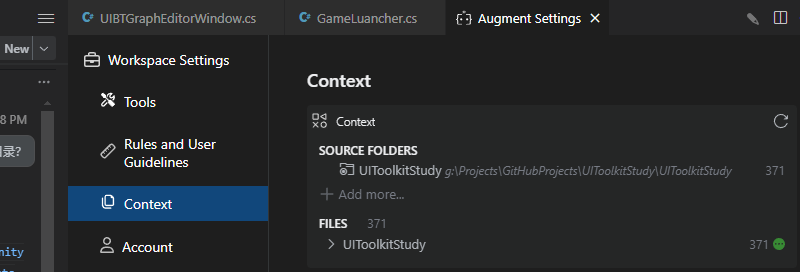
查看Augment设置的代码库上下文路径配置:
Augment Setting->Contetx即可看到:
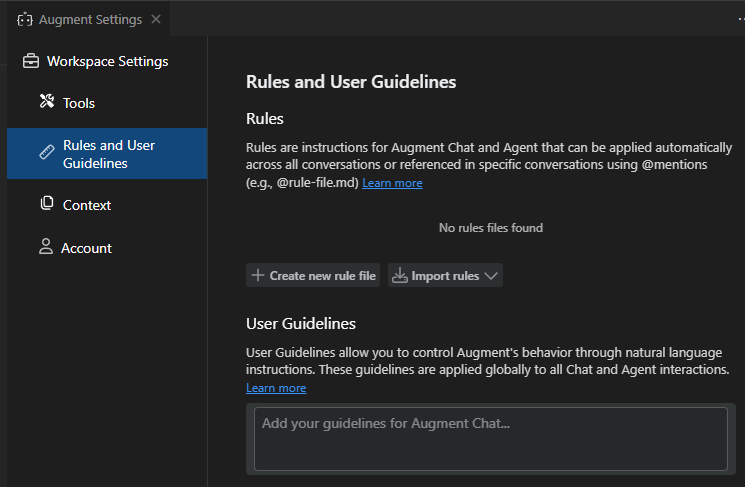
同样的道理,配置Augment规则,方便统一Augment在协作的过程中的一些规范配置(可以直接用自然语言描述规则):
Augment Setting->Rules and User Guidelines即可看到:
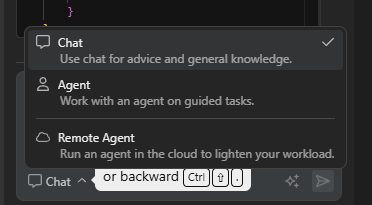
Augment Code和Cursor一样,聊天框分Chat和Agent(Agent又分为Agent和Agent Auto,后者权限更大,无需询问自动化执行)模式:
- Use Chat to explore your codebase, quickly get up to speed on unfamiliar code, and get help working through a technical problem.(Chat更适合通过AI对话的方式帮助我们快速熟悉代码和了解解决常规技术问题)
- Use Agent to complete simple and complex tasks across your workflow–implementing a feature, upgrade a dependency, or writing a pull request.(Agent更适合完成需要复杂步骤流程完成的功能或任务)
Chat和Agent的切换在对话框左下角:
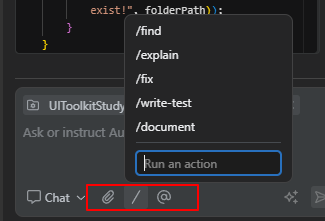
Augment Code聊天空支持了三个工具:
- Attach(支持添加附加文件作为问题对话内容)
- 支持输入/或点击/快速选择行为来帮助我们明确对AI的输入的内容
- 支持输入@或点击@快速选择对话里需要引用的上下文内容(e.g. 文件或目录等)
Augment Code主要包含四大功能:
- Chat(这个就好比Cursor的Deepseek问答系统,可以直接对话提问,这个可以帮助我们让AI快速介绍分析代码库设计,对不懂的问题进行提问等)
- Next Edit(通过选中代码块给出AI指令,让AI帮忙快速修改建议的功能)
- Using instructions(使用自然语言描述让AI把选中的代码模块进行从够或编写代码测试用例等)
- Code Completions(这个就是Cursor里基于代码库分析,编码时快速预测提示补全的功能)
Chat
Chat和Agent前面介绍过细节区别,接下来看看使用Agent提问帮助我们理解项目代码设计:
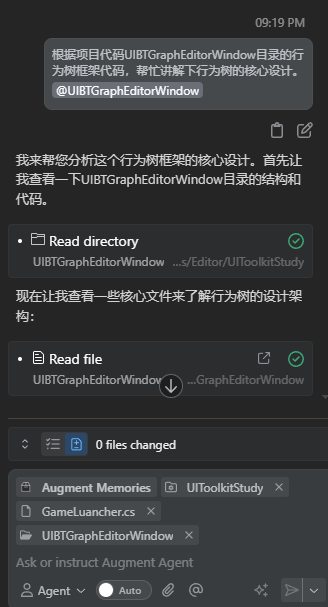
可以看到同**@符号我们添加了给AI作为思考上下文的核心代码目录**,AI通过分析把每一步思考理解过程都详细讲述出来了,最后给出了分析结论(这一点和Cursor的Chat和Agent没有本质区别),底层AI用的目前适配编程AI最好的Claude模型(2025/07/13)。
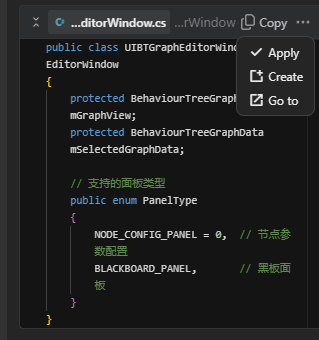
关于AI给出的代码都会提供复制和创建新文件的快捷操作入口方便我们采纳AI给出的代码建议:
Augment Code设计了一个AI自动优化提示词的功能(Rewrite Prompt),避免我们问问题的时候不够针对和准确:
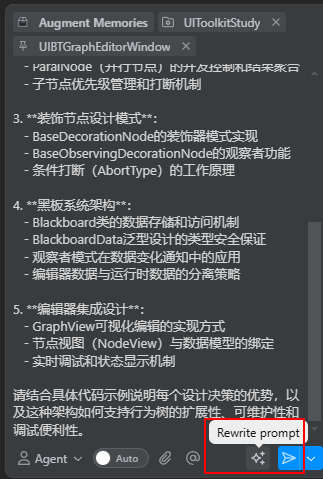
可以看到AI整理后的提示词比我们精准和详细。
Next Edit
Next Edit helps you complete your train of thought by suggesting changes based on your recent work and other context. You can jump to the next edit and quickly accept or reject the suggested change with a single keystroke.
从介绍可以看出Next Edit是基于代码库和最近编写的上下文进行代码预测和补全的。
相关操作快捷键如下:
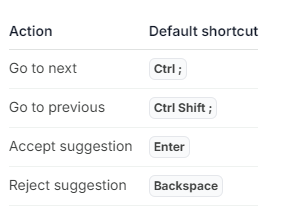
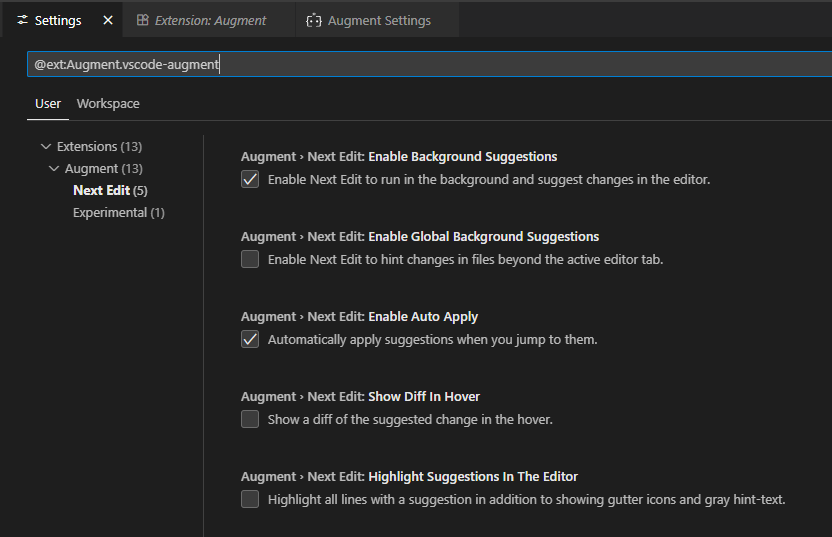
相关AugmentCode的Next Edit设置在插件->Augment->Settings->Next Edit里:
Using instructions
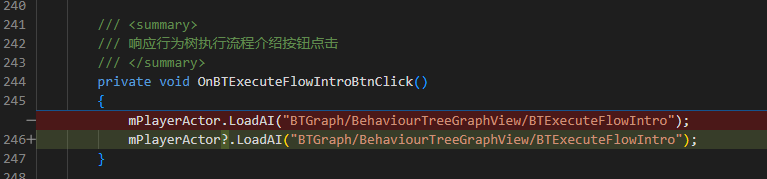
Use Instructions to write or modify blocks of code using natural language. Refactor a function, write unit tests, or craft any prompt to transform your code.
从介绍可以看出,Instructions是使用自然语言描述让AI把选中的代码块给出AI指令,让AI帮忙快速修改建议的功能等,快捷键是Ctrl+I。
通过选中需要改进的代码,我们给出AI指示,AI会给出修改前后对比让我们选择是佛接受(Return快捷键)或取消(Esc快捷键)
相关快捷键操作:
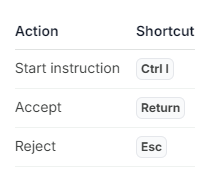
Note:
- 上面写的Return快捷键好像是Enter
Code Completions
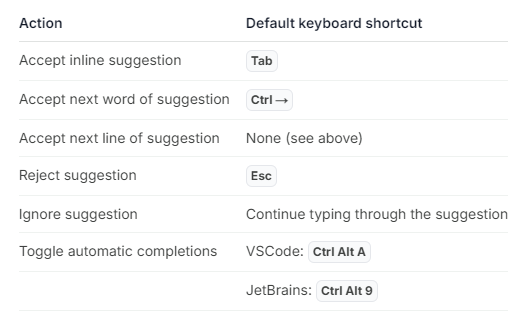
Augment’s Code Completions integrates with your IDE’s native completions system to give you autocomplete-like suggestions as you type. You can accept all of a suggestion, accept partial suggestions a word or a line at a time, or just keep typing to ignore the suggestion.
从介绍可以看出Code Completions就是Cursor里基于代码库和最近编写的代码进行代码编写预测的功能。
相关快捷键:
相对来说Agent比Chat用的更多,常规设置成Agent即可,
Ctrl+L(打开Agment面板)
Note:
- Augment Code对个人或项目代码安全保护很好,是私有分析不会上传云端
- Augment Code的Code Completions反应个人觉得比Cursor慢,具体原因未知(本人是免费用户)
Claude Code
Unleash Claude’s raw power directly in your terminal. Search million-line codebases instantly. Turn hours-long workflows into a single command. Your tools. Your workflow. Your codebase, evolving at thought speed.
从介绍可以看出Claude Code相比前面Copilot,Cursor,Augment Code最大的区别就是是基于命令行的工具,这一点对于服务器开发人员比较友好。
脱离的IDE,可以便捷轻量使用AI工具辅助开发。
Claude模型在编程方面很强
Note:
- Claude Code Pro版本(17美元每月)
AI编程工具选择
了解了主流的几个编程AI工具,个人认为结论大致如下:
Copilot – 适用于对AI编程有基础的智能补全和简单的Agent问答需求,价格不希望太贵的用户。
Cursor – 适用于能接受独立IDE,希望有完美AI深度编程体验,希望AI上下文代码分析能力强一些,同时能支付的起价格的用户。
Augment Code – 适用于不脱离原有IDE,希望有强大的AI上下文代码分析能力,同时能支付的起价格的用户
Claude Code – 适用于习惯命令行工作环境或者当做简易独立AI编程辅助工具的开发人员
综合了解了主流AI编程工具后,博主个人的使用功能需求主要如下:
- 倾向于保留原有熟悉IDE的开发环境
- 有快速和智能的代码分析补全
- 支持基础的Agent问答辅助编程开发功能
- 价格不能太贵
最终博主决定选择Copilot作为VS+Unity开发的个人AI编程工具。
在公司公司付费了Cursor,所以在公司依然使用Cursor辅助AI编程开发。
未来如果经费允许参与大型项目需要强大的上下文代码分析能力,可以考虑Augment Code。
AI工作流工具
Comfyui
ComfyUI is a node based interface and inference engine for generative AI. Users can combine various AI models and operations through nodes to achieve highly customizable and controllable content generation.
个人理解ComfyUI是一个基于节点编辑可组合各种AI模型完成指定AI工作流的一个AI工作流引擎。
这是未来的学习方向,目前暂时不做更多了解,TODO。
个人心得
现在底层AI模型百花齐放,上层AI工具也百花齐放,AI提升了人的生产力,但提升多少生产力还在于每个人对于AI的使用深度,AI并不能直接替代人,而是作为工具帮助人更高效的完成工作
学会高效使用AI,打通AI工作流是未来我们每一个人必备的一门课。
Reference
Unity+AI:The Game Dev Revolution
Cursor Doc
Unity Development with VS Code
ComfyUI