前言 游戏开发过程中打包是一个很频繁和复杂的事。打包除了涉及资源打包流程,还涉及到APK,IPA,小游戏打包等平台分类。不同平台接入第三方SDK等库又不一样,不同渠道又有不同的SDK要接入。每次打包如果都是打开Unity的打包窗口去设置这些详细打包参数,那对于打包维护成本来说就很高。本章节就是详细深入**CI/CD(持续集成和持续交付/部署)**的实战,目标是打造易用性,易扩展维护性,支持快速持续打包部署交付的自动化打包流程。
Jenkins The leading open source automation server, Jenkins provides hundreds of plugins to support building, deploying and automating any project.
Jenkins是一个用Java编写的开源的持续集成工具。
从介绍可以看出Jenkins是一个免费开源的支持数百个插件用于打包,部署,自动化的自动化服务器。
以前学习了解过Jenkins的打包流程,这一次准备从0到1搭建Unity游戏开发的全自动化打包流程(包含不同打包需求,不同平台,不同渠道,不同SDK等)。
Jenkins官网文档
Jenkins安装 因为Jenkins是基于Java编写的,所以我们要先安装Java环境:
Java下载地址
关于Java环境变量设置参考网上说明,最终配置好后:
后续会将Path里的全路径修改成访问JAVA_HOME的相对路径方便统一修改Java版本。
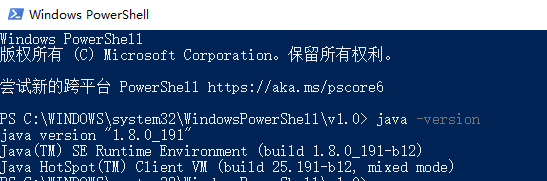
验证是否设置Java环境变量成功可以在PowerShell里输入”java -version”查看java版本信息:
搭建Jenkins自动化打包第一步安装Jenkins:
Jenkins下载地址
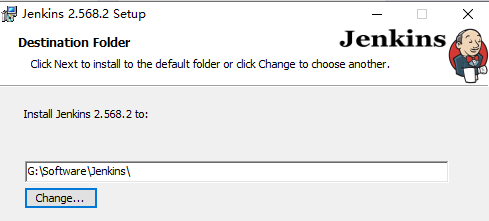
考虑到C盘硬盘容量有限,我安装到了其他盘:
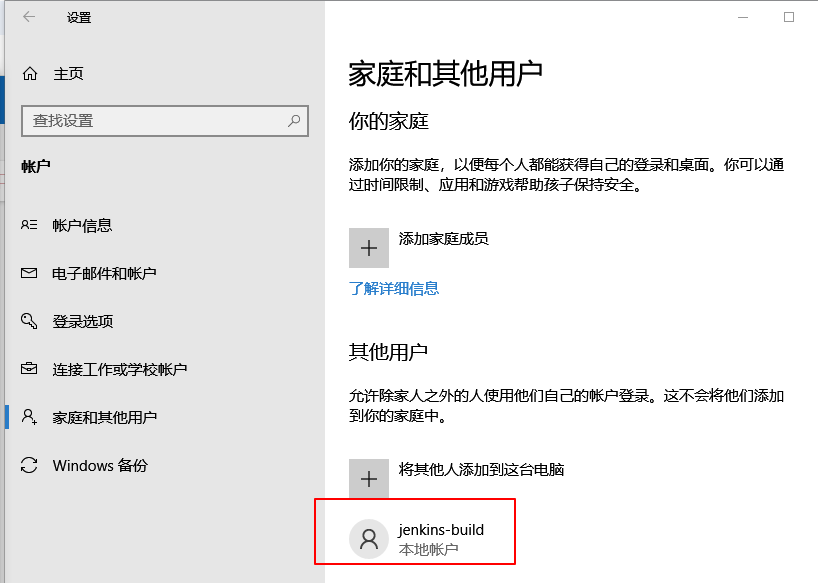
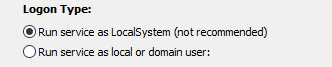
为了确保后续Jenkins权限服务正常,优先选择Logon Type为Run service as local or domain user: ,选择这个后需要输入本机的用户名和密码(这里的用户名和密码我尝试了各种用户名和密码好像都不对 ),考虑到为了避免使用现有用户名可能因为现有用户名的一些权限修改影响Jenkins运行,最终我决定新建一个用户名作为Jenkins独立使用的用户名,Win10家庭版添加用户名流程:
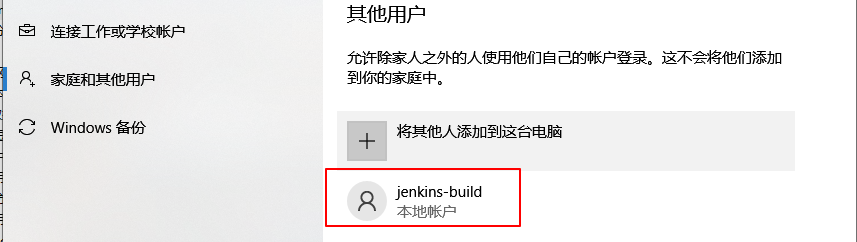
设置->账户->家庭和其他用户->将其他人添加到这台电脑->输入新用户名和密码
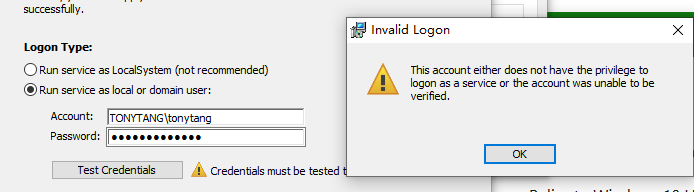
然后我们使用这个用户名和密码作为Jenkins安装的用户名,如果确认用户名密码都数对了,但还是提示Test Credential失败如下:
按照官网的说法是指定的用户名没有Logon as a service的权限解决办法
如果是家庭版Win10好像没有secpol.msc这个时候我们要使用以下方案:
How To Enable Group Policy Editor (gpedit.msc) In Windows 10 Home
经过测试上述方案命令行有报错,无法正确安装gpedit.msc,也就无法给用户名添加Logon as a service权限,最后AI的建议是先通过LocalSystem模式安装,安装完成后就能有services.msc工具,同时也能从LocalSystem指定切换用户,相当于最终又回到Run service as local or domain user的方式!
以LocalSystem安装Jenkins
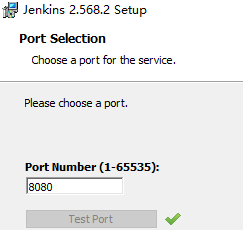
设置默认Jenkins端口号到8080
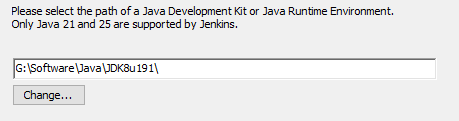
设置Java SDK位置
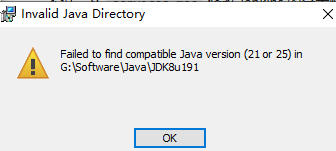
这一步Jenkins对Java版本有要求,需要下对应版本的Java JDK
这里本人安装一个Java 21,安装完成后要将JAVA_HOME重新指向最新的Java 21目录,这样本机默认使用的才是Java 21,为了保持Java Path配置一致性顺带将Path里的路修改成%JAVA_HOME%\bin的方式 :
打开PowerShell输入”java -version”测试是否配置成功:
Jenkins安装成功后我们就能在**本地服务(Ctrl+R然后输入services.msc运行)**看到Jenkins服务了,属于自动启动也就意味着开机Jenkins服务就会自动运行起来
本地服务里选中Jenkins右键->属性->登录,输入要切换的用户名和密码进行用户名切换,从而切换到前面我们无法使用的Run service as local or domain的方式:
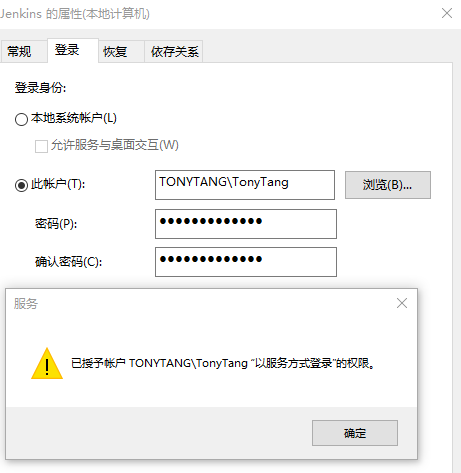
这一步貌似直接使用现成的用户名和密码好像无法正确启动Jenkins,AI说因为我使用的账户是MicrosoftAccount账户,需要单独创建一个用户作为Jenkins的用户
创建新用户,设置->账号->家庭和其他用户->将其他人添加到这台电脑
然后我们再次去设置Jenkins服务的用户到jenkins-build这个用户并启动Jenkins服务
可以看到经历千辛万苦我们终于给Jenkins指定新用户且启动起来了。
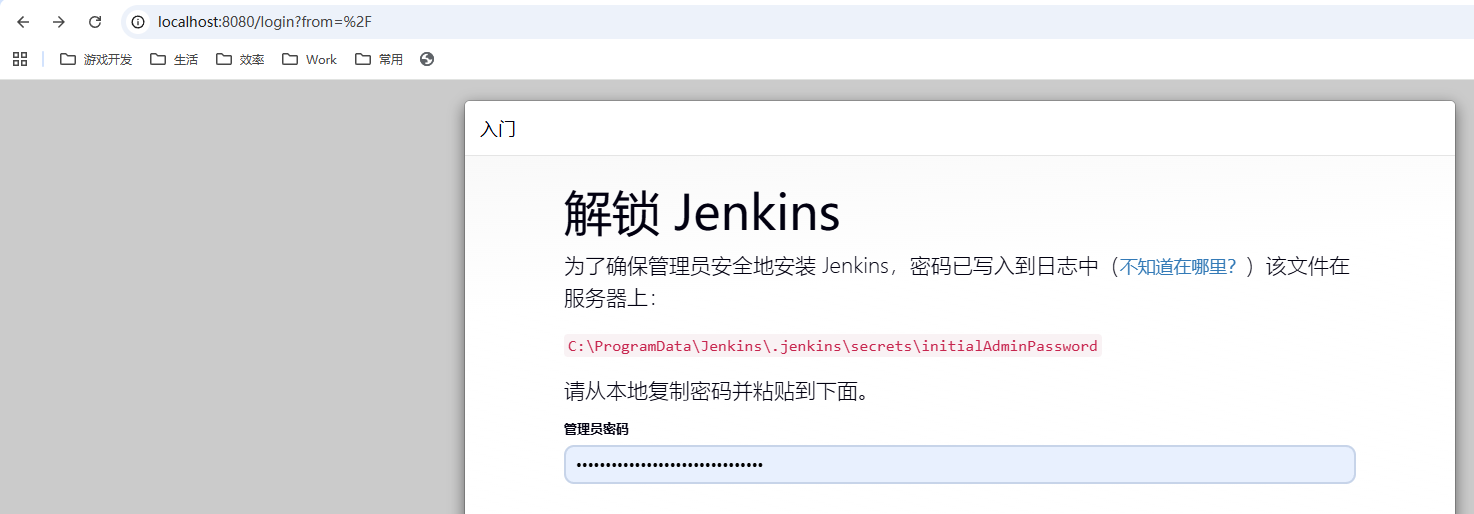
本地测试下Jenkins是否运作正常,在浏览器输入localhost:8080进行测试
默认密码存在于C:\ProgramData\Jenkins.jenkins\secrets\initialAdminPassword 我们复制输入后进入Jenkins初始化设置界面
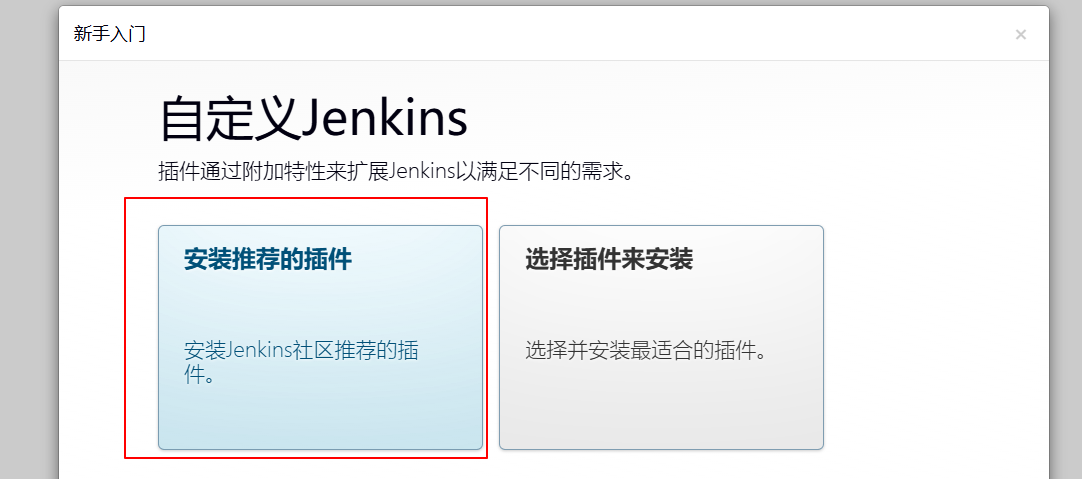
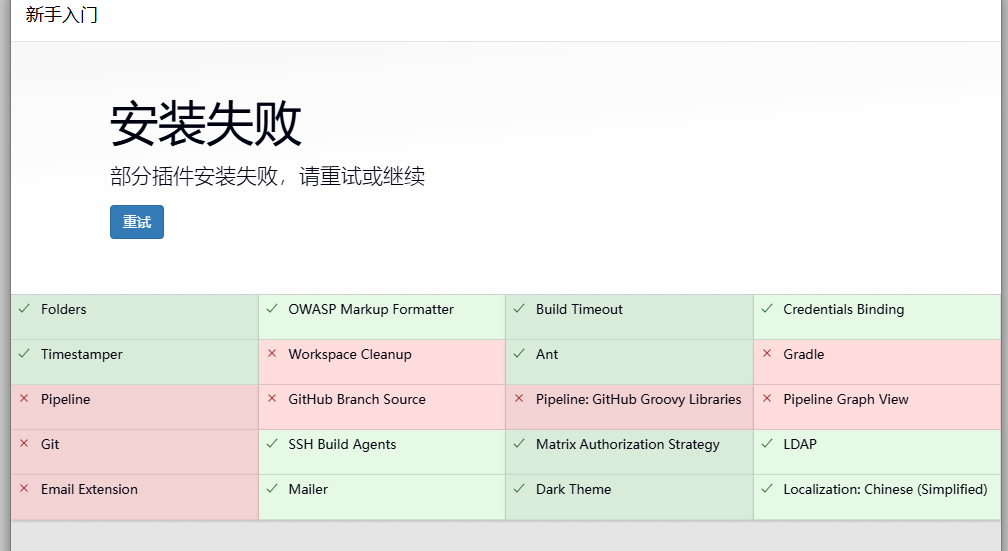
由于第一次安装也不确定安装哪些Jenkins插件,所以这里我默认安装推荐的插件模式(安装好后进入Jenkins后续我们还能根据自己需求去自行删除和安装插件)
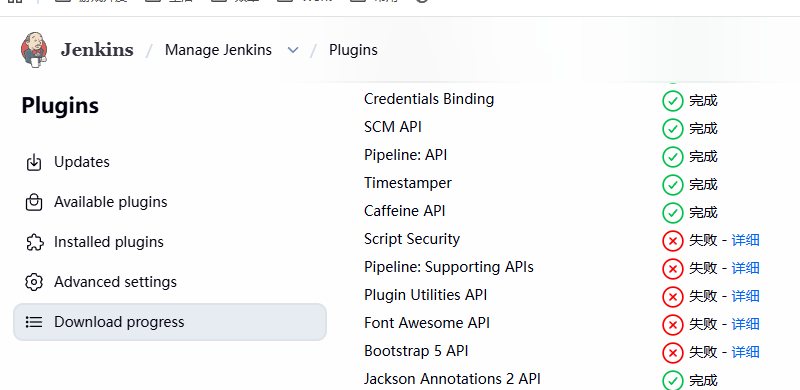
安装过程中会发现有大量插件安装失败:
这个我们可以后续再自行安装。
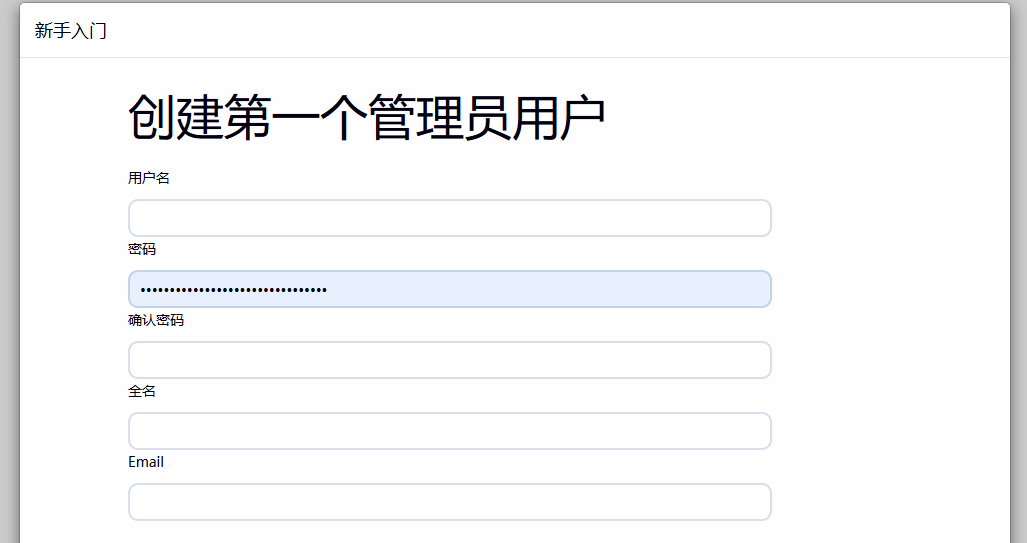
Jenkins插件安装完成后,我们需要创建我们第一个Jenkins管理员账号
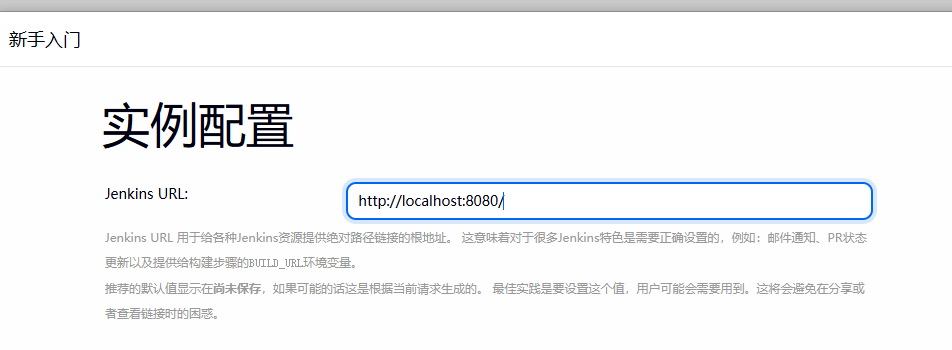
接下来配置Jenkins的访问URL
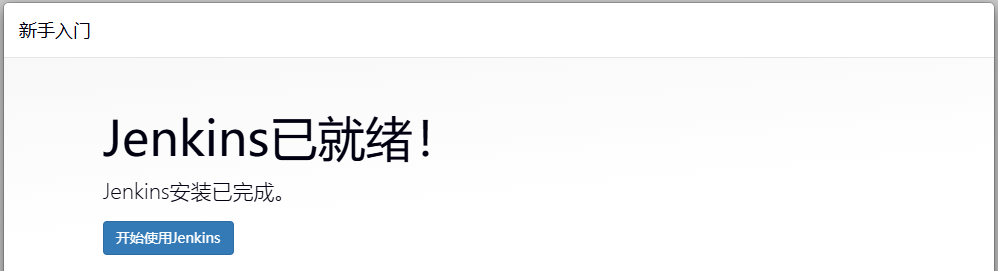
完成Jenkins设置可以开始使用Jenkins了
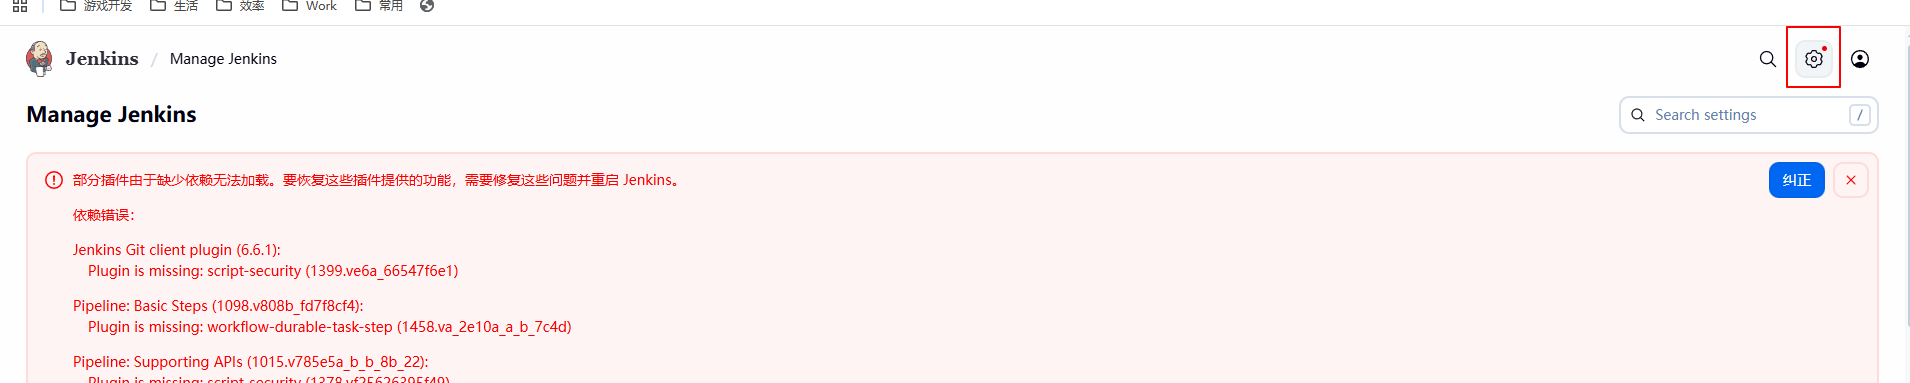
考虑到刚才有很多插件安装失败了,所以开始Jenkins使用的第一件事就是打开Manage Jenkins进行插件安装
关于到底哪些插件安装失败了,可以打开Download progress查看到:
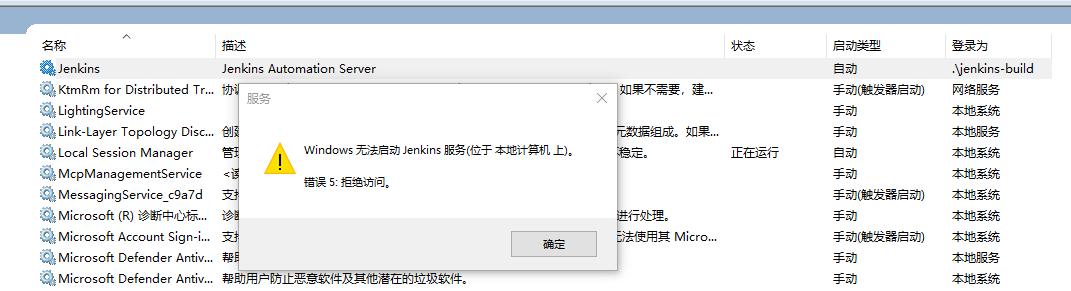
部分插件貌似需要重启Jenkins ,但重启Jenkins的我发现又报错了:
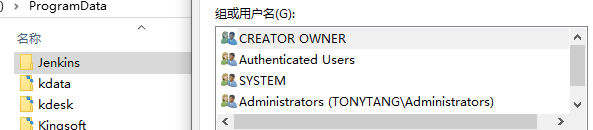
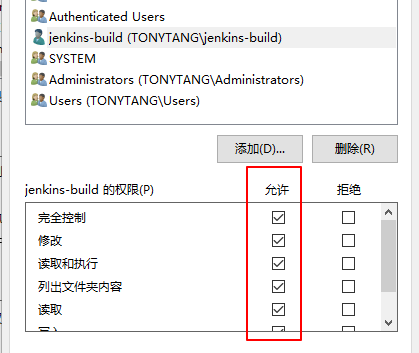
核心原因是我们前面设置的用户jenkins-build没有对C盘jenkins目录和安装Jenkins目录(含jenkins.exe)的读写权限:
所以我们需要对这两个目录右键->属性->安全->编辑->添加jenkins-build用户(并设置对应权限)
上面为了确保jenkins-build用户权限足够,我把对应两个目录的所有权限都勾上了。
然后再次重启Jenkins会发现成功启动:
然后再次打开Jenkins Manage Plugins惊奇的发现起始之前大部分插件已经安装成功了!
在真正开始使用Jenkins之前我们先了解下Managing Jenkins和Jenkins Pipeline。
Note:
Jenkins作为Service启动在Windows上,必须确保Jenkins服务账户拥有Log on as a service 权限 Jenkins的安装对Windows的.NET Framwork版本也有要求,Jenkins 2.238起要求.Net Framework 4.0,之前要求.Net Framework 2.0
修改Jenkins主目录 在了解Manageing Jenkins和Jenkins Pipeline之前,我先修改Jenkins的默认工作目录(因为我的C盘硬盘不够了),默认是在**%ProgramData%\Jenkins.jenkins**路径。
迁移流程如下:
打开PowerShell(必须以管理员身份运行 )输入”net stop Jenkins”将Jenkins服务停止
复制所有%ProgramData%\Jenkins.jenkins目录下的文件到新的Jenkins目录
修改Jenkins目录下的jenkins.xml里的
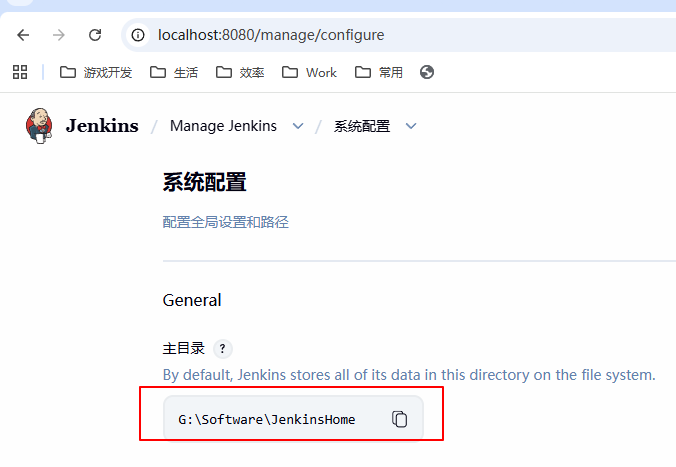
1 <env name ="JENKINS_HOME" value ="G:\Software\JenkinsHome" />
打开PowerShell(必须以管理员身份运行 )输入”net start Jenkins”将Jenkins服务开启
然后再次在页面上打开jenkins的Manage Jenkins配置可以看到Jenkins的工作目录已经切换到我们的新目录了
注意给新的Jenkins目录添加jenkins-build等使用用户的操作权限(这一步请先停止jenkins服务先,如果有部分文件权限修改报错如果能正常启起来Jenkins可以先不管,AI说是有写保护文件无法添加完全控制权限)
至此我们成功切换了Jenkins的工作目录,再也不用担心Jenkins的使用让我的C盘不够用了。
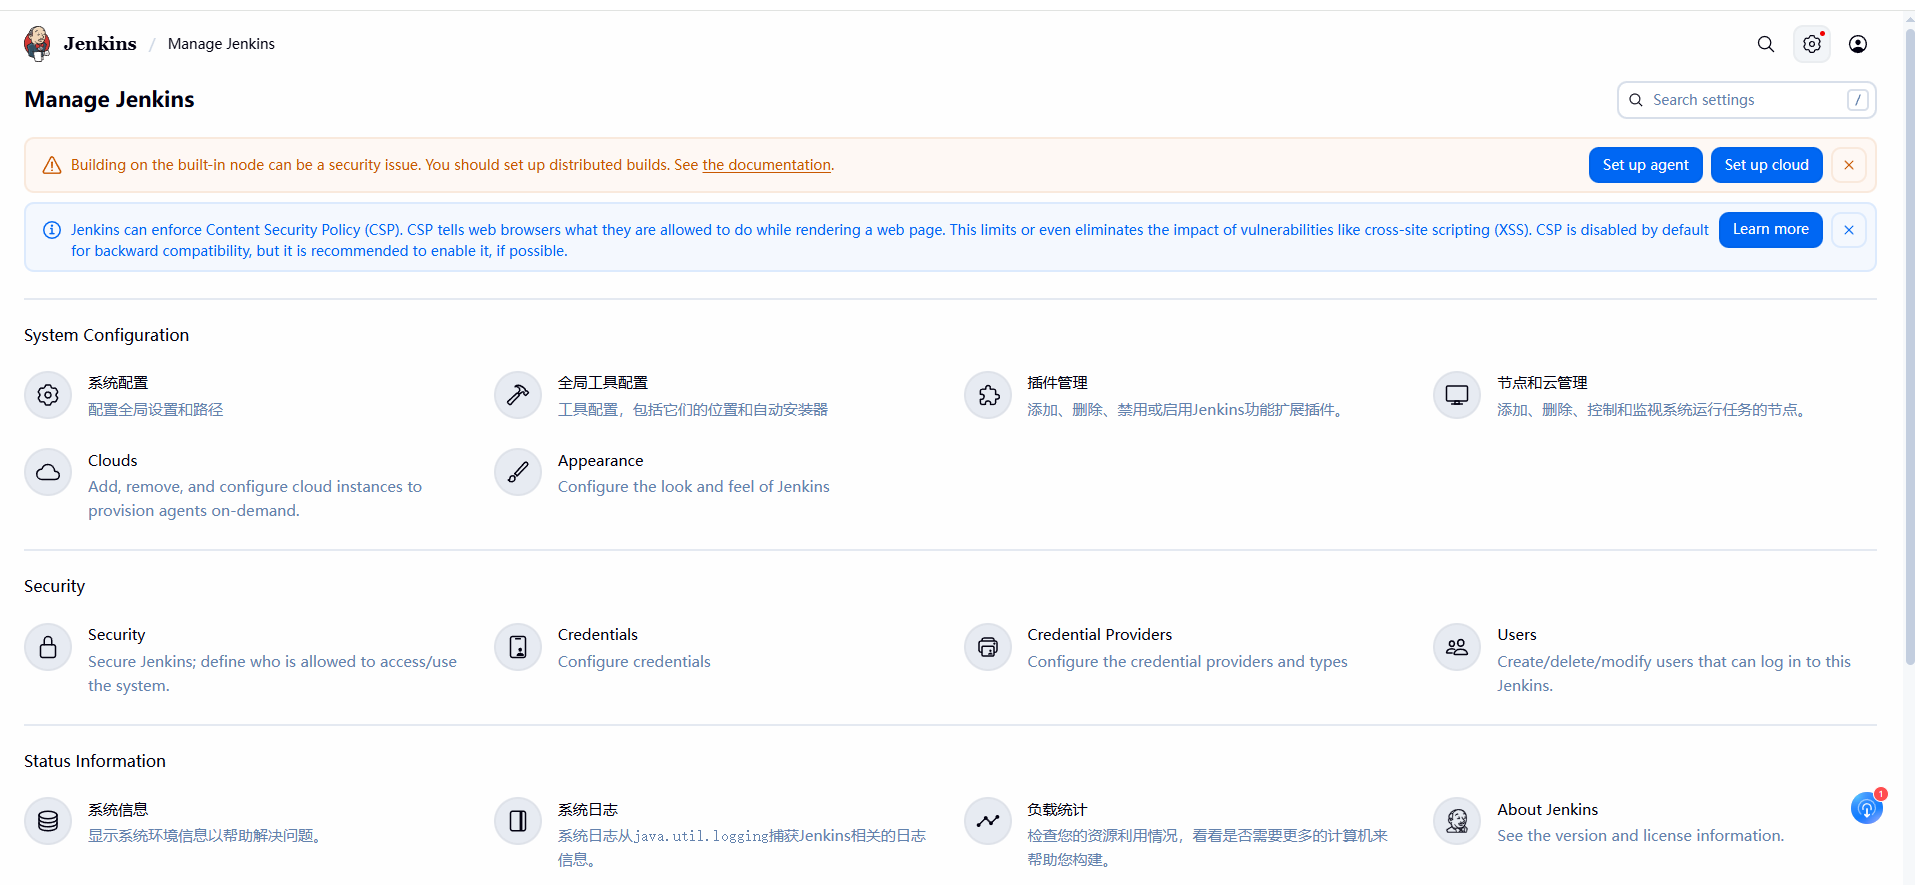
Managing Jenkins 打开Jenkins,点击Manage Jenkins我们会看到Jenkins的管理界面:
接下来分别理解下这个页面上的各个入口是做什么的。
System Configuration 系统配置 给Jenkins Controller配置全局设置和路径
比如配置Jenkins主目录,Jenkins URL,系统管理员邮箱等
目前我只添加了一个系统管理员邮件地址
全局工具配置 工具配置,包括它们的位置和自动化安装器
插件管理 添加,删除,禁用或启用Jenkins功能扩展插件
推荐把Jenkins推荐安装的插件都先安了,方便后续直接开工搭建自动化打包流程
节点和云管理 添加,删除,控制和监视系统运行任务的节点
这里我们需要深入理解下Jenkins的几个概念Controller,Nodes,Agents,Executors
Controller The Jenkins controller is the Jenkins service itself and where Jenkins is installed. It is also a web server that also acts as a “brain” for deciding how, when, and where to run tasks. Management tasks such as configuration, authorization, and authentication are executed on the controller, which serves HTTP requests. Files written when a Pipeline executes are written to the filesystem on the controller, unless they are off-loaded to an artifact repository such as Nexus or Artifactory.
从介绍来看,Jenkins Controller是Jenkins本身,是作为一个总管理者和调度中心的角色存在 ,比如管理任务调度,任务配置,任务权限等。
Nodes Nodes are the “machines” on which build agents run. Jenkins monitors each attached node for disk space, free temp space, free swap, clock time/sync, and response time. A node is taken offline if any of these values go outside the configured threshold. Jenkins supports two types of nodes:
从介绍来看,Jenkins Nodes是构建机器,Jenkins负责管理这些构建机器的磁盘空间,系统时间,磁盘释放等。
Jenkins Nodes分为一下两种:
agents
build-in node
build-in node好像是Controller里默认的一个节点,从安全,性能,可扩展性等方面来说官方不建议直接使用build-in node
我想这就是为什么我在Manage Jenkins页面看到以下警告的原因:
Agents Agents manage the task execution on behalf of the Jenkins controller by using executors.
从介绍看,Agents是通过使用Executors帮Controllers管理任务执行的 。
Executors An executor is a slot for the execution of tasks. Effectively, it is a thread in the agent. The number of executors on a node defines the number of concurrent tasks that can run. In other words, this determines the number of concurrent Pipeline stages that can execute at the same time.
从介绍看,Excecutor是真正执行任务的执行者,agent有多少个executor就表示能同时执行多少个任务。
官方建议如下:
通过上面的介绍,可以看出当我们搭建CI/CD工作流的时候,为了安全,性能和可扩展性最好不要直接使用Build-in node,我们应该去创建我们自己的Agent去针对性配置。
Clouds 添加,移除,配置远端提供Agent能力的实例
Appearance 配置Jenkins外观样子
Security Security 保护Jenkins,配置谁被允许访问和使用Jenkins系统
这里有一项关于Git验证方式的配置Host Key Verification Strategy 有以下几个选项:
Know hosts file(default)
使用.ssh\known_hosts文件进行验证(我们单独给Jenkins配置了jenkins-build用户,所以这个文件可能压根没有,也就是后续我们添加了SSH Credential后依然无法正常访问Git SSH地址的原因 )
Accept first connection
第一次连接时接受并记录GitHub提供的Host Key,后续Host Key变化时拒绝连接。
Manually provided keys
利用手动添加到这里的Host key进行验证(后续为了避免不同WIndows用户名的SSH配置问题,这里会采用这个方案)
No verification(not recommended)
不验证Host Key
Credentials 配置证书相关
这里用于全局存放打包相关证书的地方,Agent Pipeline里通过全局变量访问,不要把证书信息直接写进Agent打包流程里!
Credential Providers 配置证书提供者和类型
Users 创建,删除,修改可以登录到Jenkins的用户信息
系统信息 显示系统环境信息
系统日志 所有Jenkins通过java.util.loggins捕获到的日志信息
负载统计 显示Jenkins的资源使用情况
About Jenkins 查看Jenkins的版本和许可证信息
Jenkins Pipeline 在真正开始使用Jenkins之前我们先了解下Jenkins Pipeline,。
这里直接搬运下以前Jenkins Pipeline的学习记录。
什么是Pipeline Jenkins Pipeline is a suite of plugins which supports implementing and integrating continuous delivery pipelines into Jenkins. Pipeline provides an extensible set of tools for modeling simple-to-complex delivery pipelines “as code”. (这里的Pipeline是一套插件,用于支持持续自动化集成编写。好比脚本文件定义一系列的自动化流程,但并不等价于脚本。)
那么Pipeline是用什么语言编写了?Groovy是Java平台上设计的面向对象编程语言。这门动态语言拥有类似Python、Ruby和Smalltalk中的一些特性,可以作为Java平台的脚本语言使用。
这里了解几个Pipeline的概念Node,Stage,Step :
Node
这个就是前面讲到的Node概念,用于运行Pipeline的Node
Stage
A stage block defines a conceptually distinct subset of tasks performed through the entire Pipeline (e.g. “Build”, “Test” and “Deploy” stages), which is used by many plugins to visualize or present Jenkins Pipeline status/progress.
Stage是将Pipeline细分成几个任务流程(比如Build,Test,Deploy)
Step
A single task. Fundamentally, a step tells Jenkins what to do at a particular point in time (or “step” in the process).
Step是运行任务的最小单位,是告诉Jenkins在什么时间点执行什么的任务步骤,比如执行指定shell命令或者python脚本
为什么要Pipeline 为什么需要Pipeline?
Code – 可管理可编辑可视化的自动化流程脚本
Durable – 可持续化开发
Pausable – 可以自动也可以停止等待输入
Versatile – 支持复杂的持续交付需求
Extensible – “The Pipeline plugin supports custom extensions to its DSL [5: Domain-Specific
如何使用Pipeline 接下来让我们看看如何创建一个Pipeline。
首先我们必须安装Pipeline插件(这一步在安装推荐插件的时候完成了,没安装的可以去Manage Plugins的插件管理界面自行安装)
关于创建Pipeline有两种方式:
Through the classic UI(Jenkins提供的UI操作) In SCM(可以直接手动编写Jenkinsfile文件)
前者生成的Jenkinsfile文件在Jenkins的目录,后者的好处是可以打包流水线流程可以直接进入Git版本管理,就算电脑出问题了Jenkins的流水线也不会丢。
这里我们先了解几个Pipeline里编写的几个大的概念:
Node(这个就是我们创建Agent对应的Node概念,在Jenkinsfile里表示指定流程可动态申请一个Executor执行,并在node流程块执行完后释放) environment(表示当前Pipeline流程里可全局访问的环境变量) parameters(表示Pipeline流程里可以通过页面配置显示的参数数据) Stage(定义一个流程块,包含一系列相关任务,比如Build,Test,Deploy等流程块 Step(单个任务步骤,包含具体的任务执行) post (支持在特定step后指定运行状态下执行特定操作,比如将我们打包产物归档)
详细Pipeline语法关键词介绍参考
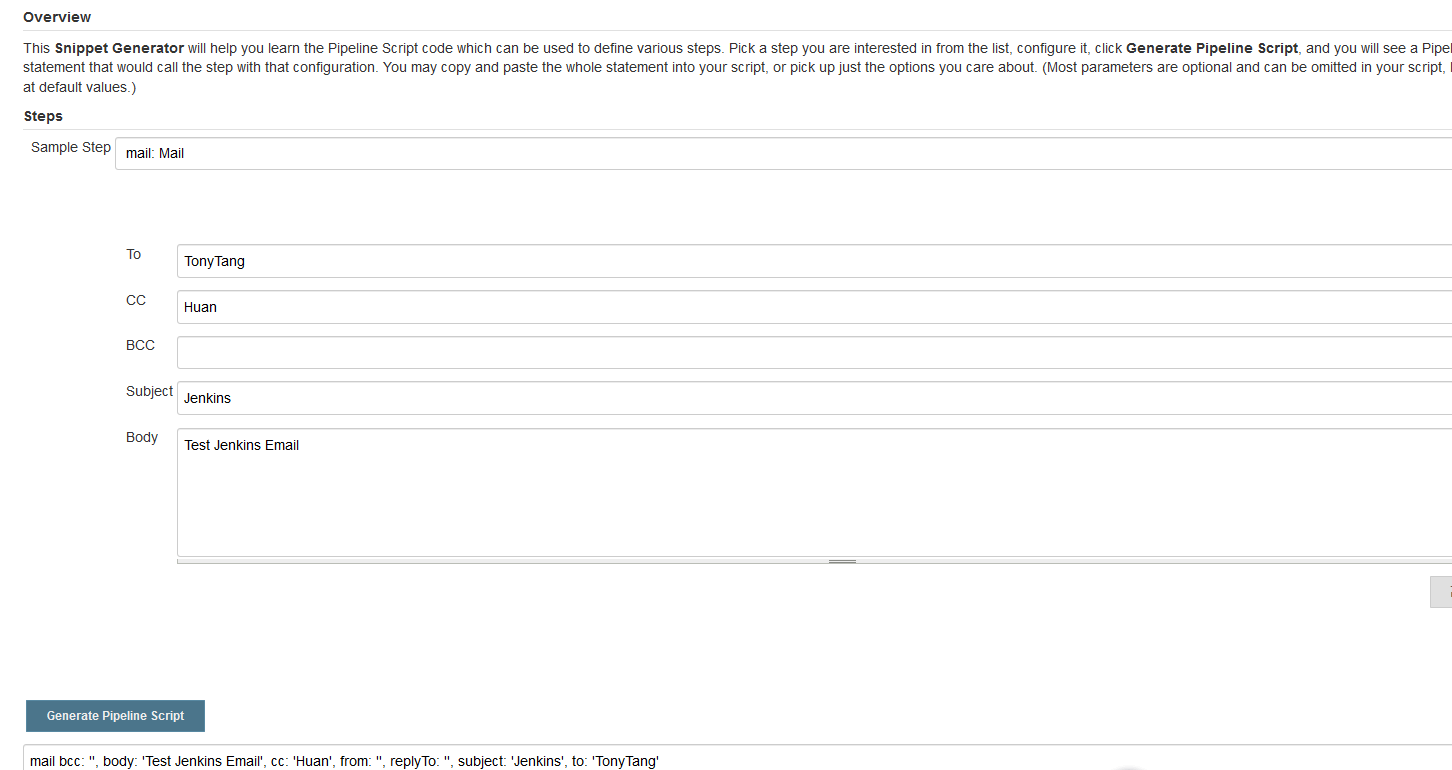
Pipeline工具 Snippet Generator
脚本命令行(Jenkins->Manage Jenkins->脚本命令行)
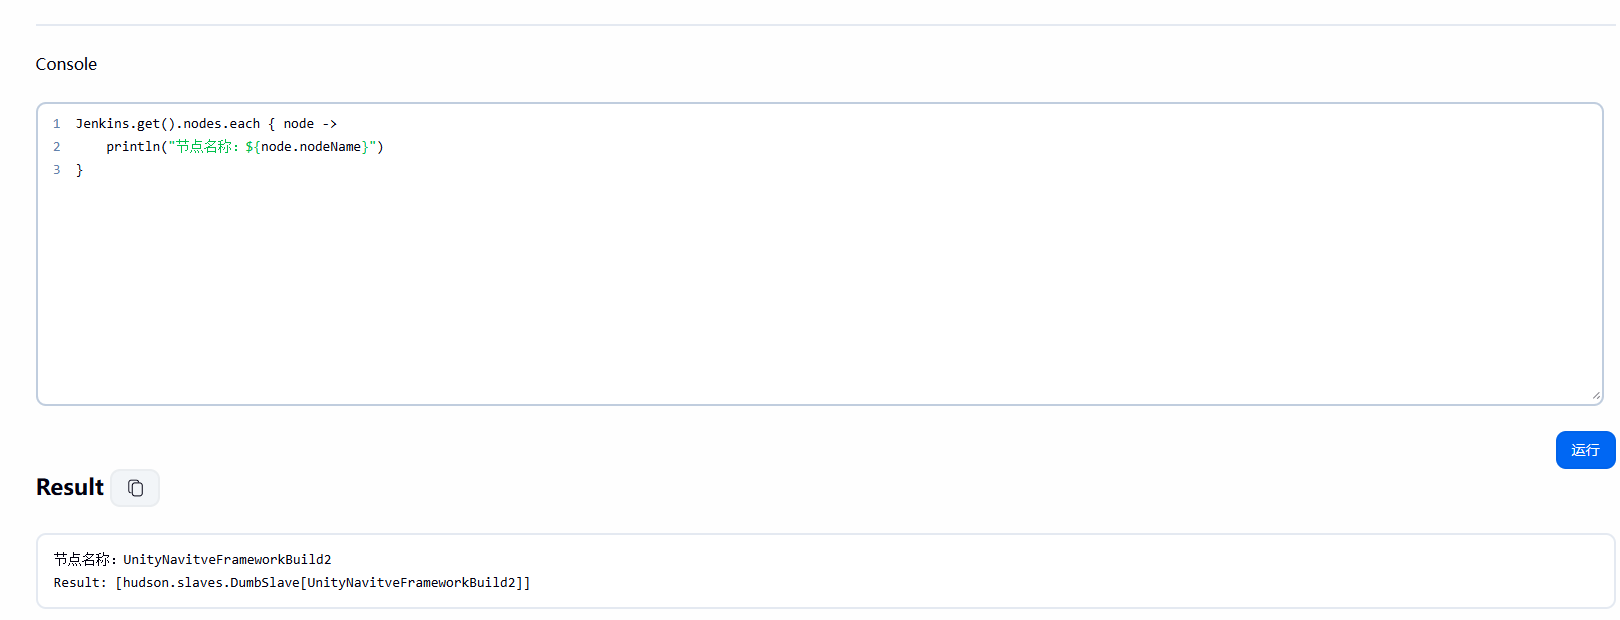
可以进行Jenkins代码编写和快速测试!
比如访问所有node并打印node名字:
1
2
3
Jenkins.get().nodes.each { node -> println("节点名称:${node.nodeName}" ) }
Pipiline全局环境变量
Unity打包CI/CD+Pipeline实战 系统配置 有些配置(比如磁盘监控警告限制配置,管理员通知邮箱)不归属单个Agent而是全局生效的
全局工具配置 有些东西是属于所有Agent都要统一使用的工具(比如Git,JDK,Gradle等),这些东西应该配置在全局而非但Agent里。
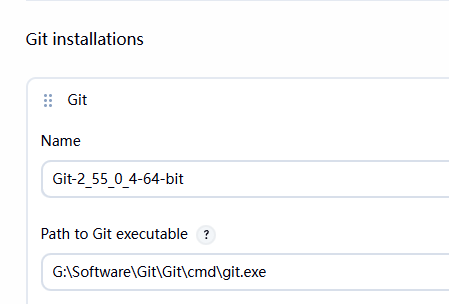
为了明确给Jenkins指定Git使用还是配置上路径避免用默认的。
比如配置Git:
Manage Plugins->全局工具配置->Git installations
如果不确定本地安装Git位置,可以打开cmd输入where git查看
如果不配置Git将会使用系统默认能找到的Git
如果发现配置了全局Git,但打包日志里依然有”Selected Git installation does not exist. Using Default. The recommended git tool is:None”日志,但Git.exe工具拉去地址后续又显示正确可以先不管,具体原因不明但功能看起来正常。
配置全局Git后发现打包Git拉取报错如下:
这是因为我们给Jenkins创建的jenkins-build用于没有配置过Git相关的.ssh配置,所以默认访问了SSH 22端口。
那为什么用默认的Git没报错?
AI给出的回答是我们创建的Agent是在TonyTang用户名下通过bat运行的,所以能读取到TonyTang\.ssh\config的配置,所以读取了443端口。(不确定是否是这个原因)
TonyTang\.ssh\config内容如下:
1
2
3
Host github.com Hostname ssh.github.com Port 443
总之我们给Pipeline配置Git地址时,准确写明是使用443端口即可:
原本Git地址:
1 git@github.com:TonyTang1990/UnityNativeFramework.git
修改到SSH 443端口后Git地址:
1 ssh://git@ssh.github.com:443/TonyTang1990/UnityNativeFramework.git
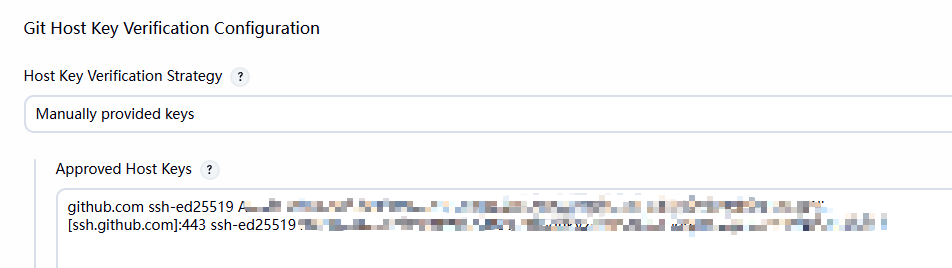
主动配置SSH 443的Git地址时,全局Security的git的Host Keys也要配置成对应的包含ssh和443端口的地址:
Note:
Unity打包自带下载了JDK,NDK,Gradle,所以一般Agent要使用对应的JDK,NDK而非全局配置的。
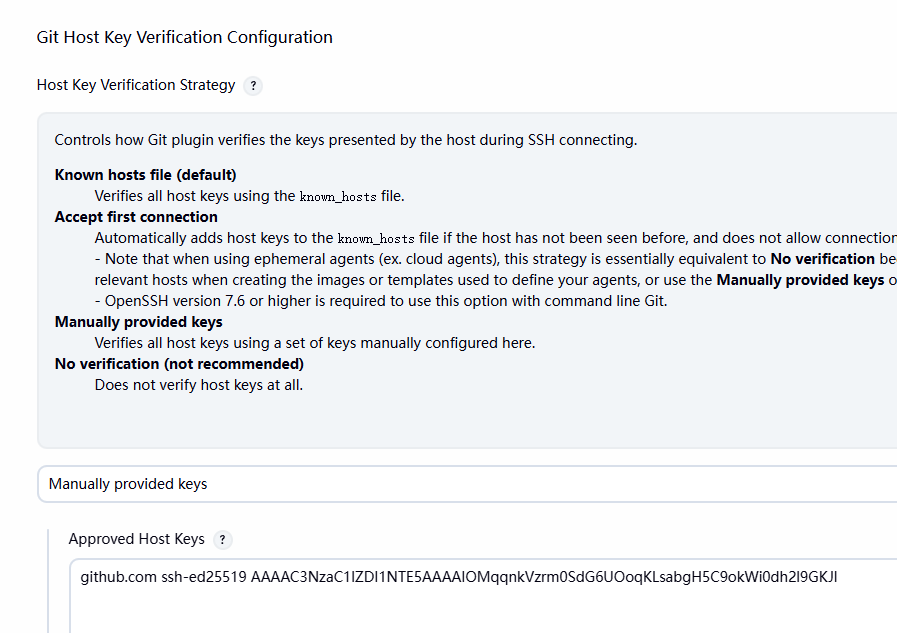
Security 这里重点讲一下前面提到的关于Git Host Key Verification Stratefy(Git Host Key验证策略)配置,这里为了避免不同Windows用户带来的SSH访问验证问题,这里选择 Manually provided keys策略 :
这里我们将我们访问Git的**Host Key(注意不是SSH的公钥)**配置上即可。
具体Git的Host Key值是哪一个在这里查看:
GitHubs SSH key fingerprints
选择符合加密方式的那个key fingerprints即可,这里我用的是ED25519算法,所以Host key为:
1 github.com ssh-ed25519 AAAAC3NzaC1lZDI1NTE5AAAAIOMqqnkVzrm0SdG6UOoqKLsabgH5C9okWi0dh2l9GKJl
Credentials 像重要的一些比如打包Keystore,Apple证书,Git SSH用户名秘钥等都不要直接配置在Agent里,避免泄露,这些东西都统一配置在全局Credentials里,然后Agent里指向使用。
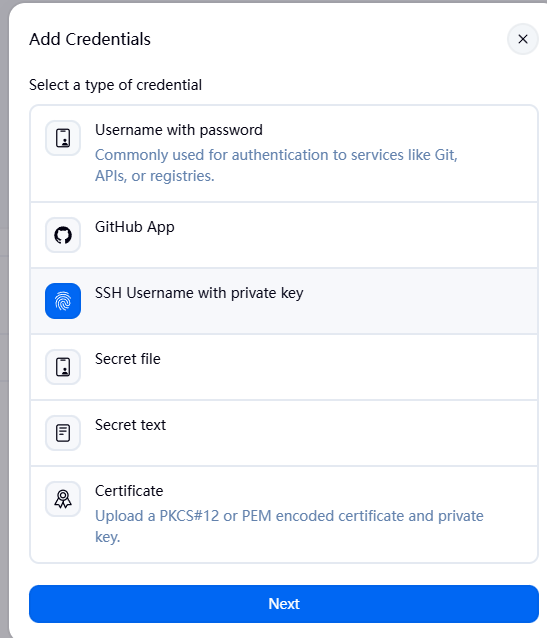
这里简单了解下Jenkins添加Credentials的方式类型 :
Secret Text(比如API token或者GitHub个人访问token) Username and password(比如配置用户名和密码,格式”用户名:密码”) Secret file(包含Secret内容的文件) SSH Username with private key(SSH链接包含用户名和私有Key,适用于Github SSH链接时的授权) Certificate(某些证书文件,暂时不清楚具体用处) Docker Host Certificate Authentication(Docker的证书授权)
每一个在Jenkins Credential里配置的Credential都有一个Credential ID,我们通过Credential ID可以在Jenkinsfile里访问
添加SSH Credential 这里我首先添加我的Git证书,考虑到用SSH访问,这里添加SSH username with private key 的方式:
Jenkins->Manage Jenkins->Credentials->Add Credentials
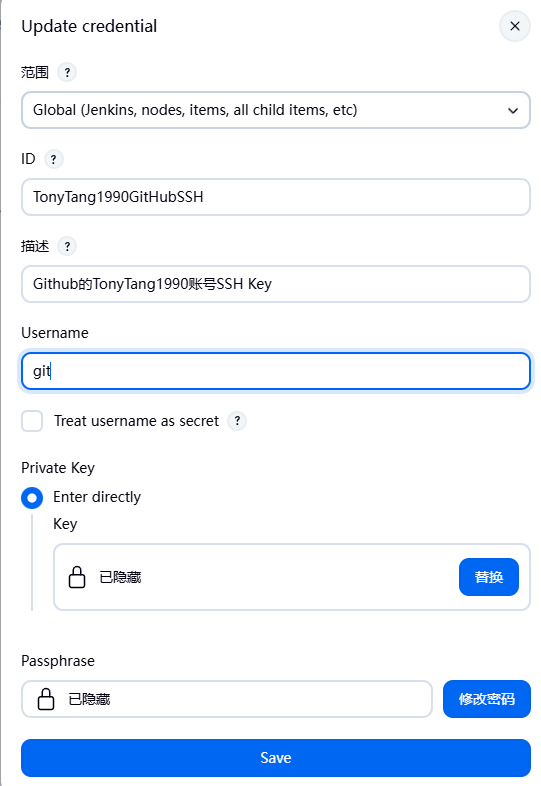
给SSH username with private key配置生效范围和访问ID:
这里考虑到为了方便范围就配成Global,ID根据自己需求取一个唯一值后续会在Jenkinsfile里使用访问Credential,关于Github如何生成SSH Key这个自行搜索了解下。
SSH Key默认是在C:\\User\\用户名\.ssh\目录下的,要求填的密码是创建私钥时的一个密码,如果忘记密码可以在改目录下输入以下命令”ssh-keygen -y -f 私钥文件”进行尝试。
添加Github SSH的时候注意Username要填写git(AI说的具体不确定是不是必须)
添加完成后就能看到Jenkins->Manage Jenkins->Credentials下方出现我们配置的Credential了:
在Jenkinsfile里访问Credential:
上面的配置是配置了SSH Credential的相关信息,但并不保证我们新建Windows的jenkins-build用户就能正确使用,因为我之前是在TonyTang这个用户下工作,所以所有的git SSH key相关都是操作保存在C:\\User\\TonyTang\\.ssh目录下的,现在Jenkins以jenkins-build用户在工作,默认全局的Security的Host Key Verification Stratety(Git的验证策略配置)是Known hosts file,也就是使用C:\\User\\USER_NAME\.ssh目录下的known_hosts文件进行验证。所以我们前面Credentials需要将Security的Host Key Verification Stratety修改成SSH Username with private key。
配置Git Host Key Verification Configuration的Manually provideed keys时注意要把http和ssh访问git的Host Keys都添加上。
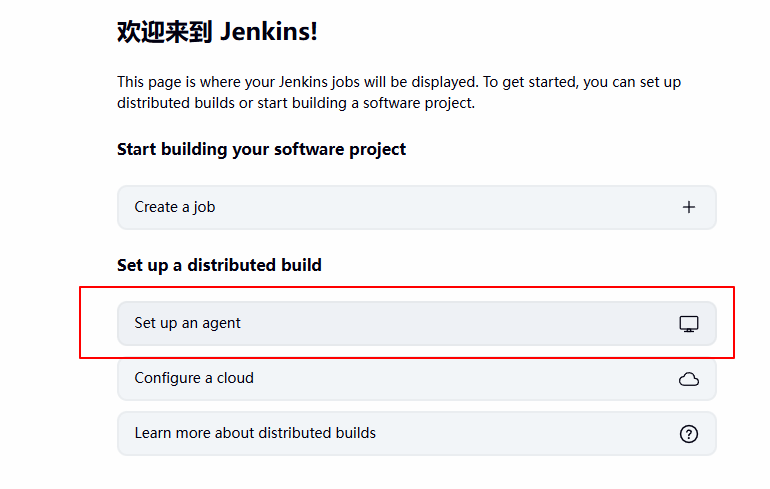
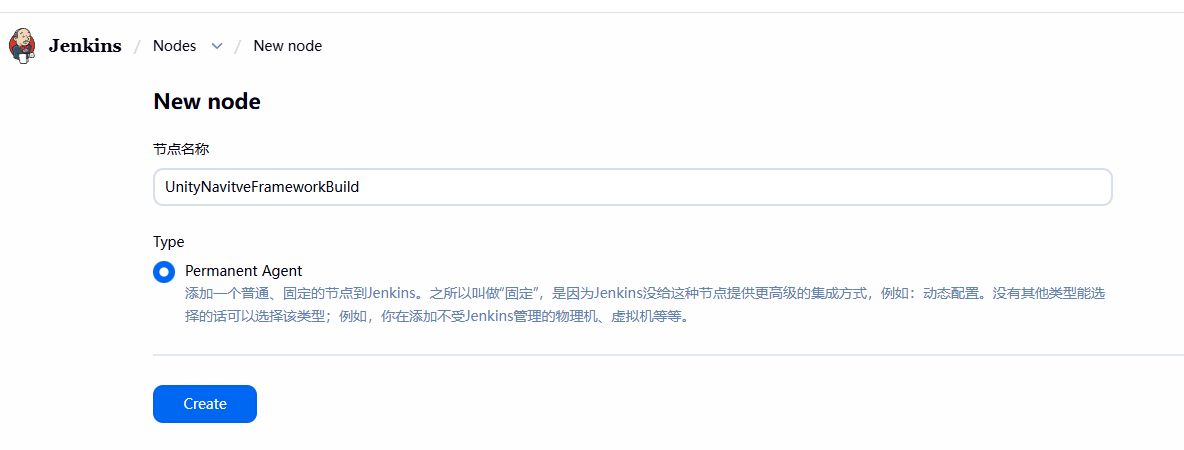
创建Agent 结合前面提到的官方不建议使用默认的build-in Node,所以我们首先要先创建我们自己的Agent,打开Jenkins主页->Set up an agent:
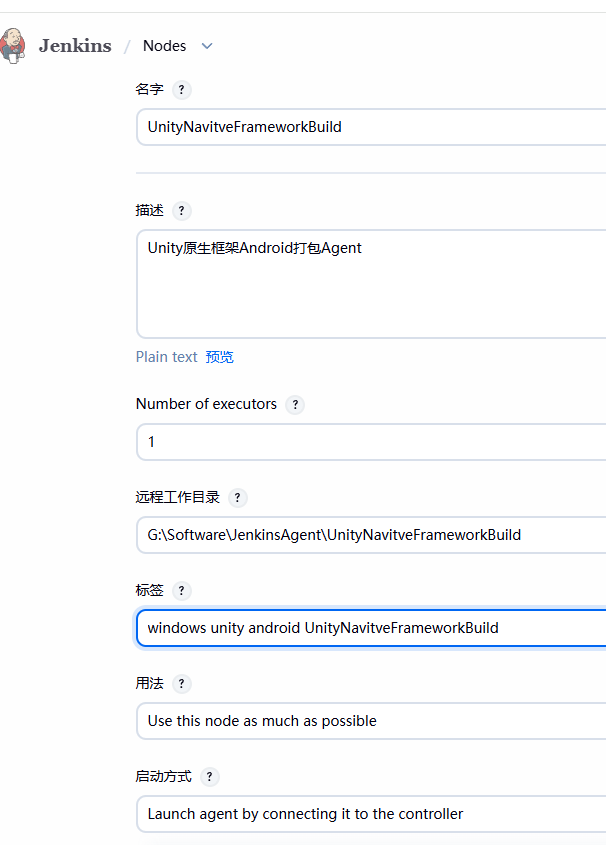
接下来分别讲讲创建Agent里的各个参数的含义。
名字(Agent的唯一Id)
比如我的项目名称是UnityNativeFramework,所以我创建的Agent名称叫UnityNativeFrameworkBuild
描述(Agent的一个文本描述)
Number of executors(Agent拥有多少的Executors,官方建议1个Agent对应1个Executor最佳)
远程工作目录(Agent所在工作目录,不要放到JENKINS_HOME下)
标签(用于Pipeline指定Agent Lable时的识别标签,符合相同标签的可以被公用,比如多个工程同一个项目建了多个Agent,指定相同的标签能自动利用空闲Agent触发打包)
用法(限定节点的使用方式)
启动方式(限定Agent的启动方式)
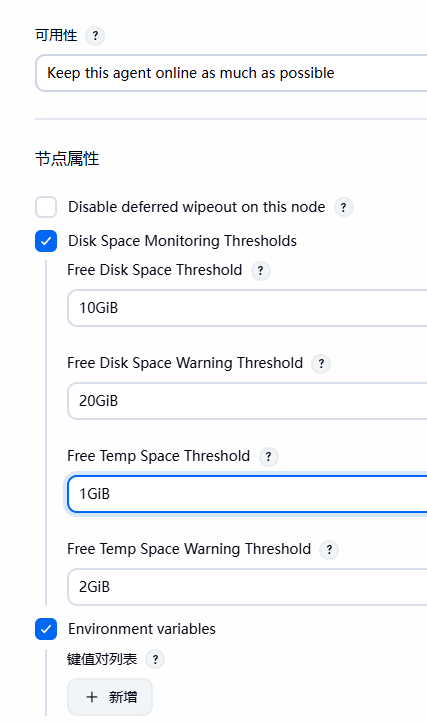
可用性(限定Agent的可用状态)
关于节点属性选项:
Disable deferred wipeout on this node
来至Workspace Cleanup插件,用于删除整个Workspace时采用延迟擦除的方式优化速度(不推荐勾选 ,避免一些奇怪的问题)
Disk Space Monitoring Thresholds
用于设置该Agent的磁盘空间阈值,避免特定硬盘空间情况可以发出警告或直接终止打包(推荐勾选 ,设置合理阈值)
Enviroment variables
配置只运行在当前Agent的一些环境变量数据,比如Unity.exe路径,后续Pipeline里编写时可以通过%*%访问环境变量值,这里不要放证书相关数据,证书相关放到配置Security的Credentials里 (推荐勾选 ,按需设置必要的环境变量)
Tool Locations
用于覆盖 Jenkins全局工具在这个Node上的实际安装位置。(不推荐勾选 ,,当前Agent和全局Controller配置工具没有特殊情况都使用统一的,比如Git使用统一配置)
最终设置结果:
Note:
Agent的远程工作目录不要放到JENKINS_HOME 一个Agent推荐1个Executor,这是官方建议最稳妥的方式,避免一些I/O,CPU或内存的负载问题 新建一个统一放Jenkins Agent的目录,记着把该目录的修改权限添加给jenkins-build用户 标签里的名字默认不能与Agent名同名,因为默认Jenkinsfile里就能用Agent名字指定特定Agent
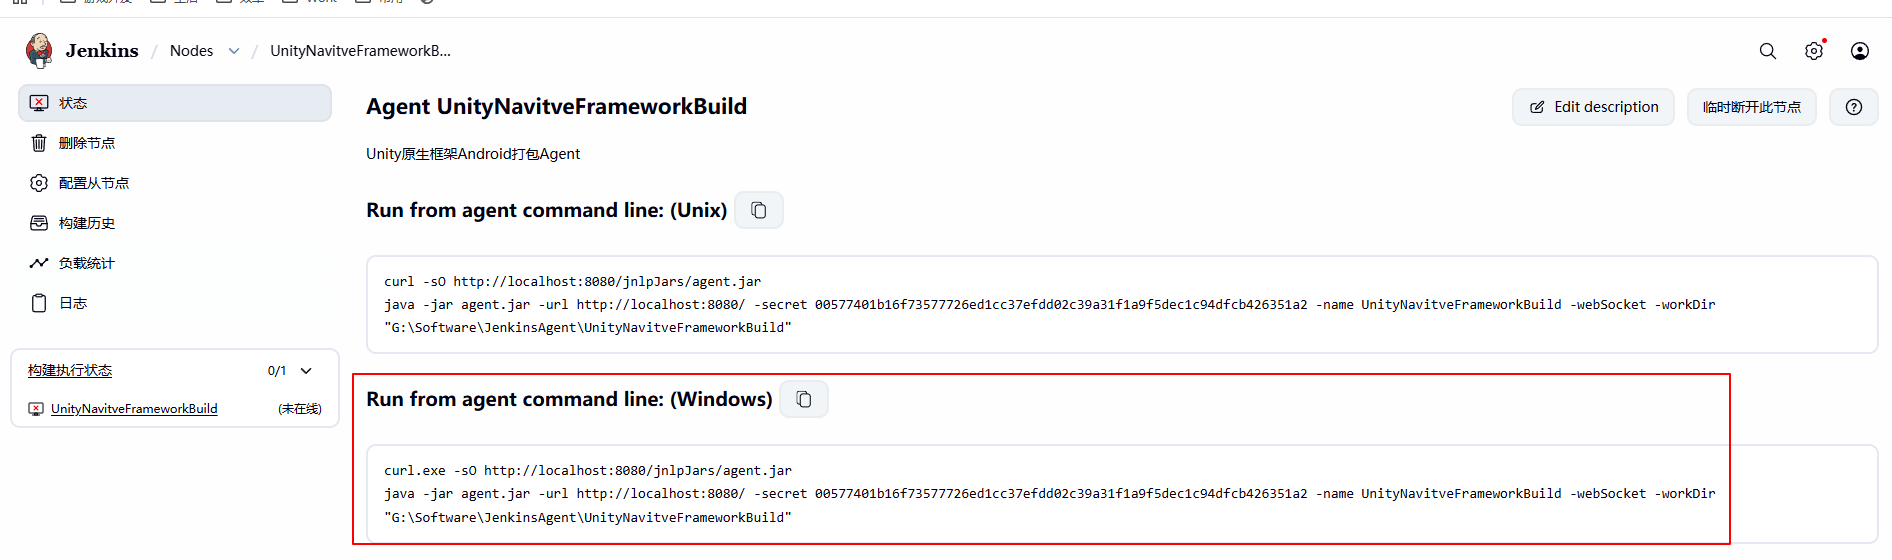
启动Agent 创建完成后会发现我们新建的Unity NativeFrameworkBuild还处于离线状态:
这是因为我们只是保存了Agent配置,Agent进程还没启动。
点击UnityNativeFrameworkBuild的Agent名字,点击状态,我们会看到启动Agent的办法:
多行命令复制粘贴到PowerShell会有问题,需要自己一行一行的复制执行:
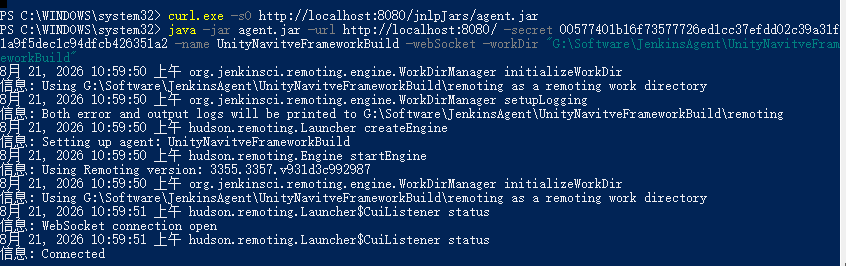
可以看到我们成功启动了我们新建的UnityNativeFrameworkBuild的Agent:
我们新建的Agent的启动方式之前设置的是Launch agent by connecting it to the controller ,为了避免每次重启电脑我们自己创建的Agent都要重新执行命令启动,我们需要利用WinSW将长期Unity构建的Jenkins Agent注册为Windows服务,考虑到注册服务也挺麻烦的,这里暂时将启动命令做成start-UnityNavitveFrameworkBuild-agent.bat运行:
1 2 3 4 @echo off curl.exe -sO http://localhost:8080/jnlpJars/agent.jar java -jar agent.jar -url http://localhost:8080/ -secret 00577401b16f73577726ed1cc37efdd02c39a31f1a9f5dec1c94dfcb426351a2 -name UnityNavitveFrameworkBuild -webSocket -workDir "G:\Software\JenkinsAgent\UnityNavitveFrameworkBuild" pause
Note:
如果不想每个Agent都独立注册Windows服务,可以选择Luanch agent via SSH的方式,配置好SSH Server和SSH Key让所有Agent一次性自动全启动 bat启动这个方式目前的bat代码是窗口关闭Agent就断开连接离线
搭建打包流程 搭建打包流程前,我们需要深入理解一个概念Pipeline ,详情参考前面的介绍。
Jenkins搭建打包流程只要通过定义Pipeline,Pipeline有两种方式定义:
通过网页可视化界面
这种方式生成的Jenkinsfile默认在JENKINS_HOME文件夹下,不方便可视化+版本管理
手写Jenkinsfile文件
这种方式好处是可以提交版本管理,同一个项目多个Agent可以快速重用同一个Agent,不同考虑Jenkinsfile流程同步问题
创建Pipeline In SCM Jenkinsfile官方文档
创建Jenkinsfile流程如何:
确保Pipeline插件安装好
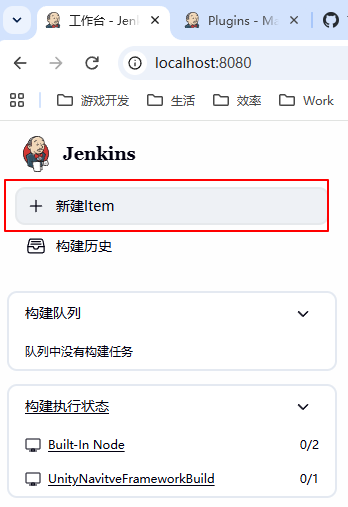
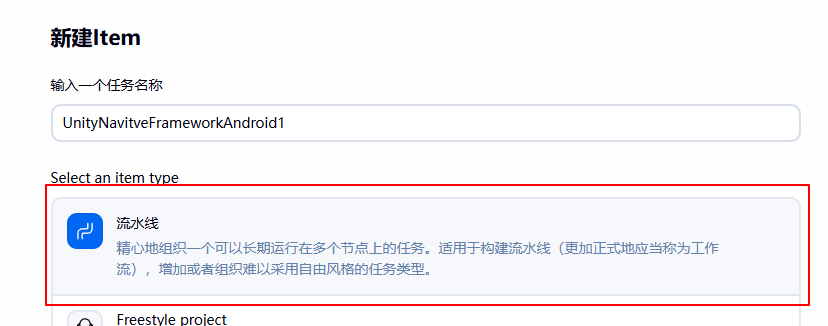
New Item – 新建Pipeline(选择Pipeline类型)
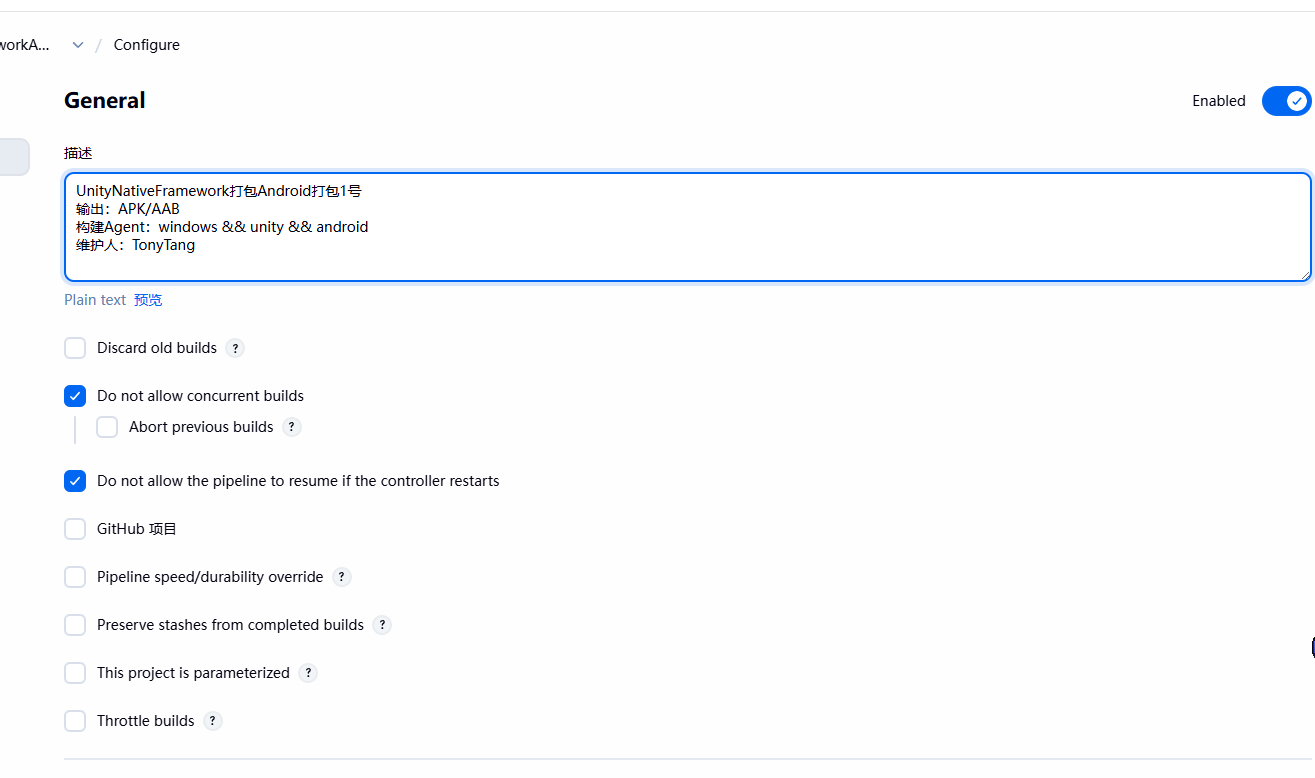
Configure Pipeline
这里简单讲几个重要的基础配置含义:
Discard old builds(丢弃旧的构建,用于自动丢弃时长过久的构建,确保硬盘空间够)
为了避免构建的包被意外清除,不推荐勾选
Do not allow concurrent builds(多个构建发起时的响应策略,用于确保不会同时并发执行多个构建或者后一个覆盖前一个构建等设置)
一般来说单个Unity工程只允许启动一个Batch mode打包,推荐勾选
Do not allow the pipeline to resume if the controller restarts(是否不允许Pipeline在controller重启后继续)
一般来说打包流水线必须要完整执行才不容易出问题,推荐勾选
GitHub project(用于关联一个Github项目URL,为部分插件提供上下文)
一般来说项目打包都是走自己的Git操作流程,不推荐勾选
This project is parameterized(这个项目是否允许参数配置化打包)
参数配置化打包也就是Jenkins里常见的页面可视化参数配置,然后打包时传入Unity进行对应打包参数控制,推荐勾上
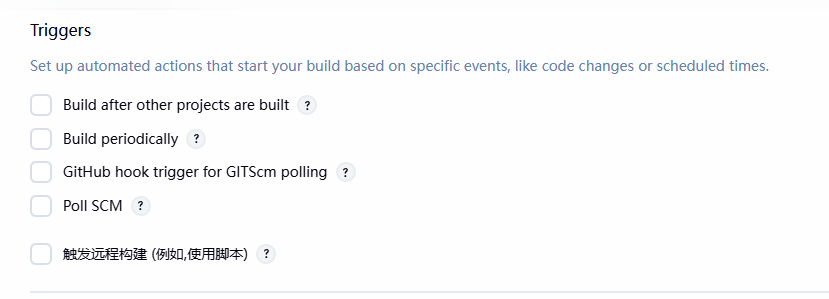
这里简单讲几个重要触发时机配置介绍:
Build after other projects are build(是否在其他工程打包完成后自动触发打包)
适用于多个打包流程顺序合作构建的情况,目前Untiy打包暂时不需要,不推荐勾选
Build periodically(固定间隔时间或者固定时间自动构建)
主要用于每隔一段时间自动触发构建进行连续打包测试跟进
Unity开发过程中提交情况比较复杂,每隔一段时间打包很可能出现提交不完全导致打包失败等情况,建议还是自己主动找合适时机触发打包,不推荐勾选
关于Pipeline的详细配置介绍:
定义选择Pipeline script form SCM而非Pipeline script(因为我们打算走本地jenkinsfile的方式而非网页可视化配置界面) SCM类型选择Git,目前我使用的是Git,Jenkins显示支持的选项也只有Git,其他方式估计要安装对应插件 Repository URL(jenkinsfile文件所在git地址,一般来说jenkinsfile文件都是放到Git项目根目录) Credentials(Git地址访问权限证书,这个也就是我们需要配置Git证书之后才能选择的了,证书添加参考前面的Credentials)
最终Pipeline创建配置如下:
如果想Jenkins Pipeline启用Git LFS,除了本地安装Git LFS还要在Pipeline仓库地址下方添加Additional Behaviours(Git LFS pull after checkout)
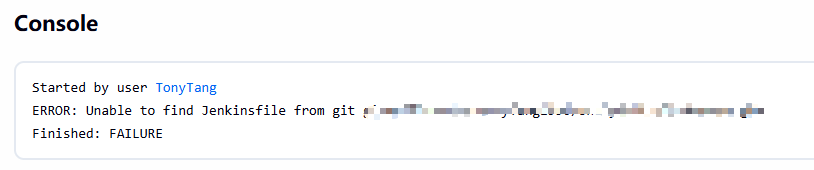
Pipeline打包 No Jenkinsfile打包报错 我们直接点击Build Now 会发现没有打包参数界面直接就开始打包并报错:
这是因为我们选择了SCM Jenkinsfile的方式,但我们还没有自己在仓库根目录创建Jenkinsfile文件上传导致的,所以我们需要在Git仓库下方自己创建Jenkinsfile并编写内容上传。
Jenkinsfile编写 Jenkinsfile初版内容如下:
1
2
3
4
5
6
7
8
9
10
11
12
13
14
15
16
17
18
19
20
21
22
23
24
25
26
27
28
29
30
31
32
33
34
35
36
37
38
39
40
41
42
43
44
45
46
47
48
49
50
51
52
53
54
55
56
57
58
59
60
61
62
63
64
65
66
67
68
69
70
71
72
73
74
75
76
77
78
79
80
81
82
83
84
85
86
87
88
89
90
91
pipeline { agent { // 指定用UnityNavitveFrameworkBuild的Agent的标签打包 // 方便后续创建多个符合的Agent做Agent池 label 'windows & & unity & & android' } parameters { // bool值的是否生成开发版本参数 booleanParam( name: 'DEVELOPMENT_ BUILD', defaultValue: true, description: '是否生成Development Build' ) // 版本号 string( name: 'VERSION_ CODE', defaultValue: '1', description: '版本号(格式:*.**)' ) // 资源版本号 string( name: 'RESOURCE_ CODE', defaultValue: '1', description: '资源版本号(格式:*)' ) } options { // 让Pipeline打包输出Log带时间戳信息 timestamps() // 禁止同时并发多个Build disableConcurrentBuilds() // 配置Pipeline打包超时时长 timeout( time: 120, unit: 'MINUTES' ) } environment { // 环境变量配置 UNITY_ PROJECT_ DIR = 'UnityNativeFramework' } stages { // 验证Pipeline相关环境变量数据流程 stage('Verify Pipeline') { steps { // 打印打包相关变量信息 bat ''' echo NODE_ NAME= echo NODE_ LABELS= echo WORKSPACE= echo UNITY_ PROJECT_ DIR= echo DEVELOPMENT_ BUILD= echo VERSION_ CODE= echo RESOURCE_ CODE= ''' } } // 打包流程 stage('Build') { steps { dir("$ {env.UNITY_ PROJECT_ DIR}") { bat ''' @echo off rem 将Windows CMD代码页切换为UTF-8 chcp 65001 >nul rem 强制Python标准输入输出使用UTF-8 set PYTHONIOENCODING=utf-8 echo '进入项目工程目录!' echo Current directory: python -u "BuildScripts\\ BatchBuildAndroid.py" ^ -isDevelopment -versionCode -resourceVersionCode echo '打包结束!' ''' } } } } }
Jenkinsfile负责编写打包流程,将所有打包流程串联起来。
Jenkins将可视化配置的打包参数一个一个传递给BatchBuildAndroid.py打包脚本打包。
Note:
详细的Pipeline参数语法参考 Pipiline全局环境变量查看(需要启动Jenkins服务)
打包脚本编写 BatchBuildAndroid.py
1 2 3 4 5 6 7 8 9 10 11 12 13 14 15 16 17 18 19 20 21 22 23 24 25 26 27 28 29 30 31 32 33 34 35 36 37 38 39 40 41 42 43 44 45 46 47 48 49 50 51 52 53 54 55 56 57 58 59 60 61 62 63 64 65 66 67 68 69 70 71 72 73 74 75 76 77 78 79 80 81 82 83 84 85 86 87 88 89 90 91 92 93 94 95 """将 Jenkins 参数逐个转交给 Unity Batch Mode。""" import argparseimport subprocessimport sysfrom pathlib import PathUNITY_EDITOR = Path( r"G:\Software\UnityAllVersions\2022.3.62f3\2022.3.62f3\Editor\Unity.exe" ) UNITY_EXECUTE_METHOD = "BuildTool.DoBuildFromCommands" def parse_args () -> argparse.Namespace: parser = argparse.ArgumentParser() parser.add_argument("-isDevelopment" , required=True ) parser.add_argument("-versionCode" , required=True ) parser.add_argument("-resourceVersionCode" , required=True ) return parser.parse_args() def run () -> int : args = parse_args() project_path = Path.cwd().resolve() unity_editor = UNITY_EDITOR.resolve() print (f'project_path:{project_path} ' ) print (f'unity_editor:{unity_editor} ' ) if not unity_editor.is_file(): print (f"Unity Editor executable was not found: {unity_editor} " , file=sys.stderr) return 1 required_directories = ("Assets" , "Packages" , "ProjectSettings" ) missing = [name for name in required_directories if not (project_path / name).is_dir()] if missing: print ( f"Not a valid Unity project: {project_path} . " f"Missing directories: {', ' .join(missing)} " , file=sys.stderr, ) return 1 command = [ str (unity_editor), "-batchmode" , "-nographics" , "-quit" , "-logFile" , "-" , "-projectPath" , str (project_path), "-executeMethod" , UNITY_EXECUTE_METHOD, "-buildTarget" , "Android" , "-isDevelopment" , args.isDevelopment, "-versionCode" , args.versionCode, "-resourceVersionCode" , args.resourceVersionCode, ] print (f"Unity Command: {subprocess.list2cmdline(command)} " , flush=True ) process = subprocess.Popen( command, stdout=subprocess.PIPE, stderr=subprocess.STDOUT, universal_newlines=True , encoding="utf-8" , errors="replace" , bufsize=1 , ) if process.stdout is not None : for line in process.stdout: print (line, end="" , flush=True ) return_code = process.wait() if return_code != 0 : print ( f"Unity build failed with exit code {return_code} ." , file=sys.stderr, flush=True , ) return return_code if __name__ == "__main__" : raise SystemExit(run())
BatchBuildAndroid.py脚本负责接收Jenkins打包传过来的参数并解析,然后利用Unity Batch Build模式将Unity启动起来触发打包并将打包参数传递进打包代码。
Android KeyStore创建 在编写CSharp打包脚本前,我们打包Android还需要准备KeyStore去签名。
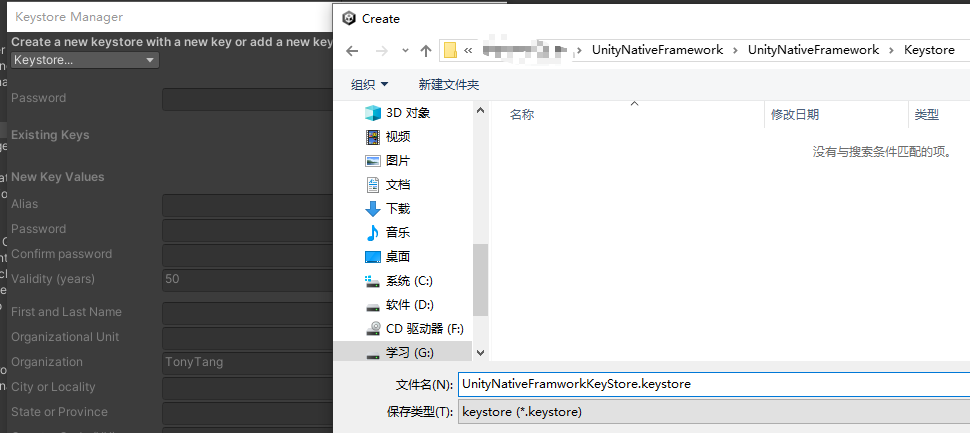
Android KeyStore创建,除了传统Keytool工具我们也可以利用Unity Keystore Manager创建属于我们自己的Android KeyStore。
Edit->Project Settings->Player->Android Platform->Publishing Settings->Keystore Manager->Keystore->Create New->Anywhere
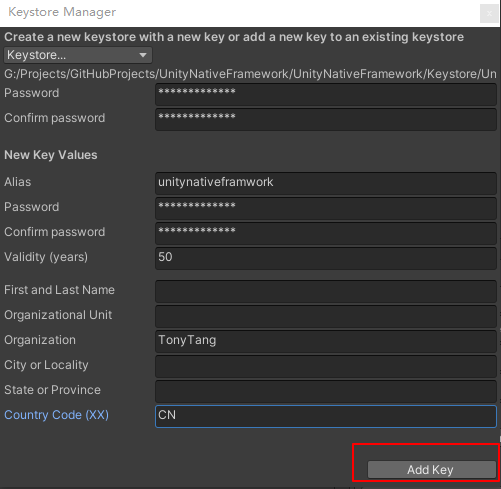
按需输入Keystore基础信息后点击Add Key:
记住UnityNativeFramworkAndroidKeyStore 这个名字,这个是我们配置的credentialsId后续在Jenkinsfile里访问会用到。
Note:
如果有不同渠道就创建多个KeyStore。
多渠道打包 Android多渠道打包:
常规来说我们游戏发行特别是国内Android会有很多不同的渠道要发行,不同渠道除了常规的包名,Keystore,图标等不一样,甚至有些要求游戏功能也有细分。
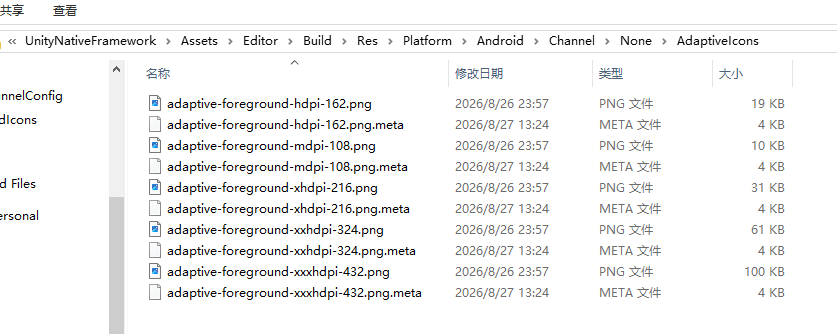
所以当前设想的是支持Android多渠道打包采用所有相关**打包静态资源(比如图标)放到一个独立的 Editor/BuildChannles/渠道名/StaticRes(比如图标)**目录下。
Android渠道Icon存储位置:
不同渠道打包时通过AssetDatabase去读取并设置,至于不同渠道的功能差异可以通过根据渠道动态得出打包宏去控制。
首先我们抽象一个能包含Android原生打包所有相关资源信息的类,然后将所有数据都配置进去。
AllPlatformChannelConfig.cs(包含所有平台的渠道信息配置(比如包名,公司名,应用程序名,Keystore相关数据等 ))
1 2 3 4 5 6 7 8 9 10 11 12 13 14 15 16 17 18 19 20 21 22 23 24 25 26 27 28 29 30 31 32 33 34 35 36 37 [CreateAssetMenu(fileName = "AllPlatformChannelConfig" , menuName = "Build/Config/AllPlatformChannelConfig" ) ] public sealed class AllPlatformChannelConfig : ScriptableObject { public static AllPlatformChannelConfig LoadAllPlatformChannelConfig () { var allPlatformChannelConfig = AssetDatabase.LoadAssetAtPath<AllPlatformChannelConfig>(PlatformChannelPath.AllPlatformChannelConfigAssetPath); if (allPlatformChannelConfig == null ) { Debug.LogError($"未找到AllPlatformChannelConfig,路径为:{PlatformChannelPath.AllPlatformChannelConfigAssetPath} ,请自行创建一个并配置相关数据用于打包!" ); } return allPlatformChannelConfig; } [Header("Android平台渠道配置" ) ] public AndroidPlatformChannelConfig AndroidPlatformChannelConfig = new AndroidPlatformChannelConfig(); [Header("IOS平台渠道配置" ) ] public IOSPlatformChannelConfig IOSPlatformChannelConfig = new IOSPlatformChannelConfig(); [Header("Windows平台渠道配置" ) ] public WindowsPlatformChannelConfig WindowsPlatformChannelConfig = new WindowsPlatformChannelConfig(); ****** }
PlatformChannelConfig.cs(平台渠道配置抽象类)
1 2 3 4 5 6 7 8 9 10 11 12 13 14 15 16 17 18 19 20 21 22 23 24 25 26 27 28 29 30 31 32 33 34 35 36 37 38 39 40 41 42 43 44 45 46 47 48 49 [Serializable ] public abstract class PlatformChannelConfig <T > where T : ChannelConfig { public abstract BuildPlatform BuildPlatform { get ; } [Header("平台所有渠道配置" ) ] public List<T> ChannelCofigs = new List<T>(); public T GetChannelConfig (Channel channel ) { if (ChannelCofigs == null ) { Debug.LogError($"没有配置任何渠道的配置,无法获取{BuildPlatform} 平台指定渠道的配置,channel={channel} " ); return null ; } foreach (var config in ChannelCofigs) { if (config == null ) { continue ; } if (config.Channel == channel) { return config; } } Debug.LogError($"没有找到对应的渠道配置,channel={channel} " ); return null ; } }
AndroidPlatformChannelConfig.cs(Android平台渠道抽象类 )
1 2 3 4 5 6 7 8 9 10 11 12 13 14 15 [Serializable ] public class AndroidPlatformChannelConfig : PlatformChannelConfig <AndroidChannelConfig >{ public override BuildPlatform BuildPlatform { get { return BuildPlatform.Android; } } }
ChannelConfig.cs(渠道公共配置抽象类 )
1 2 3 4 5 6 7 8 9 10 11 12 13 14 15 16 17 18 19 20 21 22 23 24 25 26 27 28 29 30 31 32 33 34 35 36 37 38 39 40 41 [Serializable ] public abstract class ChannelConfig { [Header("渠道" ) ] public Channel Channel; [Header("应用程序标识符" ) ] public string ApplicationIdentifier; [Header("公司名称" ) ] public string CompanyName; [Header("应用程序名称" ) ] public string ProductName; public virtual bool IsContentValide () { return true ; } }
AndroidChannelConfig.cs(Android渠道配置类 )
1 2 3 4 5 6 7 8 9 10 11 12 13 14 15 16 17 18 19 20 21 22 23 24 25 26 27 28 29 30 31 32 33 34 35 36 37 38 39 40 41 42 43 44 45 46 47 48 49 50 51 52 53 54 55 56 57 58 59 60 61 62 63 64 65 66 67 68 69 70 71 72 [Serializable ] public class AndroidChannelConfig : ChannelConfig { [Header("Keystore文件相对路径" ) ] public string KeystoreFileRelativePath; [Header("Keystore文件密码" ) ] public string KeystorePassword; [Header("Keystore别名" ) ] public string KeyAlias; [Header("Keystore别名密码" ) ] public string KeyAliasPassword; [Header("Android图标集合" ) ] public AndroidIconSet iconSet = new AndroidIconSet(); public override bool IsContentValide () { var baseResult = base .IsContentValide(); if (!baseResult) { return false ; } if (string .IsNullOrEmpty(KeystoreFileRelativePath)) { Debug.LogError($"渠道:{Channel} 配置参数KeystoreFileRelativePath为空,打包失败!" ); return false ; } else if (string .IsNullOrEmpty(KeystorePassword)) { Debug.LogError($"渠道:{Channel} 配置参数KeystorePassword为空,打包失败!" ); return false ; } else if (string .IsNullOrEmpty(KeyAlias)) { Debug.LogError($"渠道:{Channel} 配置参数KeyAlias为空,打包失败!" ); return false ; } else if (string .IsNullOrEmpty(KeyAliasPassword)) { Debug.LogError($"渠道:{Channel} 配置参数KeyAliasPassword为空,打包失败!" ); return false ; } else if (IconSet == null || !IconSet.IsContentValide()) { Debug.LogError($"渠道:{Channel} 配置参数IconSet无效,打包失败!" ); return false ; } return true ; } }
AndroidIconSet.cs(Android平台图标集合类 )
1 2 3 4 5 6 7 8 9 10 11 12 13 14 15 16 17 18 19 20 21 22 23 24 25 26 27 28 29 30 31 32 33 34 35 36 37 38 39 40 41 42 43 44 45 46 47 48 49 50 51 52 53 54 55 56 57 58 59 60 61 62 63 64 65 66 67 68 69 70 71 72 73 74 75 76 77 78 79 80 81 82 83 84 85 86 87 88 [Serializable ] public class AndroidIconSet { [Header("图标集合" ) ] public Texture2D[] LegacyIcons; [Header("自适应图标背景图标集合" ) ] public Texture2D[] AdaptiveBackgroundIcons; [Header("自适应图标前景图标集合" ) ] public Texture2D[] AdaptiveForegroundIcons; [Header("偏好圆形图标集合" ) ] public Texture2D[] RoundIcons; public bool IsContentValide () { if (!IsValideNumberTextures(LegacyIcons, 6 )) { Debug.LogError("Legacy Icons 数量不正确或有空纹理Icon!" ); return false ; } else if (!IsValideNumberTextures(AdaptiveForegroundIcons, 6 )) { Debug.LogError("Adaptive Foreground Icons 数量不正确或有空纹理Icon!" ); return false ; } else if (!IsValideNumberTextures(AdaptiveBackgroundIcons, 6 )) { Debug.LogError("Adaptive Background Icons 数量不正确或有空纹理Icon!" ); return false ; } else if (!IsValideNumberTextures(RoundIcons, 6 )) { Debug.LogError("Round Icons 数量不正确或有空纹理Icon!" ); return false ; } return true ; } private bool IsValideNumberTextures (Texture2D[] textures, int requiredNumber ) { if (textures == null || textures.Length != requiredNumber) { return false ; } for (int i = 0 ; i < textures.Length; i++) { if (textures[i] == null ) { Debug.LogError($"纹理数组中第 {i} 个纹理为空, 打包失败!" ); return false ; } } return true ; } }
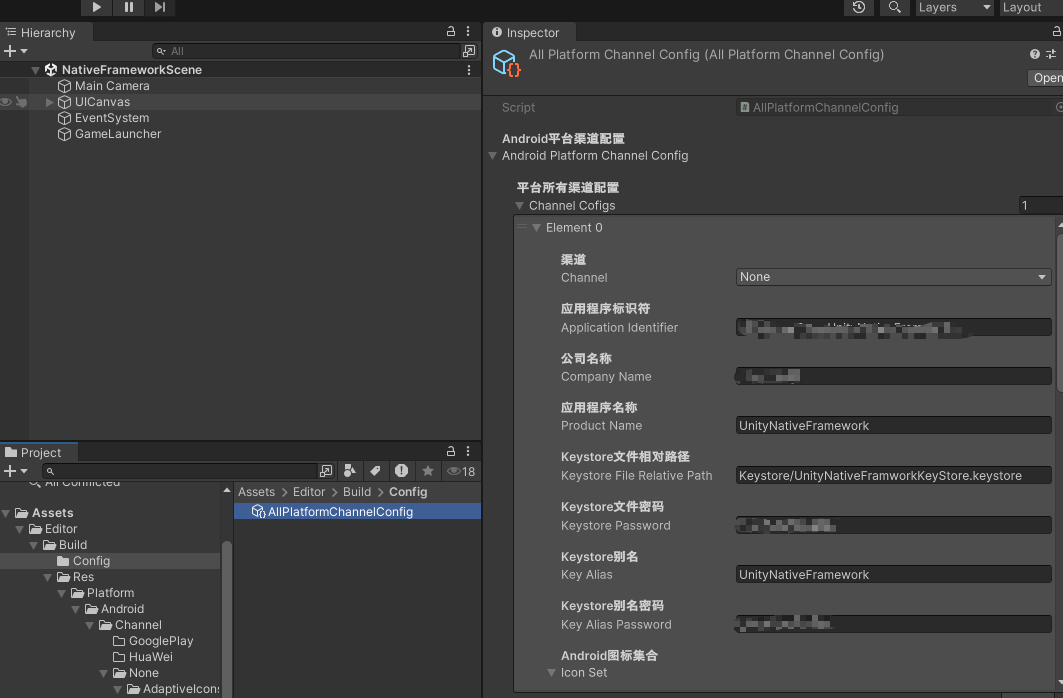
我们在Assets/Editor/Build/Config创建一个AllPlatformChannelConfig.asset用于配置各个平台的渠道相关数据。
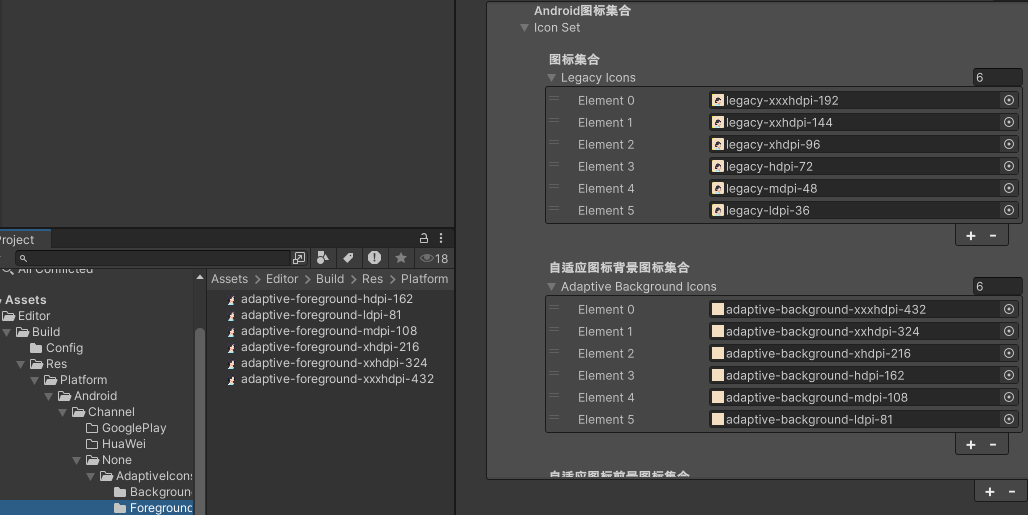
这里配置一个Android 平台None 渠道的相关打包数据为例,其他渠道添加渠道配置配置对应数据即可:
看到我已经完成了Android平台None渠道的所有打包数据配置,接下来就是打包流程里去读取配置并设置对应打包参数了,继续请看CSharp打包编写 部分。
渠道挂钩的AAR这类渠道特有的动态资源,我们先统一放到项目目录下的BuildChannels/渠道名/DynamicRes(比如渠道AAR)(注意这里是Assets外层的目录)。然后每次打包Android渠道包的时候我们先将Plugins/Android/Channel目录清空,然后根据渠道类型复制对应的DynamicRes到该目录下,然后触发Asset保存刷新后接着触发APK打包。
上述动态资源复制方案待实战测试。
目前为了方便,我只支持不同平台不同渠道静态资源配置(比如包名,图标,KeyStore位置,密码,Aliases和Aliases密码等信息),然后打包时根据渠道去读取对应渠道数据进行动态打包参数设置。
Note:
配置Android渠道图标时,注意按照对应图标数量要求和图标大小的顺序设置 Android渠道图标资源注意设置类型Default+Alpha is Transparency+None Compression
IOS多渠道打包:
IOS一般来说如果不考虑越狱版本支持,官方就一个AppStore,IOS多渠道打包暂时不列入考虑。
AppStore打包只需要在Unity导出XCode工程后通过固定的签名证书打包生成IPA即可。
Window多渠道打包:
Windows不同渠道是指不同发行平台(e.g. Steam,Microsoft Store等),这一步发生在打包生成可执行EXE程序以后,我们可以做成脚本工具,根据不同渠道调用不同脚本工具打包即可。
CSharp打包编写 打包设计到多平台打包,但流程比较固有化,所以我们需要抽象对象和抽象固有流程去支持不同平台的打包DIY代码细节编码。
我这里首先抽象了PlatformBuildPipeline类表示平台打包抽象,里面包含基础数据传入和打包流程定义抽象 。
PlatformBuildPipeline.cs
1
2
3
4
5
6
7
8
9
10
11
12
13
14
15
16
17
18
19
20
21
22
23
24
25
26
27
28
29
30
31
32
33
34
35
36
37
38
39
40
41
42
43
44
45
46
47
48
49
50
51
52
53
54
55
56
57
58
59
60
61
62
63
64
65
66
67
68
69
70
71
72
73
74
75
76
77
78
79
80
81
82
83
84
85
86
87
88
89
90
91
92
93
94
95
96
97
98
99
100
101
102
103
104
105
106
107
108
109
110
111
112
113
114
115
116
117
118
119
120
121
122
123
124
125
126
127
128
129
130
131
132
133
134
135
public abstract class PlatformBuildPipeline { protected string mOutputFolderPath; protected BuildParameters mBuildParameters; protected BuildTargetGroup buildTargetGroup; private PlatformBuildPipeline () { } public PlatformBuildPipeline (string outputFolderPath, BuildParameters buildParameters { ****** } protected abstract void InitPlatformChannelConfig () public BuildResult DoBuild () { ****** } protected bool DoCommonBuildPreProcess () { ****** } protected virtual bool DoBuildResource () { ****** } protected bool DoBuildTargetCommonPreProcess () { ****** } protected abstract bool DoBuildTargetPreProcess () protected abstract BuildResult DoRealAppBuild () protected abstract bool DoBuildTargetPostProcess () protected bool CheckOutputPath () { ****** } protected virtual bool CheckBuildParameters () { ****** } protected bool CheckInnerVersionConfigExist () { ****** } protected abstract bool CheckPlatformChannelConfigExist () protected abstract bool CheckPlatformChannelConfigParams () protected bool SaveNewInnerConfigVersion () { ******* } }
根据传入的打包平台(BuildTarget)构建不同*BuildPipeline子类,每个子类初始化自己的平台渠道配置并检查,然后子类在特定的流程接口里去细化打包代码,实现不同平台的DIY打包流程编码。
以下以AndroidBuildPipeline.cs为例:
1
2
3
4
5
6
7
8
9
10
11
12
13
14
15
16
17
18
19
20
21
22
23
24
25
26
27
28
29
30
31
32
33
34
35
36
37
38
39
40
41
42
43
44
45
46
47
48
49
50
51
52
53
54
55
56
57
58
59
60
61
62
63
64
65
66
67
68
69
70
71
72
73
74
75
76
77
78
79
80
81
82
83
84
85
86
87
88
89
90
91
92
93
94
95
96
97
98
99
100
101
102
103
104
105
106
107
108
109
110
111
112
113
114
115
116
117
118
119
120
121
122
123
124
125
126
127
128
129
130
131
132
133
134
135
136
137
138
139
140
141
142
143
144
145
146
147
148
149
150
151
152
153
154
155
156
157
158
159
160
161
162
163
164
165
166
167
168
169
170
171
172
173
174
175
176
177
178
179
180
181
182
183
184
185
186
187
188
189
190
191
192
193
194
195
196
197
198
199
200
201
202
203
204
205
206
207
208
public class AndroidBuildPipeline : PlatformBuildPipeline { protected AndroidChannelConfig mTargetChannelConfig; public AndroidBuildPipeline (string outputPath, BuildParameters buildParametersbase (outputPath, buildParameters ) { } protected override void InitPlatformChannelConfig () { var allPlatformChannelConfig = AllPlatformChannelConfig.LoadAllPlatformChannelConfig(); if (allPlatformChannelConfig != null ) { mTargetChannelConfig = allPlatformChannelConfig.AndroidPlatformChannelConfig.GetChannelConfig(mBuildParameters.Channel); } } protected override bool CheckPlatformChannelConfigExist () { if (mTargetChannelConfig == null ) { Debug.LogError($"Android平台的渠道:{mBuildParameters.Channel} 配置不存在,打包失败!" ); return false ; } return true ; } protected override bool CheckPlatformChannelConfigParams () { return mTargetChannelConfig.IsContentValide(); } protected override bool DoBuildTargetPreProcess () { MakeSureBuildOutputFolderExists(); var buildOutputFolderPath = GetBuildOutputFolderPath(); Debug.Log($"buildOutputFolderPath:{buildOutputFolderPath} " ); if (!Directory.Exists(buildOutputFolderPath)) { Directory.CreateDirectory(buildOutputFolderPath); } EditorUserBuildSettings.buildAppBundle = true ; Debug.Log($"打包设置生成AAB为:{EditorUserBuildSettings.buildAppBundle} " ); PlayerSettings.Android.targetArchitectures = AndroidArchitecture.ARM64 | AndroidArchitecture.ARMv7; Debug.Log($"打包设置目标架构为:{PlayerSettings.Android.targetArchitectures} " ); PlayerSettings.Android.minSdkVersion = AndroidSdkVersions.AndroidApiLevel22; Debug.Log($"打包设置最小SDK版本为:{PlayerSettings.Android.minSdkVersion} " ); PlayerSettings.Android.targetSdkVersion = AndroidSdkVersions.AndroidApiLevelAuto; Debug.Log($"打包设置目标SDK版本为:{PlayerSettings.Android.targetSdkVersion} " ); PlayerSettings.Android.minifyRelease = true ; Debug.Log($"打包设置Release包代码压缩为:{PlayerSettings.Android.minifyRelease} " ); PlayerSettings.Android.minifyDebug = false ; Debug.Log($"打包设置Debug包代码压缩为:{PlayerSettings.Android.minifyDebug} " ); PlayerSettings.Android.useCustomKeystore = true ; Debug.Log($"打包设置使用自定义签名文件为:{PlayerSettings.Android.useCustomKeystore} " ); PlayerSettings.Android.keystoreName = mTargetChannelConfig.KeystoreFileRelativePath; PlayerSettings.Android.keystorePass = mTargetChannelConfig.KeystorePassword; PlayerSettings.Android.keyaliasName = mTargetChannelConfig.KeyAlias; PlayerSettings.Android.keyaliasPass = mTargetChannelConfig.KeyAliasPassword; Debug.Log($"打包设置签名文件路径为:{PlayerSettings.Android.keystoreName} " ); Debug.Log($"打包设置签名文件密码为:{PlayerSettings.Android.keystorePass} " ); Debug.Log($"打包设置密钥别名为:{PlayerSettings.Android.keyaliasName} " ); Debug.Log($"打包设置密钥别名密码为:{PlayerSettings.Android.keyaliasPass} " ); var iconSet = mTargetChannelConfig.IconSet; var configLegacyIcons = iconSet.LegacyIcons; PlatformIcon[] legacyPlatformIcons = PlayerSettings.GetPlatformIcons(mBuildTargetGroup, AndroidPlatformIconKind.Legacy); for (int index = 0 , length = legacyPlatformIcons.Length; index < length; index++) { var legacyPlatformIcon = legacyPlatformIcons[index]; legacyPlatformIcon.SetTexture(configLegacyIcons[index]); } PlayerSettings.SetPlatformIcons(mBuildTargetGroup, AndroidPlatformIconKind.Legacy, legacyPlatformIcons); PlatformIcon[] adaptivePlatformIcons = PlayerSettings.GetPlatformIcons(mBuildTargetGroup, AndroidPlatformIconKind.Adaptive); var configAdaptiveBackgroundIcons = iconSet.AdaptiveBackgroundIcons; var configAdaptiveForegroundIcons = iconSet.AdaptiveForegroundIcons; for (int index = 0 , length = adaptivePlatformIcons.Length; index < length; index++) { var adaptivePlatformIcon = adaptivePlatformIcons[index]; var configBackgroundIcon = configAdaptiveBackgroundIcons[index]; var configForegroundIcon = configAdaptiveForegroundIcons[index]; adaptivePlatformIcon.SetTexture(configBackgroundIcon, 0 ); adaptivePlatformIcon.SetTexture(configForegroundIcon, 1 ); } PlayerSettings.SetPlatformIcons(mBuildTargetGroup, AndroidPlatformIconKind.Adaptive, adaptivePlatformIcons); PlatformIcon[] roundPlatformIcons = PlayerSettings.GetPlatformIcons(mBuildTargetGroup, AndroidPlatformIconKind.Round); var configRoundIcons = iconSet.RoundIcons; for (int index = 0 , length = roundPlatformIcons.Length; index < length; index++) { var roundPlatformIcon = roundPlatformIcons[index]; roundPlatformIcon.SetTexture(configRoundIcons[index]); } PlayerSettings.SetPlatformIcons(mBuildTargetGroup, AndroidPlatformIconKind.Round, roundPlatformIcons); return true ; } protected override BuildResult DoRealAppBuild () { var buildTarget = mBuildParameters.BuildTarget; var targetVersionCode = mBuildParameters.VersionCode; var targetResourceVersionCode = mBuildParameters.ResourceVersionCode; var isDevelopment = mBuildParameters.IsDevelopment; Debug.Log($"打包修改版本号从:{PlayerSettings.bundleVersion} 到{targetVersionCode} " ); PlayerSettings.bundleVersion = targetVersionCode.ToString(); var buildNumer = BuildEditorUtilities.CalculateBuildNumber(targetVersionCode, targetResourceVersionCode); Debug.Log($"打包修改Android构建版本号从:{PlayerSettings.Android.bundleVersionCode} 到{buildNumer} " ); PlayerSettings.Android.bundleVersionCode = buildNumer; BuildPlayerOptions buildPlayerOptions = new BuildPlayerOptions(); var now = DateTime.Now; var timeStamp = $"{now.Year} _{now.Month} _{now.Day} _{now.Hour} _{now.Minute} _{now.Second} " ; var buildPostFix = BuildEditorUtilities.GetCorrespondingBuildFilePostfix(buildTarget); var outputFileName = $"{PlayerSettings.productName} _{timeStamp} {buildPostFix} " ; var buildOutputPath = Path.Combine(mOutputFolderPath, $"{targetVersionCode} /{targetResourceVersionCode} /" ); var locationPathName = Path.Combine(buildOutputPath, outputFileName); Debug.Log($"打包输出路径:{locationPathName} " ); buildPlayerOptions.locationPathName = locationPathName; buildPlayerOptions.scenes = BuildEditorUtilities.GetBuildSceneArray(); buildPlayerOptions.target = buildTarget; buildPlayerOptions.options = BuildOptions.StrictMode; if (isDevelopment) { buildPlayerOptions.options |= BuildOptions.Development; } Debug.Log($"打包平台:{Enum.GetName(typeof (BuildTarget), buildTarget)} " ); Debug.Log($"开发版本:{isDevelopment} " ); Debug.Log($"打包输出路径:{buildPlayerOptions.locationPathName} " ); buildPlayerOptions.targetGroup = mBuildTargetGroup; EditorUserBuildSettings.exportAsGoogleAndroidProject = false ; EditorUserBuildSettings.buildAppBundle = false ; var buildReport = BuildPipeline.BuildPlayer(buildPlayerOptions); var buildResult = buildReport.summary.result; var isBuildSuccess = buildResult == UnityEditor.Build.Reporting.BuildResult.Succeeded; if (!isBuildSuccess) { Debug.LogError($"打包失败,打包结果:{buildResult} !" ); return BuildResult.Build_Failed; } return BuildResult.Success; } protected override bool DoBuildTargetPostProcess () { ****** } private void MakeSureBuildOutputFolderExists () { ****** } private string GetBuildOutputFolderPath () { ****** } }
BuildTool.cs(打包工具脚本 )
1 2 3 4 5 6 7 8 9 10 11 12 13 14 15 16 17 18 19 20 21 22 23 24 25 26 27 28 29 30 31 32 33 34 35 36 37 38 39 40 41 42 43 44 45 46 47 48 49 50 51 52 53 54 55 56 57 58 59 60 61 62 63 64 65 66 67 68 69 70 71 72 73 74 75 76 77 78 79 80 81 82 83 84 85 86 87 88 89 90 91 92 93 94 95 96 97 98 99 100 101 102 103 public static class BuildTool { [MenuItem("Build/Android/打Inner包(None Channel+No SDK)" ) ] static void DoBuildInnerAndroid () { Debug.Log("BuildTool.DoBuildInnerAndroid()" ); var innerVersionConfig = VersionUtilities.ReadInnerVersionConfig(); var versionCode = innerVersionConfig != null ? innerVersionConfig.VersionCode : 1 ; var resourceVersionCode = innerVersionConfig != null ? innerVersionConfig.ResourceVersionCode : 1 ; var buildParameters = new BuildParameters(BuildTarget.Android, DevelopmentMode.Inner, Channel.None, true , versionCode, resourceVersionCode, false , SDKType.All); DoBuild(buildParameters); } ****** #region 命令行打包 public static void DoBuildFromCommands () { Debug.Log("BuildTool.DoBuildFromCommands()" ); var commandArgs = Environment.GetCommandLineArgs(); var buildParameters = BuildCommand.ParseCommandArgsToBuildParameters(commandArgs); try { var buildResult = DoBuild(buildParameters); EditorApplication.Exit((int )buildResult); } catch (Exception ex) { Debug.LogError($"BuildTool.DoBuildFromCommands() Exception:{ex} " ); EditorApplication.Exit((int )BuildResult.Build_Exception); } } #endregion private static PlatformBuildPipeline CreateBuildPipeline (string outputFolderPath, BuildParameters buildParameters { var buildTarget = buildParameters.BuildTarget; if (buildTarget == BuildTarget.Android) { return new AndroidBuildPipeline(outputFolderPath, buildParameters); } else if (buildTarget == BuildTarget.iOS) { return new IOSBuildPipeline(outputFolderPath, buildParameters); } else if (buildTarget == BuildTarget.StandaloneWindows || buildTarget == BuildTarget.StandaloneWindows64) { return new WindowsBuildPipeline(outputFolderPath, buildParameters); } else { Debug.LogError($"不支持的打包平台:{buildTarget} ,创建打包管线对象失败!" ); return null ; } } public static BuildResult DoBuild (BuildParameters buildParameters ) { Debug.Log("BuildTool.DoBuild()" ); if (buildParameters == null ) { Debug.LogError("不允许传入空参数,打包失败!" ); return BuildResult.No_Build_Parameters; } Debug.Log($"打包参数:{buildParameters} " ); var outputFolderPath = BuildEditorUtilities.GetBuildOutputFolderPath(buildParameters.BuildTarget); var buildPipeline = CreateBuildPipeline(outputFolderPath, buildParameters); if (buildPipeline == null ) { return BuildResult.Not_Supported_Build_Target; } var buildResult = buildPipeline.DoBuild(); if (buildResult != BuildResult.Success) { Debug.LogError($"[BuildPatch] App打包失败,打包结果:{buildResult} ,打包终止!" ); return buildResult; } Debug.Log($"[BuildPatch] 打包成功,打包结束!" ); return buildResult; } }
BuildCommand.cs(Jenkins打包命令参数静态类 )
1 2 3 4 5 6 7 8 9 10 11 12 13 14 15 16 17 18 19 20 21 22 23 24 25 26 27 28 29 30 31 32 33 34 35 36 37 38 39 40 public static class BuildCommand { public static BuildParameters ParseCommandArgsToBuildParameters (string [] args { ****** } public static Dictionary<string , string > ParseCommandArgsToDictionary (string [] args { ****** } private static BuildParameters ConstructBuildParametersByParamsMap (Dictionary<string , string > parameterMap ) { ****** } }
我保留了Android核心打包流程读取平台渠道配置并设置相关参数代码和执行打包代码,其他不重要的代码省略了,详情请参考文章最后放的Github地址。
从上面代码流程可以看出BuildTool.cs提供了菜单打包和Jenkins命令行打包相关接口方法。触发菜单打包时,主动构建打包参数并传入BuildTool.DoBuild(),BuildTool通过构建对应平台的BuildPipeline执行对应的DoBuild()打包方法流程。
通过不同平台构建不同的BuildPipeline子类,我们实现了流程详细高度可自定义化的打包流程编码。
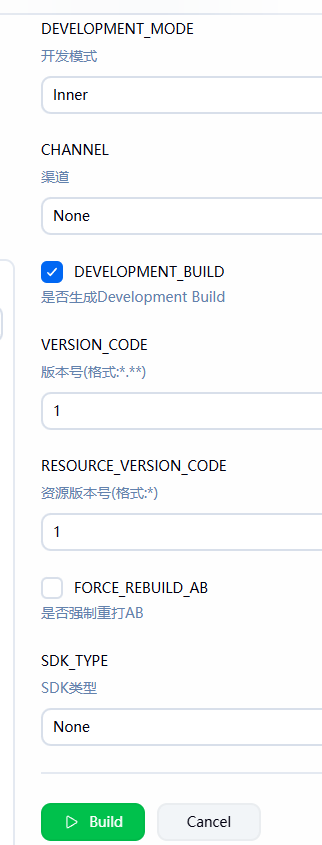
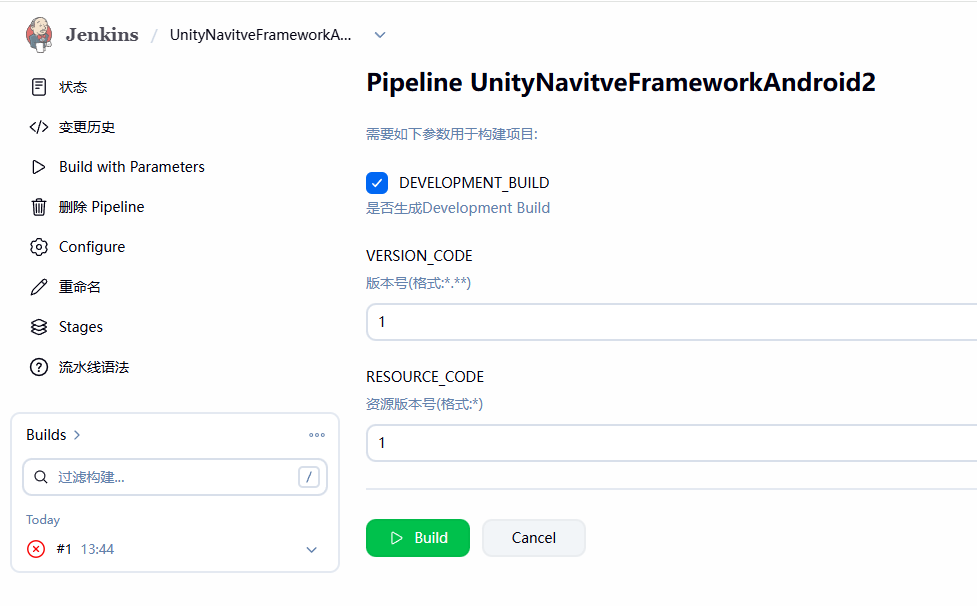
让我们来看看完成了所有打包参数后的Jenkins配置参数面板:
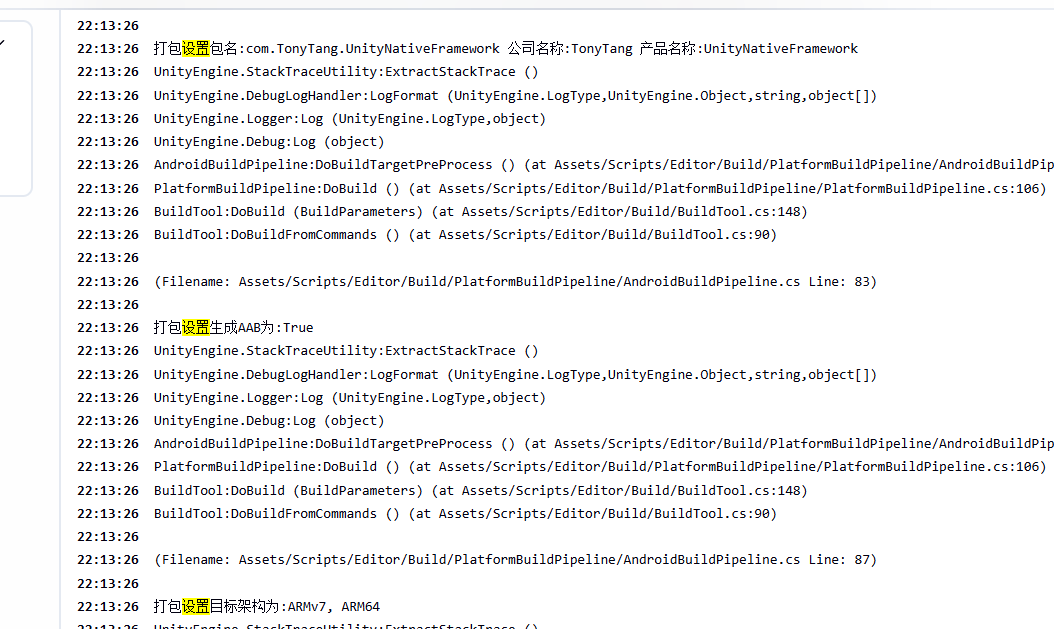
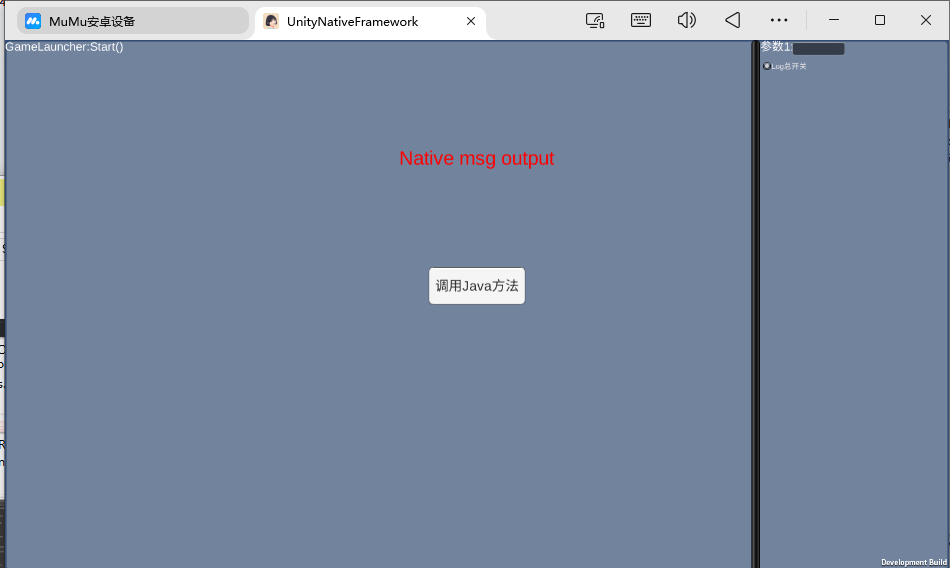
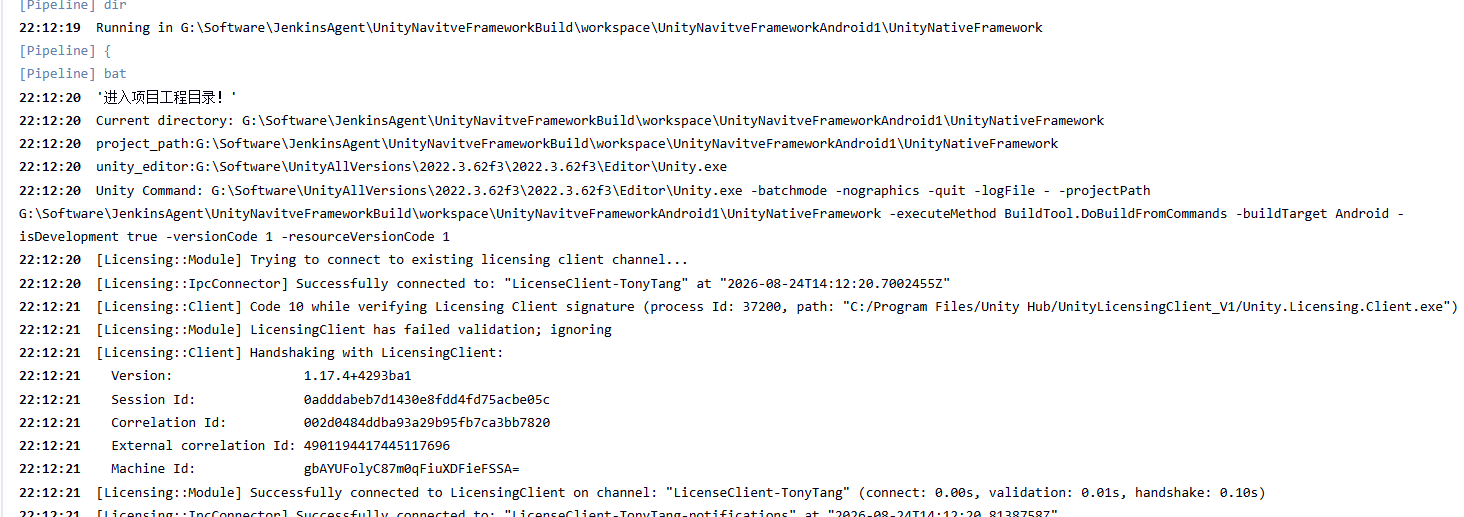
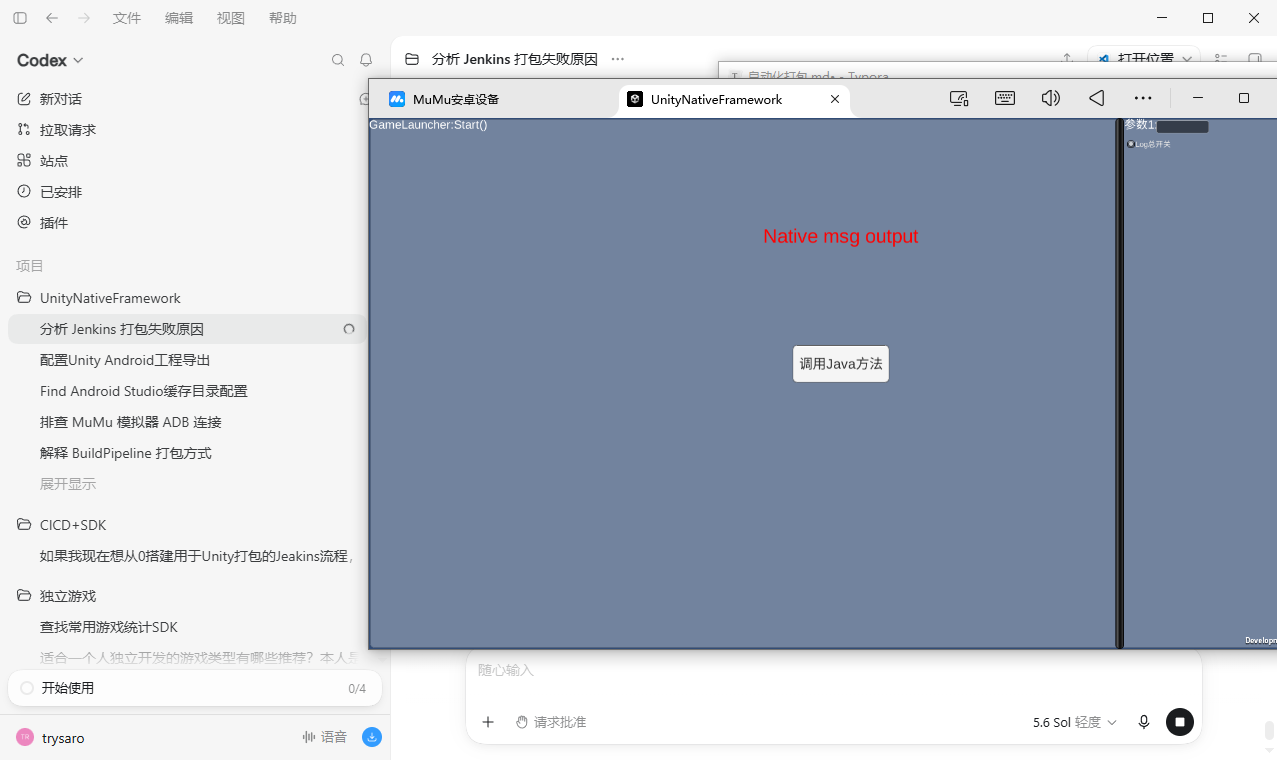
然后触发打包后,我们来看看打包日志和最终的安装效果:
可以看出我们Android Jenkins打包无论是打包名设置,Keystore设置还是Android图标设置都成功并打包运行成功了。
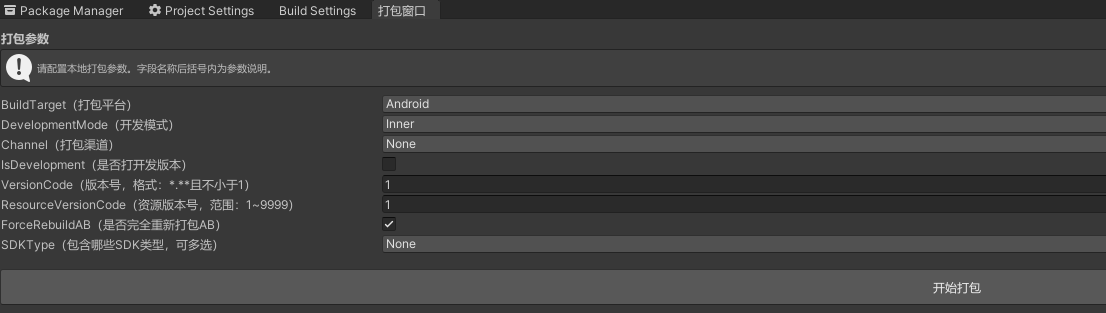
这里顺带编写一个纯Editor打包的编辑器窗口BuildWindow.cs,这里就不放代码了,详细去Github看。这个工具是直接让AI写的,核心需求就是让所有BuildParameters里的属性参数都能在EditorWindow的打包窗口上配置并点击打包,打包时做必要的一些版本号和资源版本号合法性校验,以及一些二次确认。
打包窗口打开流程Build->打包窗口:
Note:
考虑到Jenkins引入Keystore相关配置传递会有很多东西要配置,所以不同渠道所有相关东西的配置选择我准备全部做到Unity打包脚本里,通过AllPlatformChannelConfig.cs的ScriptableObject进行所有平台所有渠道的静态资源配置(比如)。
Git SSH访问报错 上传Jenkinsfile后再次打包会发现依然打包报错:
这是因为我们配置Git Host Key的Host Keys只添加了支持http访问的Host Key而没有添加SSH访问的Host Key ,按照前面添加SSH Credential的方式添加上后,我们再次打开新建的Agent会看到Jenkins的参数配置界面显示出来了:
打包CS脚本传漏报错 修改SSH访问的Host Key后我们再次触发打包:
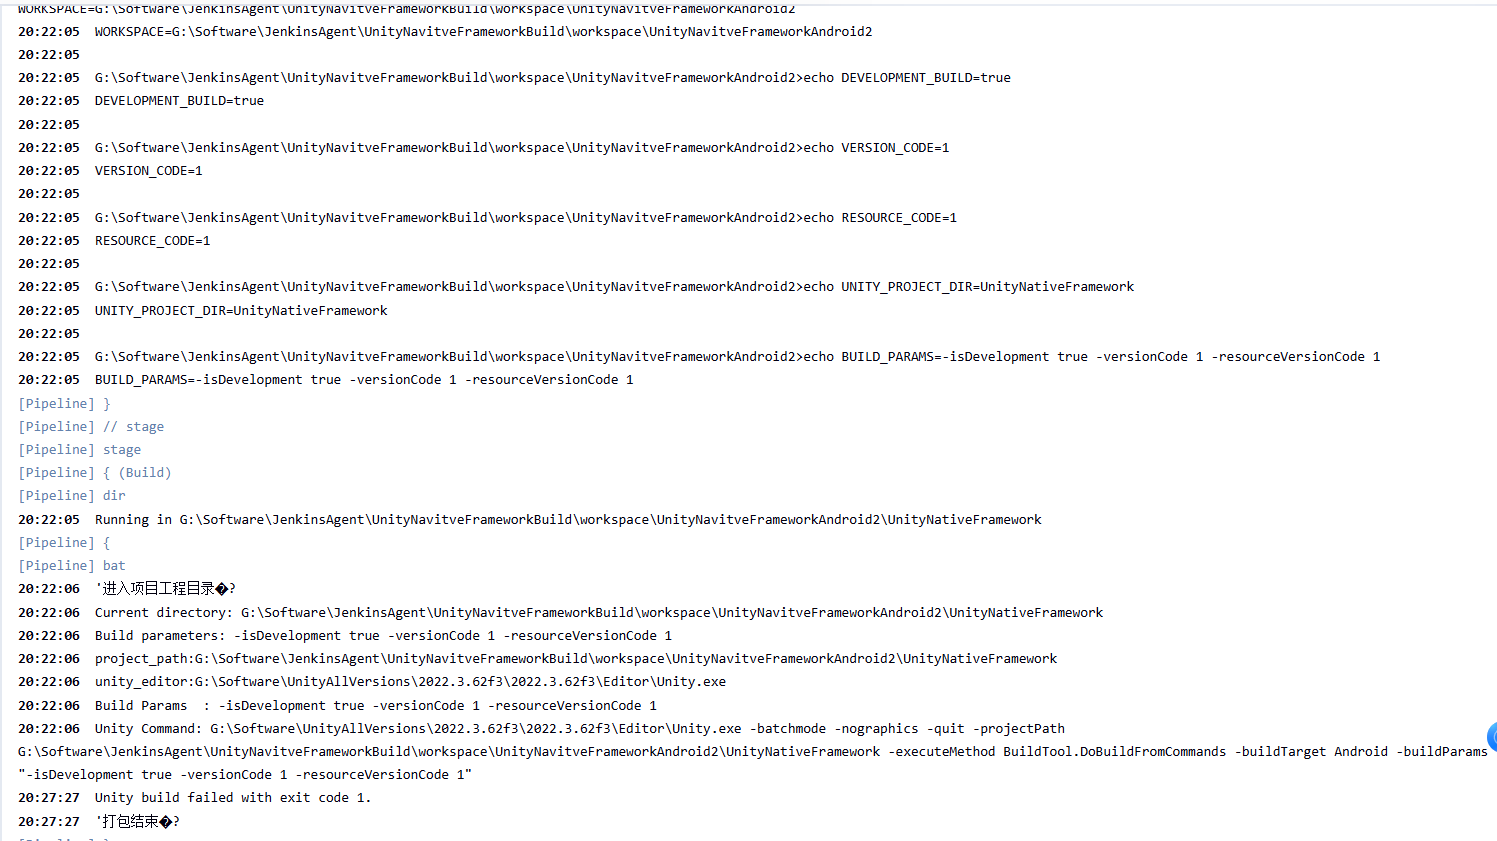
发现依然打包失败,但我们打包流程里无论是Jenkins的打印输出还是BatchBuildAndroid.py里的打印输出都成功打印了,从日志可以看到我们触发了Unity Batch Mode打包,但过了一会就打包失败了,这里是因为我忘记上传打包相关脚本了,Git仓库上根本没有BuildTool.DoBuiuldFromCommands的代码文件。
Jenkins没输出Unity日志问题 原因如下:
Unity Batch Mode运行模式需要添加**-logFile -**参数,表示将将日志输出到控制台。
通过Jenkins->cmd.exe->Python->Untiy这个打包流程后,Unity没能正确得到能写入的stdout
方案:
我们需要再Python里显示去获取Unity日志并转发打印到Jenkins控制台
通过在打包脚本BatchBuildAndroid.py里添加以下代码,将
1
2
3
4
5
6
7
8
9
10
11
12
13
process = subprocess.Popen( command, stdout=subprocess.PIPE, stderr=subprocess.STDOUT, universal_newlines=True , encoding="utf-8" , errors="replace" , bufsize=1 , ) if process.stdout is not None : for line in process.stdout: print (line, end="" , flush=True )
Unity中文日志乱码问题 原因如下:
Windows控制台,Python,Jenkins使用的字符编码不一致造成的。
方案:
在打包流程脚本里统一字符编码格式
Jenkinsfile(统一Jenkins bat的字符编码到UTF-8,并将Python输入输出指定为UTF-8 )
1
2
3
4
5
6
7
8
9
10
bat ''' @echo off rem 将Windows CMD代码页切换为UTF-8 chcp 65001 >nul rem 强制Python标准输入输出使用UTF-8(确保Python向Jenkins输出使用UTF-8) set PYTHONIOENCODING=utf-8 ****** '''
BatchBuildAndroid.py(确保Python保持UTF-8解码 )
1
2
3
4
5
6
7
8
9
process = subprocess.Popen( command, stdout=subprocess.PIPE, stderr=subprocess.STDOUT, universal_newlines=True , encoding="utf-8" , errors="replace" , bufsize=1 , )
打包成功 上传打包文件后再次触发Jenkins打包:
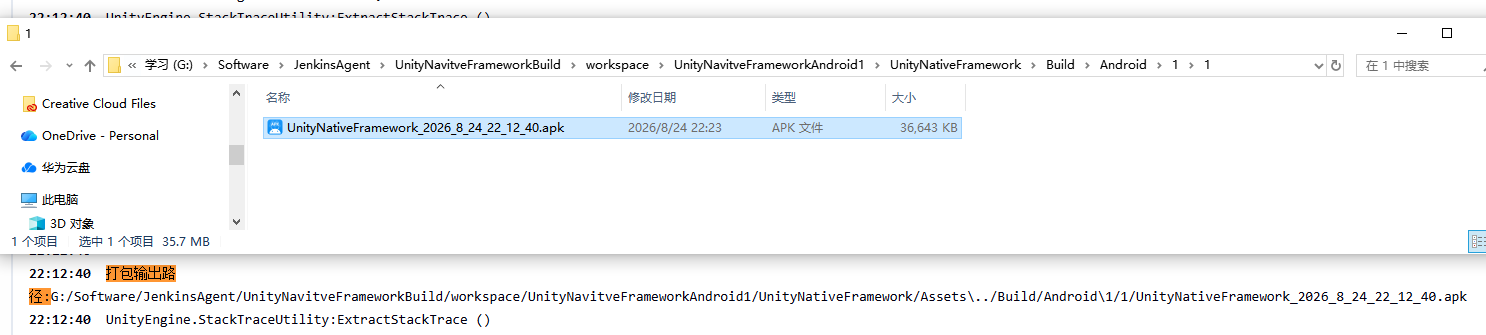
可以看到我们终于正确触发Unity Batch Mode打包并打包成功:
最后在JenkinsAgent对应Agent和Pipeline目录下找到了打包输出的APK文件:
安装运行成功:
Pipeline打包归档 Pipeline打包归档是指我们打包生成的APK等产物,默认生成在JenkinsAgent对应Agent对应Pipeline项目工程下的特定位置,这种位置会受项目Git拉取,Jenkins清理工作区等操作影响。所以最好的方式就是Jenkins打包的最终产物统一放到一个独立长期保存的位置,这个就是Pipeline打包归档。
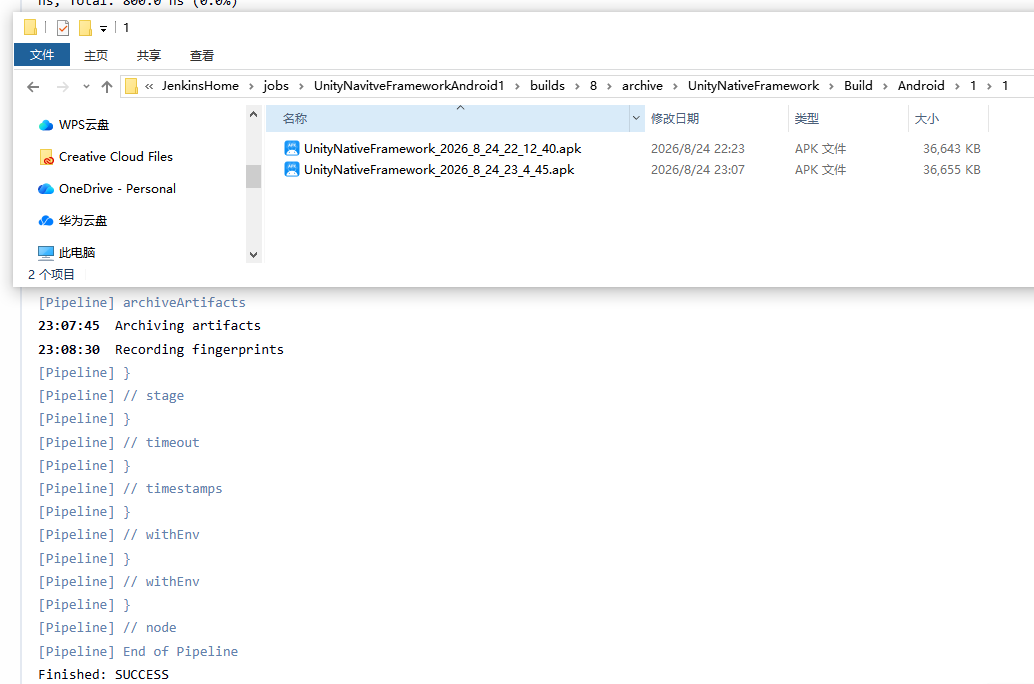
设置好打包归档后我们能在Jenkins对应Pipeline页面点击Build Artifacts里找到所有打包产物。
归档后的存储位置在%JENKINS_HOME%\jobs\任务名\builds\构件编号\archive路径下。
可以看到打包成功后Jenkins成功将打包产物符合的文件全部归档到了%JENKINS_HOME%目录对应目录下。
Note:
归档成功后没在Jenkins页面看到相关入口,原因不明
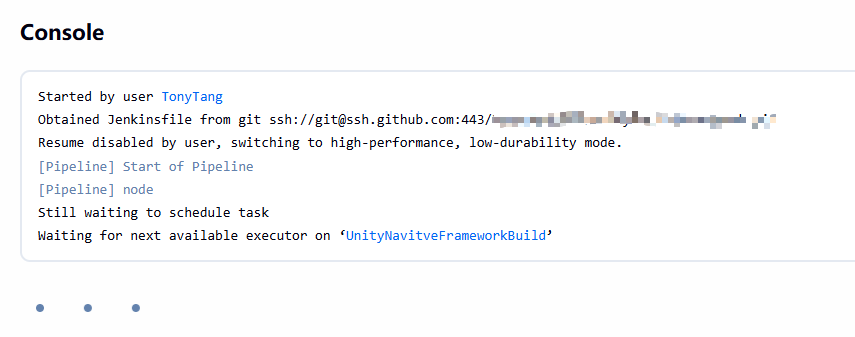
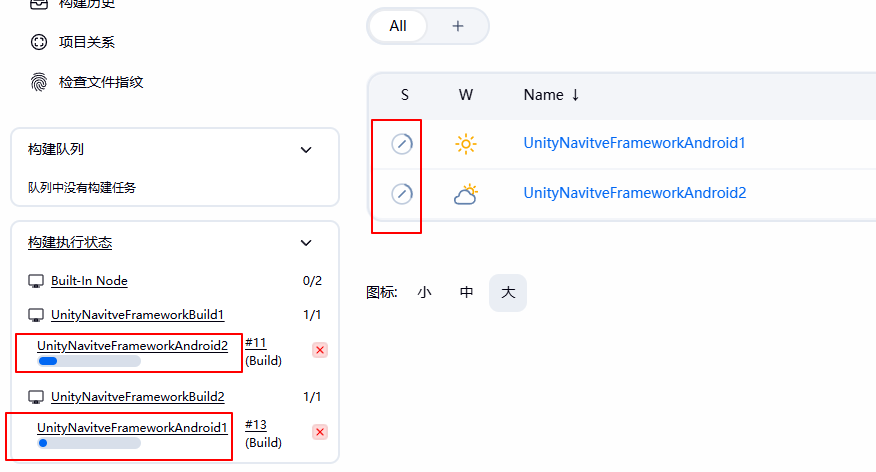
多Agent多Pipeline打包 之前我们只创建了一个UnityNativeFrameworkBuild Agent(只有1个Executor),但我们却创建了2个指定Agent Lable是UnityNativeFrameworkBuild的Pipeline,如果我们同时触发这2个Pipeline打包会发生什么?
答案是排队等待。
还记着我们之前给Pipeline设置的禁止并发打包吗?
创建的Agent只有1个Executor且禁止并发打包,这就是为什么2个Pipeline触发打包会排队等待的原因。
解决方案:
创建多个可用的Agent并启起来,2个Pipeline指向的Agent Lable多个Agent都符合,那么就会选空闲的Agent的executor进行打包。
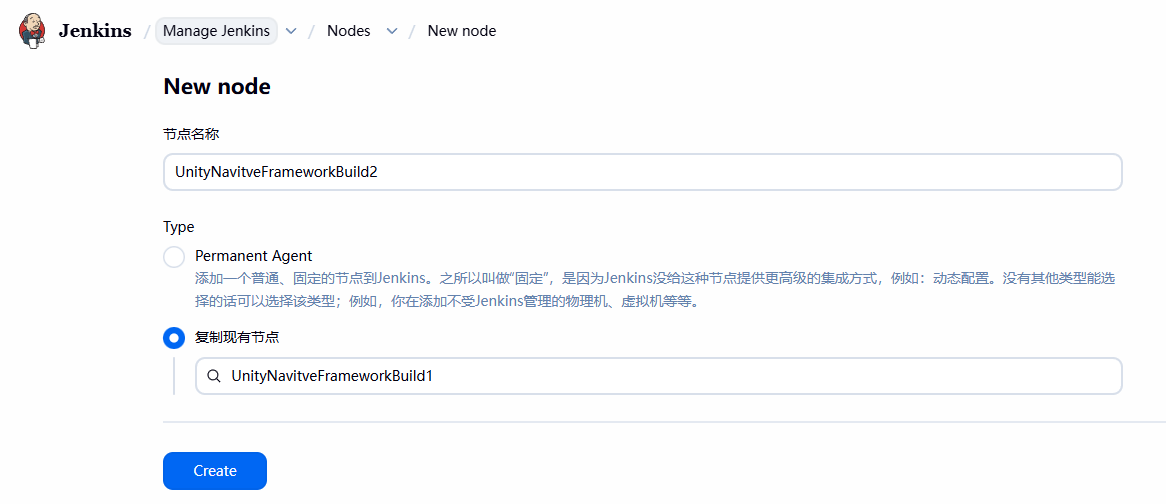
为了快速创建相似的Agent,我们可以通过Jenkins->Manage Jenkins->Nodes->New Node->复制现有节点:
取名UnityNativeFrameworkBuild2
编写启动UnityNativeFrameworkBuild2的Agent的start-UnityNavitveFrameworkBuild2-agent.bat:
1 2 3 4 5 @echo off curl.exe -sO http://localhost:8080/jnlpJars/agent.jar java -jar agent.jar -url http://localhost:8080/ -secret ****** -name UnityNavitveFrameworkBuild2 -webSocket -workDir "G:\Software\JenkinsAgent\UnityNavitveFrameworkBuild" pause
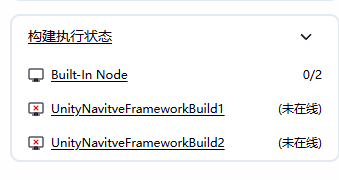
启动后新Agent就可用了。
这是我们再次同时触发2个Pipeline打包会发现,2个Agent都同时运作起来,2个Pipeline也同时开始了打包流程:
Note:
复制Agent时远程目录记着要配套修改,不然就指向同一个远程目录了。
多分支打包方案 常规游戏开发中我们都会创建不止一个分支,比如develop用于开发版本功能,release用于线上发布版本,main作为主分支存在。
那么我们在Jenkins里如何支持多分支的打包操作了?
方案1:
使用Jenkins的Multiplebranch Pipeline 默认支持多分支自由选择打包。
实战:
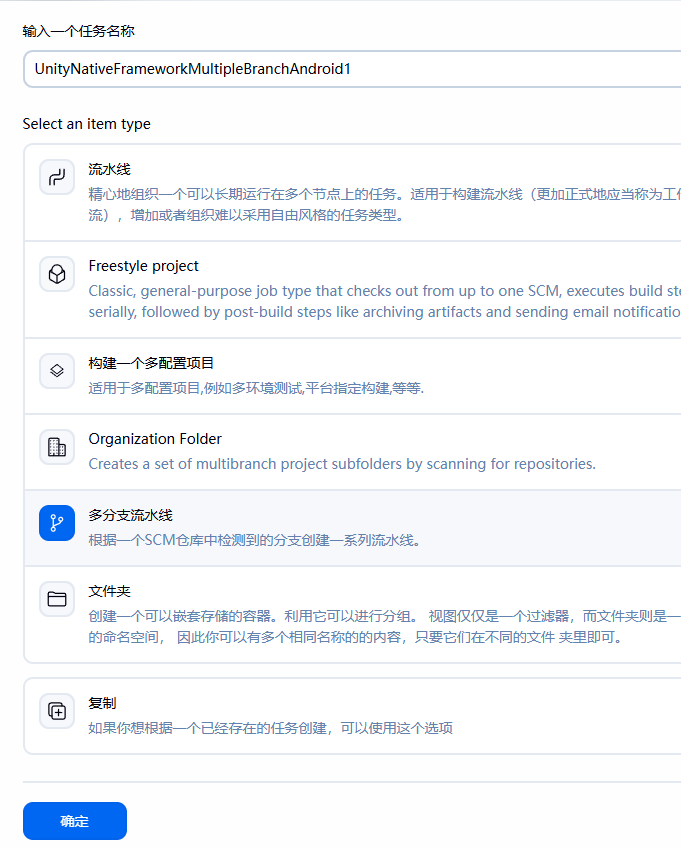
创建Multiplebranch Pipline:
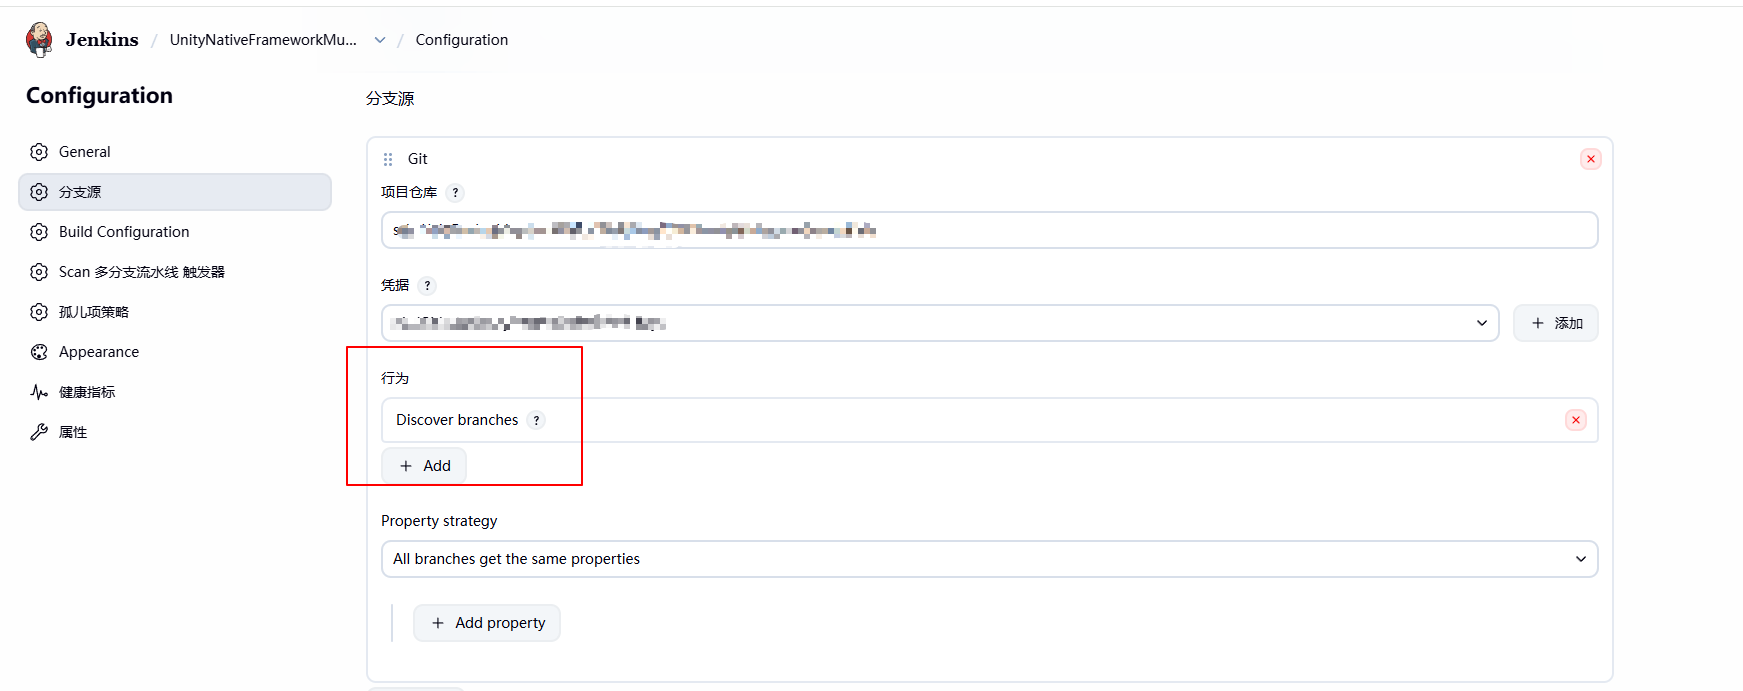
配置Git仓库地址:
可以看到Multiplebranch Pipeline可以配置自动发现分支,也就说我们不需要去配置具体有哪些分支,它可以自行发现供我们打包时选择打包哪个分支。
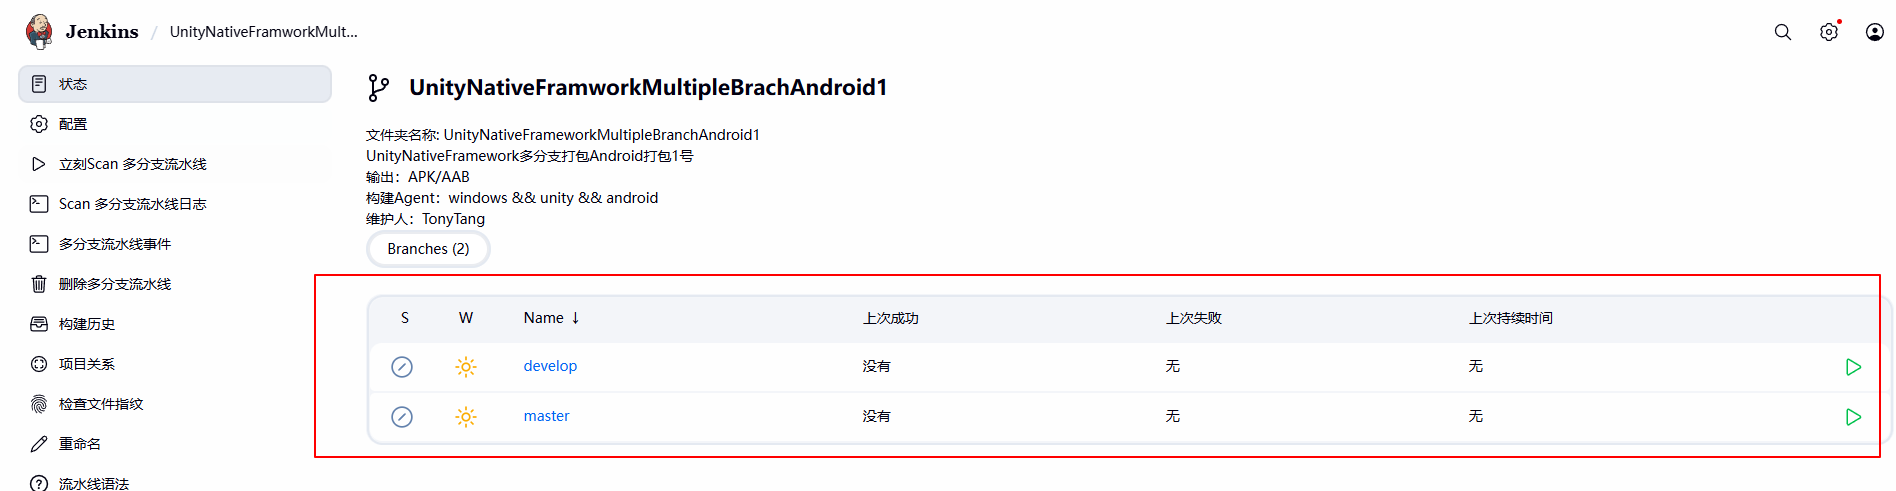
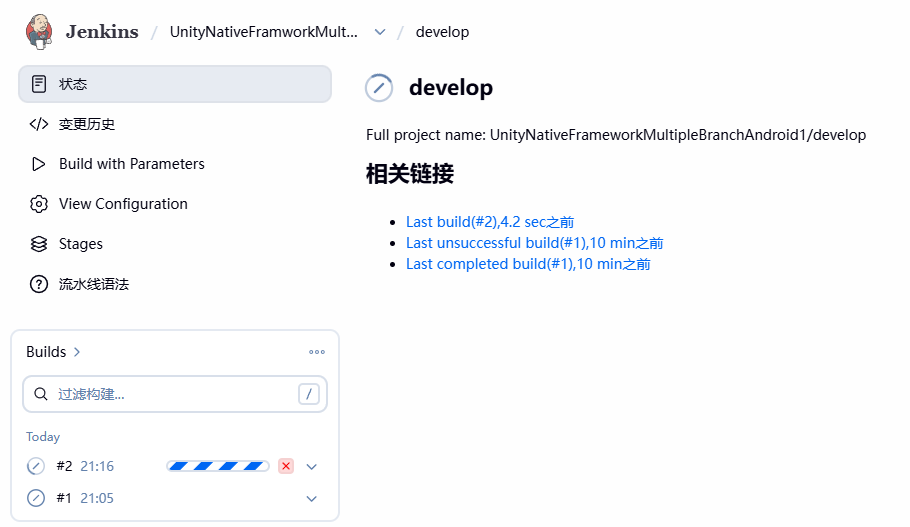
创建后Multiplebranch Pipeline会自行开始检测多分支并开始任务,这个我们自行停止下。然后我们进入Multiplebranch Pipiline页面会看到有多个分支的Pipeline选择:
随便点一个分支名字进去后会发现跟我们创建的普通Pipeline分支没区别,后续就走正常流程打包即可:
方案2:
新建多个普通Pipeline,每个用于固定分支的打包。
实战2:
方案2实战没什么好说的,就是在配置Pipeline的分支名字时设置成对应分支名字即可。
Reference Using a Jenkinsfile
Pipeline
Getting started with Pipeline
Pipeline Syntax
Using credentials
Using Jenkins agents